This is an older tutorial. Check out the Getting started guide for React.
This tutorial will show you how to create a React chat feature by using TalkJS's classic JavaScript SDK. It will also serve as a step-by-step guide to integrate TalkJS into any React application. We will use a practical and real-world use case to do this demonstration. We will build a LinkedIn-like messaging app. Here is a link to the repository of the messaging app. You can follow the guide to set it up and see how it works.
Prerequisites
To follow along with this tutorial, you will need the following:
- Basic knowledge of JavaScript.
- An understanding of React and its component lifecycle methods.
- Node >= version 6 and NPM >= version 5.2 (or yarn if you prefer yarn) running on your machine.
What you'll be building
We will be building an app like the messaging feature of LinkedIn. This will be divided into two sections. In the first section of this tutorial, we will build the sample app. The second section is where we add TalkJS and make the chat work. If you are solely interested in adding chat to your app, you can skip to the second section.
LinkedIn messaging has two major parts.
- The chat widget that pops up when you want to send a message to a connection.
- The main messaging page. This page shows the list of all the conversations you have with your connections.
We will be building a messaging app similar to this. There are three major parts of this app.
1. The login page: This is a simple form that takes basic user data TalkJS will use for the chats.
2. The MyNetwork page: This is an interface that displays a list of users that represent your connections on LinkedIn. For this tutorial, we will be using dummy data. In a real app, this user list can be gotten from your database. Each user on the list has a “Message” button which you can use to start a conversation with that user. Clicking on this button brings up a Chatbox similar to that found on LinkedIn.
3. The Messaging page: This is similar to the messaging page of LinkedIn that shows all the conversations a user has had with other connections. This will be accomplished using the Inbox feature of TalkJS.

Here is a live demo of this application.
Let us start building. First, we need to do a basic setup for the application.
Setting up the App using Create React App Boilerplate
To set up the app, we will be using the create-react-app boilerplate which makes it very easy to set up any React app. If you do not already have it installed, then run the command below to install it globally on your machine.
npm install -g create-react-app
After installing this, you can easily create react apps on your machine. Let us create one for the app we are building. We will call it messaging-app.
create-react-app messaging-app
When we do that, we are ready to start building our project. Next, we navigate to the folder we created.
cd messaging-app
To start the application, run the following command.
npm start
The app should be running now on your default browser. That is it for setting up the React application. Now, let us move over to set up routes for the app using react-router.
Structuring the files and adding routes
This is the file structure of the project we will be building. We will keep this as simple as possible.
/
|-- node_modules
|-- /public
|-- /src
    |-- /Components
        |-- Messaging.js
        |-- Login.js
        |-- MyNetwork.js
        |-- Users.js
|-- App.css
|-- App.js
|-- index.css
|-- index.js
Create the files to make your project structure similar to the file structure above. We will be using react-router to add basic routes for our components in our App.js file. So next, we will install react-router.
npm install --save react-router react-router-domThen, we replace the content of the App.js file with the following code.
import React, { Component } from 'react';
import { BrowserRouter as Router, Link, Route } from 'react-router-dom';

import './App.css';

class App extends Component {
    render() {
        return (
            <div>
                <Router>
                    <nav className="navbar">
                        <ul className="navbar-list">
                            <li className="navbar-item">
                                <Link to="/mynetwork" className="navbar-link">My Network</Link>
                            </li>
                            <li className="navbar-item">
                                <Link to="/messaging" className="navbar-link">Messaging</Link>
                            </li>
                        </ul>

                    </nav>
                </Router>
            </div>
        );
    }
}
export default App;
The App.js contains the navbar that we can use to access the parts of the app. For now, the links do nothing because we have not added routes. We will add these routes as the create the components.
Since we assume that you have a basic knowledge of React, we will not be explaining every part of the code. Let us add some CSS styles for the navbar in the App.css file.
body {
  background-color: #F5F5F5;
}
li {
  list-style-type: none;
}
* {
  box-sizing: border-box;
}
.navbar {
  display: flex;
  align-items: center;
  height: 52px;
  background-color: #283E4A;
  margin-bottom: 50px;
}
.navbar-list {
  display: flex;
  margin: 0 auto;
}
.navbar-item {
  color: #ffffff;
}
.navbar-link {
  color: #ffffff;
  text-decoration: none;
  margin-right: 20px
}
Next, we will create the Login component.
Creating the Login Component
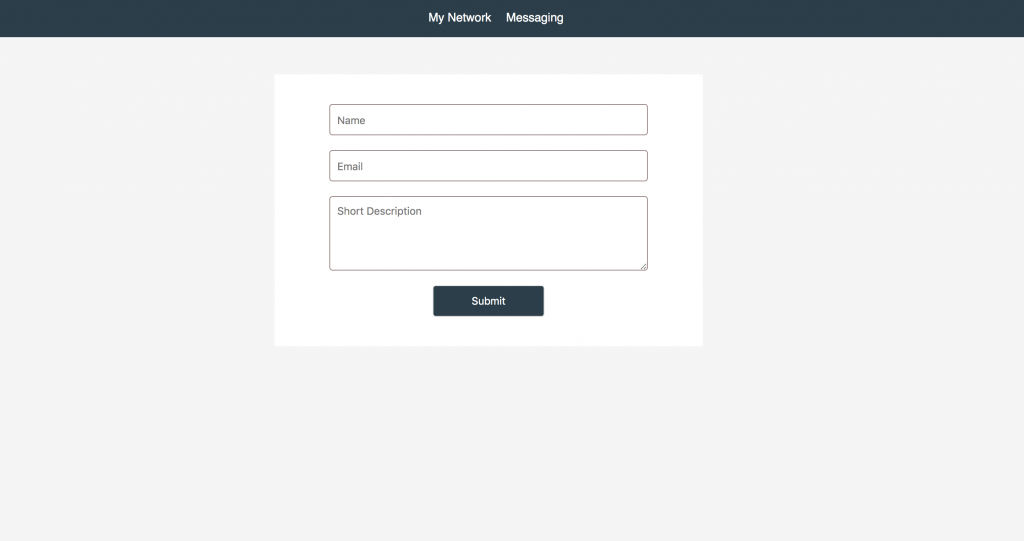
As shown in the login image, the login interface is a form used to take basic user data. TalkJS will use this data to create a new user. This user data includes the user’s name, email and a short description to make it look more LinkedIn-like. We will store this data in the browser’s local storage. We can retrieve it from the local storage whenever we need it.
To create a new user, we assign a number to the user as the ID of the user. TalkJS will use this ID to identify each user and retrieve messages by that user. In this tutorial, we will assign a random number to each new user as shown in the code below.
First, in the login component, we add the form.
import React from "react";

class Login extends React.Component {
    constructor(props) {
        super(props);
        this.state = {
            name: "",
            email: "",
            description: "",
        }
        this.handleChange = this.handleChange.bind(this)
        this.handleSubmit = this.handleSubmit.bind(this)
    }
    handleChange(e) {
        const target = e.target;
        this.setState({
            [target.name] : target.value
        })
    }
    handleSubmit(event) {
        event.preventDefault();
        const { name, email, description } = this.state;

        /* Generate random number that will be serve as the ID of the user */
        const randomNum  = Math.ceil(Math.random() * 10000);
        const userData = {
            name,
            email,
            description,
            id: randomNum,
            role: "Member",
            photoUrl: "https://talkjs.com/docs/img/ronald.jpg"
        }

        /* Store user data in browser's local storage */
        localStorage.setItem("currentTalkjsUser", JSON.stringify(userData))
        /*Redirect to the my network page */
        this.props.history.push("/mynetwork");
    }
    render() {
        return (
            <div className="login-container">
                <div className="login-form">
                    <form onSubmit={this.handleSubmit}>
                        <input type="text"
                          name="name"
                          onChange={this.handleChange}
                          placeholder="Name"
                          className="input"
                          required
                        />
                        <input
                          type="email"
                          name="email"
                          onChange={this.handleChange}
                          placeholder="Email"
                          className="input"
                          required
                        />
                        <textarea type="text"
                          name="description"
                          onChange={this.handleChange}
                          placeholder="Short Description"
                          className="input textarea">
                        </textarea>
                        <input type="submit"
                          className="button"
                          placeholder="submit"
                        />
                    </form>
                </div>
            </div>
        )
    }
}
export default Login
The form takes the user's data and stores it in the local storage using the handleSubmit method. Then, it redirects the user to the MyNetwork page. Let us import this to our App.js file and create a route for it there. This will enable us to see the login page.
import React, { Component } from 'react';
import { BrowserRouter as Router, Link, Route } from 'react-router-dom';
import Login from './Components/Login';

...

...
                  <li className="navbar-item">
                    <Link to="/messaging" className="navbar-link">Messaging</Link>
                  </li>
                </ul>
            </nav>

            <Route path="/" exact component={Login}/>
         </Router>
      </div>
...
At this point, your screen should look like this.
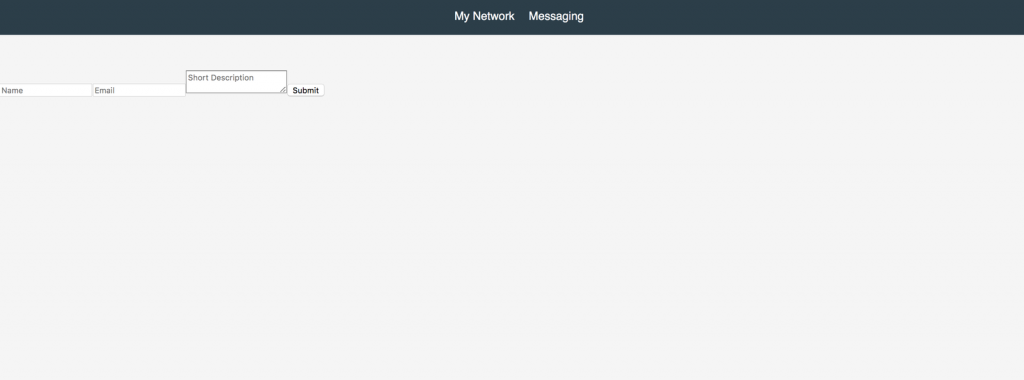
Ugly right? To make it look more appealing, add the following styles to the App.css file.
.login-container {
  width: 40%;
  margin: 0 auto;
  text-align: center;
}
.login-form {
  background: #ffffff;
  padding: 40px 20px;
}
.input {
  display: block;
  height: 42px;
  width: 80%;
  margin: 0 auto 20px;
  padding: 10px;
  font-size: 14px;
  border-radius: 4px;
  border: 1px solid #8F7474;
}
.button {
  width: 150px;
  border-radius: 4px;
  height: 42px;
  font-size: 14px;
  background-color: #283E4A;
  color: #ffffff;
}
.textarea {
  height: 100px;
}
It looks much better now.

Clicking on the submit button will redirect to the "mynetwork" which has no content for now. Let us move on to this page then. This is where we get to use TalkJS.
Creating the “My Network” Component
This will be similar to the “my network” page on LinkedIn, where you see a list of all connections. In this case, though, we will be using dummy data to fetch these users. Below is a list of dummy connections. We will add this list to the Users.js file and import it in the MyNetwork file.
export const dummyUsers = [
    {
        id: "2",
        name: "Kelvin Samson",
        email: "kelvin@sample.com",
        photoUrl: "https://randomuser.me/api/portraits/men/32.jpg",
        role: "Member",
        info: "Product Designer at Facebook",
        welcomeMessage: "Hey there! Love to chat :-)"
    },
    {
        id: "3",
        name: "Annabel Stone",
        email: "annie@sample.com",
        photoUrl: "https://randomuser.me/api/portraits/women/65.jpg",
        role: "Member",
        info: "Digital Marketer at Microsoft",
        welcomeMessage: "Hey there! Love to chat :-)"
    },
    {
        id: "4",
        name: "Grace Loveday",
        email: "grace@sample.com",
        photoUrl: "https://randomuser.me/api/portraits/women/44.jpg",
        role: "Member",
        info: "Product Designer at Google",
        welcomeMessage: "Hey there! Love to chat :-)"
    },
    {
        id: "5",
        name: "Angela Jobs",
        email: "angela@sample.com",
        photoUrl: "https://pbs.twimg.com/profile_images/834493671785525249/XdLjsJX_.jpg",
        role: "Member",
        info: "Software Engineer at TalkJS",
        welcomeMessage: "Hey there! Love to chat :-)"
    },
]
Next up, we will create the MyNetwork component and display the list of users.
Rendering the list of users
Create the MyNetwork.js file if you have not already done so. Add the following code to it.
import React, { Component } from 'react';
import { dummyUsers } from "./Users";

class MyNetwork extends Component {
    render() {
        return (
            <div className="users">
                <div className="users-container">
                    <ul>
                        { dummyUsers.map(user =>
                          <li key={user.id} className="user">
                              <picture className="user-picture">
                                  <img src={user.photoUrl} alt={`${user.name}`} />
                              </picture>
                              <div className="user-info-container">
                                  <div className="user-info">
                                      <h4>{user.name}</h4>
                                      <p>{user.info}</p>
                                  </div>
                                  <div className="user-action">
                                      <button >Message</button>
                                  </div>
                              </div>
                          </li>
                        )}
                    </ul>
                </div>
            </div>
        )
    }
}
export default MyNetwork;
We added a map that loops through each user and displays their basic data.
Let us import this file and create a route for it in the App.js file.
import React, { Component } from 'react';
import { BrowserRouter as Router, Link, Route } from 'react-router-dom';
import Login from './Components/Login';
import MyNetwork from './Components/MyNetwork';

...

...

            <Route path="/" exact component={Login}/>
            <Route path="/mynetwork" component={MyNetwork}/>
         </Router>
      </div>
...
If you click on the “my network” link on the navbar, you will see that the name, user description and image of each user is being displayed. You will also notice that there is a message button for each user. This is the button we will use to call up the TalkJS chatbox. Before we do this, let us add some styles to the App.css file for this page.
.users {
  display: flex;
  width: 55%;
  margin: 0 auto;
  justify-content: space-around;
}
.users-container {
  background-color: #ffffff;
  width: 65%;
  padding: 20px 0;
}
.user {
  display: flex;
  margin-bottom: 20px;
  position: relative;
  border-bottom: 1px solid #e6e9ec;
}
.user:last-of-type {
  border: 0;
}
.user::after {
  content: '';
  width: 92px;
  height: 2px;
  background: #fff;
  position: absolute;
  bottom: -1px;
  left: 0;
}
.user-picture img {
  height: 72px;
  width: 72px;
  border-radius: 50%;
  margin-right: 20px;
}
.user-info {
  width: 70%;
  display: flex;
  flex-direction: column;
  justify-content: center;
}
.user-info-container {
  display: flex;
  width: 100%;
}

.user-info h4 {
  margin: 0;
}
.user-info p{
  margin-top: 7px;
  color: #676767;
  font-size: 14px;
}
.user-action {
  width: 25%;
  display: flex;
  align-items: center;
  justify-content: center;
}
.user-action button {
  background-color: transparent;
  color: #0073b1;
  border: 1px solid #0073b1;
  height: 32px;
  width: 92px;
  font-size: 14px;
  font-weight: bold;
  border-radius: 2px;
  cursor: pointer;
}
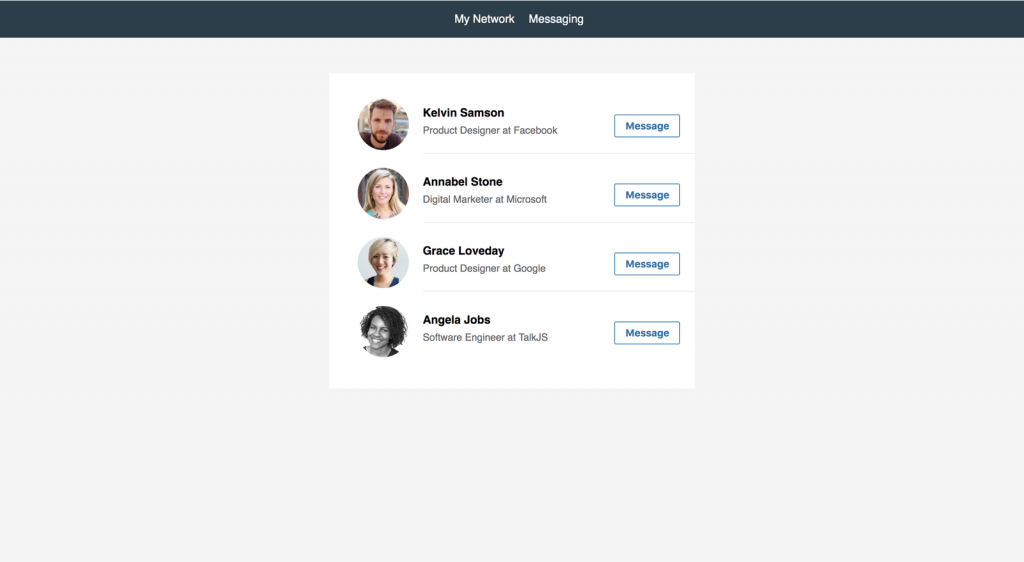
The network page should look like this now.
Displaying the current user
Before we will be able to send messages, we need to get the current user. TalkJS will use this to set up the conversation between the current user and the user that you want to send a message to. Remember we saved the logged-in user in the local storage. Let us retrieve it an add it to our component’s state. We can even get fancier by adding the current user’s data to the user interface. That way the user will know who he is logged in as.
Let us do this by adding the following code to the constructor method of our component.
class MyNetwork extends Component {
    constructor(props) {
        super(props);
        let currentUser;
        const currentTalkjsUser = localStorage.getItem('currentTalkjsUser');
        if (currentTalkjsUser) {
            currentUser = JSON.parse(currentTalkjsUser)
        }
        this.state = {
            currentUser
        }
   }
...
Next, we will use the data to display the current user’s information in the render function.
...
 render() {
        const { currentUser } = this.state;
        return (
            <div className="users">
                <div className="current-user-container">
                    {currentUser &&
                        <div>
                            <picture className="current-user-picture">
                                <img alt={currentUser.name} src={currentUser.photoUrl} />
                            </picture>
                            <div className="current-user-info">
                                <h3>{currentUser.name}</h3>
                                <p>{currentUser.description}</p>
                            </div>
                        </div>
                    }
                </div>
                <div className="users-container">
...
Now you should have some user data on the interface. Let us add some styles for it. Add the following CSS to the App.css file.
.current-user-container {
  width: 28%;
}
.current-user-container>div {
  background-color: #ffffff;
  display: flex;
  flex-direction: column;
  justify-content: center;
  align-items: center;
  min-height: 300px;
}
.current-user-info {
  text-align: center;
}
.current-user-info h3 {
  margin-bottom: 10px;
}
.current-user-info p {
  margin-bottom: 0;
}
.current-user-picture img {
  width: 120px;
  height: 120px;
  border-radius: 50%;
}
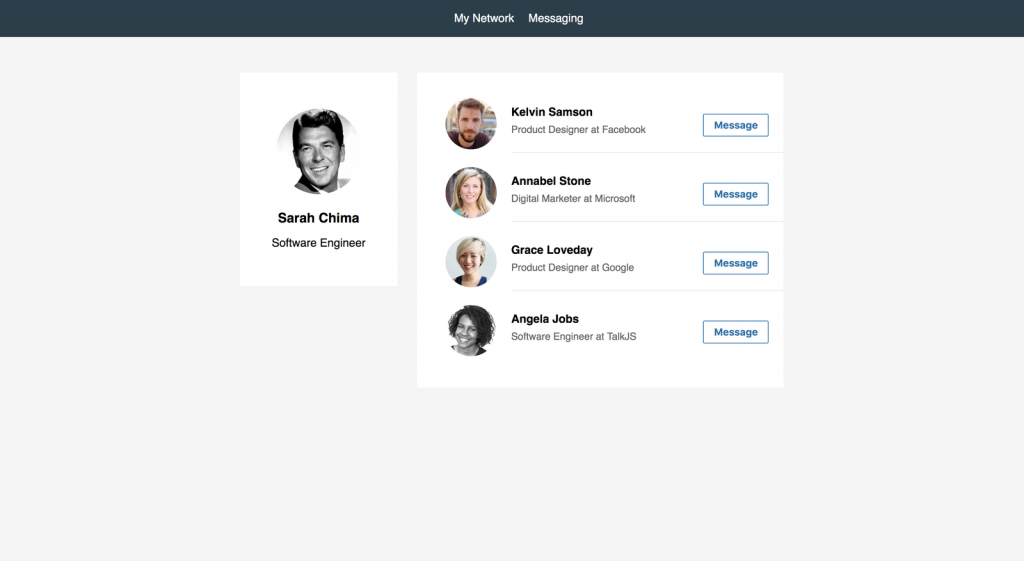
It should look great now. We are making good progress. Let us get to the reason why we are here. Let us set up the TalkJS and then the chat widget that pops to the right of the screen.
Setting up TalkJS
Creating an account and adding user roles
First, you will have to create a free account with TalkJS. To do this, visit the TalkJS website On the navigation menu, you will a blue button that says “Try for Free”. Click on this button and create an account. If this is successful, you will be redirected to your TalkJS dashboard. Take note of your App ID which you will be using later in this tutorial.
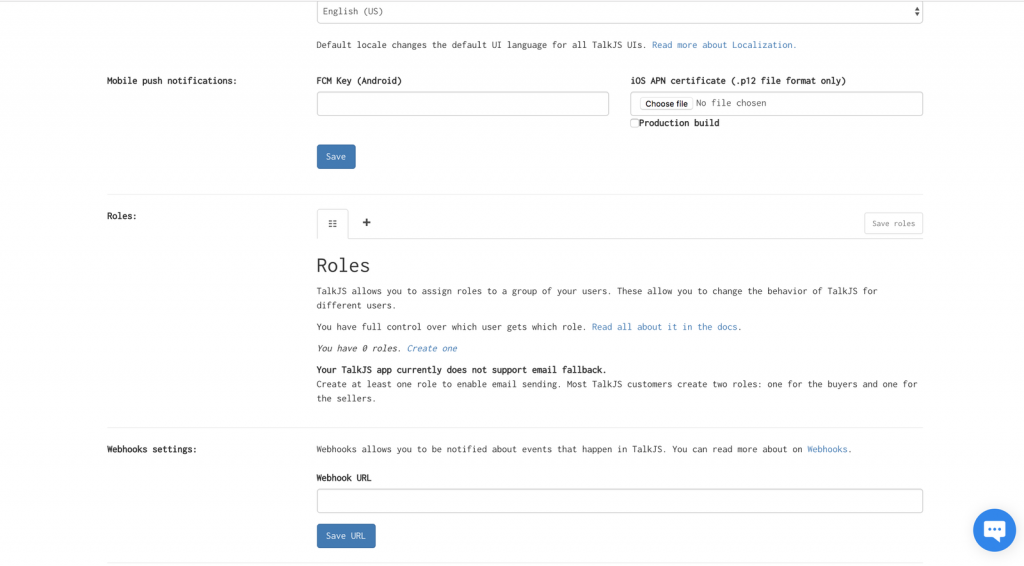
TalkJS allows different groups of users to have different settings by assigning them a 'role'. You have full control over which user gets which role. Since we want features like file sharing and location sharing in our app, we need to create a role on our TalkJS dashboard.
To create a role, scroll down the page to where you see roles. Click on the “+” button to create a new role. We will call our role Member. Click on the save button. Next, settings for this user will be displayed. Click on enable file sharing and location sharing and any other setting you want to enable.
Adding TalkJS to the App
Setting up TalkJS on your app is quite easy too. To install, we run the following command.
npm install talkjs --save

# or, if you use yarn
yarn add talkjs
When this is done, you can use TalkJS in any file in our project by importing it.
import Talk from "talkjs";
That is it for setting up TalkJS. Now let us move to build the application.
Setting up the Chatbox
First, we import TalkJS into the MyNetwork.js file.
import React, { Component } from 'react';
import Talk from "talkjs";
import { dummyUsers } from "./Users";

...
Next, we add a method that handles the click of the “message” button event. Add this to the component.
...
handleClick(userId) {

        /* Retrieve the two users that will participate in the conversation */
        const { currentUser } = this.state;
        const user = dummyUsers.find(user => user.id === userId)

        /* Session initialization code */
        Talk.ready
        .then(() => {
            /* Create the two users that will participate in the conversation */
            const me = new Talk.User(currentUser);
            const other = new Talk.User(user)

            /* Create a talk session if this does not exist. Remember to replace tthe APP ID with the one on your dashboard */
            if (!window.talkSession) {
                window.talkSession = new Talk.Session({
                    appId: YOUR_APP_ID,
                    me: me
                });
            }

            /* Get a conversation ID or create one */
            const conversationId = Talk.oneOnOneId(me, other);
            const conversation = window.talkSession.getOrCreateConversation(conversationId);

            /* Set participants of the conversations */
            conversation.setParticipant(me);
            conversation.setParticipant(other);

            /* Create and mount chatbox in container */
            this.chatbox = window.talkSession.createChatbox(conversation);
            this.chatbox.mount(this.container);
        })
        .catch(e => console.error(e));
}
There is a lot going on in the code above. Let us analyse what is going on.
Users need to belong to a Talk session to use TalkJS. A user does not need to log directly into TalkJS to do this. Rather, in our app, we ensure that only users logged in on our app can have a TalkJS session. We do this session initialisation in lines 9-21. You can find your APP ID on your TalkJS dashboard. Remember to replace YOUR_APP_ID with it.
Lines 24-30 creates a conversation between the two users, then creates and mount the chatbox.
For handleClick method to be useful, we have to call it when any of the “message” buttons are clicked. We also need to pass the userId of the user as we call the handleClick method. Let us do that. Replace the button in the render method with the following code.
 ...
     <div className="user-action">
         <button onClick={(userId) => this.handleClick(user.id)}>Message</button>
      </div>

...
We also need to add the container which the chatbox will be mounted on. So in the render method, we also add the following.
...
      </ul>
         <div className="chatbox-container" ref={c => this.container = c}>
            <div id="talkjs-container" style={{height: "300px"}}><i></i></div>
         </div>
      </div>
...
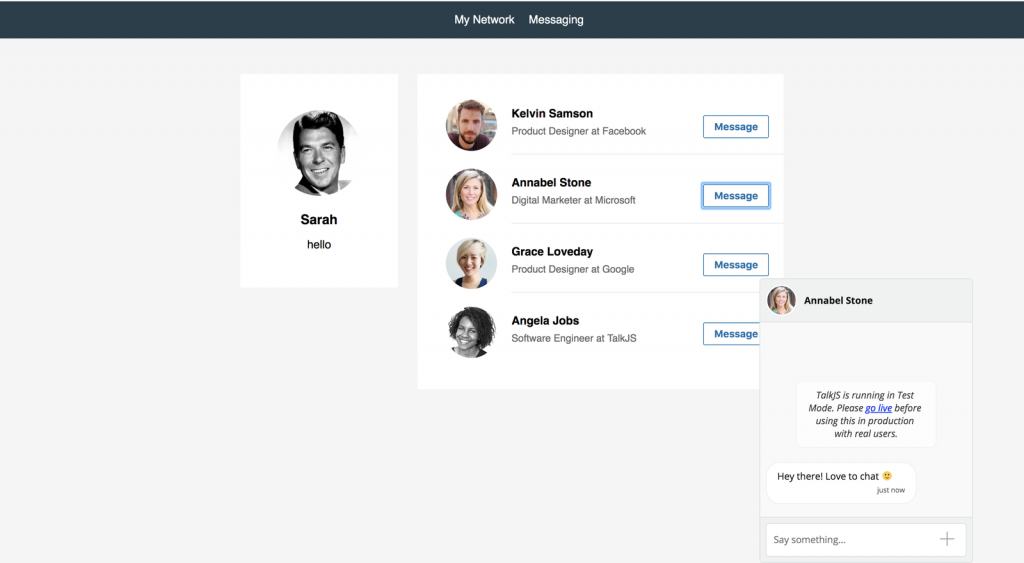
Go ahead and click on any of the “message” buttons now. You should see the chatbox pop up when you click on any of them.
To make it look more LinkedIn-like, let us position the chatbox to the bottom right of the page by styling the chatbox-container class. So add the following style to your App.css file.
.chatbox-container {
  position: absolute;
  bottom: 0;
  height: 400px;
  right: 5%;
  width: 300px;
}
This should be the page when you click on any of the message buttons.
That is it. We have made significant progress. Did you notice how easy it is to set up a chat feature? Go ahead and start a conversation with any of the dummy users. Of course, they cannot reply to you because they are dummy users.
Let us move on to our last component - the messaging component.
Creating the Messaging Component
The messaging component holds a list of all conversations the current user has had with other users just like on LinkedIn. TalkJS also makes it easy to set this up. Let’s create a basic component. Create the Messaging.js file if you have not already done so.
    import React, { Component, Fragment } from 'react';
    import Talk from "talkjs";

    class Messaging extends Component {

        render() {
            return (
                <Fragment>
                    <div style={{height: '500px'}} className="inbox-container" ref={c => this.container = c}>Loading...</div>
                </Fragment>
            );
        }
      }

      export default Messaging;
Remember to import this file in the App.js file and create a route for it
    ...
    import Login from './Components/Login';
    import MyNetwork from './Components/MyNetwork';
    import Messaging from './Components/Messaging';

    ...

    ...

                <Route path="/" exact component={Login}/>
                <Route path="/mynetwork" component={MyNetwork}/>
                <Route path="/messaging" component={Messaging}/>
             </Router>
          </div>
    ...
You should see just the loading… message on the screen right now.
Let us set up the TalkJS inbox in the Messaging.js file. First, we retrieve the current user from the local storage and add it to the state of the component. TalkJS will use this to fetch the conversations and add it to the state. In line 4, we initialise the value of inbox.
constructor(props) {
      super(props);

      this.inbox = undefined;
      let currentUser;
      const currentTalkjsUser = localStorage.getItem('currentTalkjsUser');
      if (currentTalkjsUser) {
          currentUser = JSON.parse(currentTalkjsUser)
      }

      this.state = {
          currentUser
      }
  }
Next, we add a componentDidMount lifecycle method and set up the inbox there.
componentDidMount() {
        Talk.ready
            .then(() => {
                const me = new Talk.User(this.state.currentUser);

                if (!window.talkSession) {
                    window.talkSession = new Talk.Session({
                        appId: YOUR_APP_ID,
                        me: me
                    });
                }

                this.inbox = window.talkSession.createInbox();
                this.inbox.mount(this.container);

            })
            .catch(e => console.error(e));
    }
Notice that this is quite similar to how we created the chatbox. There are subtle differences though.
In lines 13-14, instead of using createChatbox, we used createInbox. Also, we did not have to create another user, since this basically displays the previous conversations you have had with users.
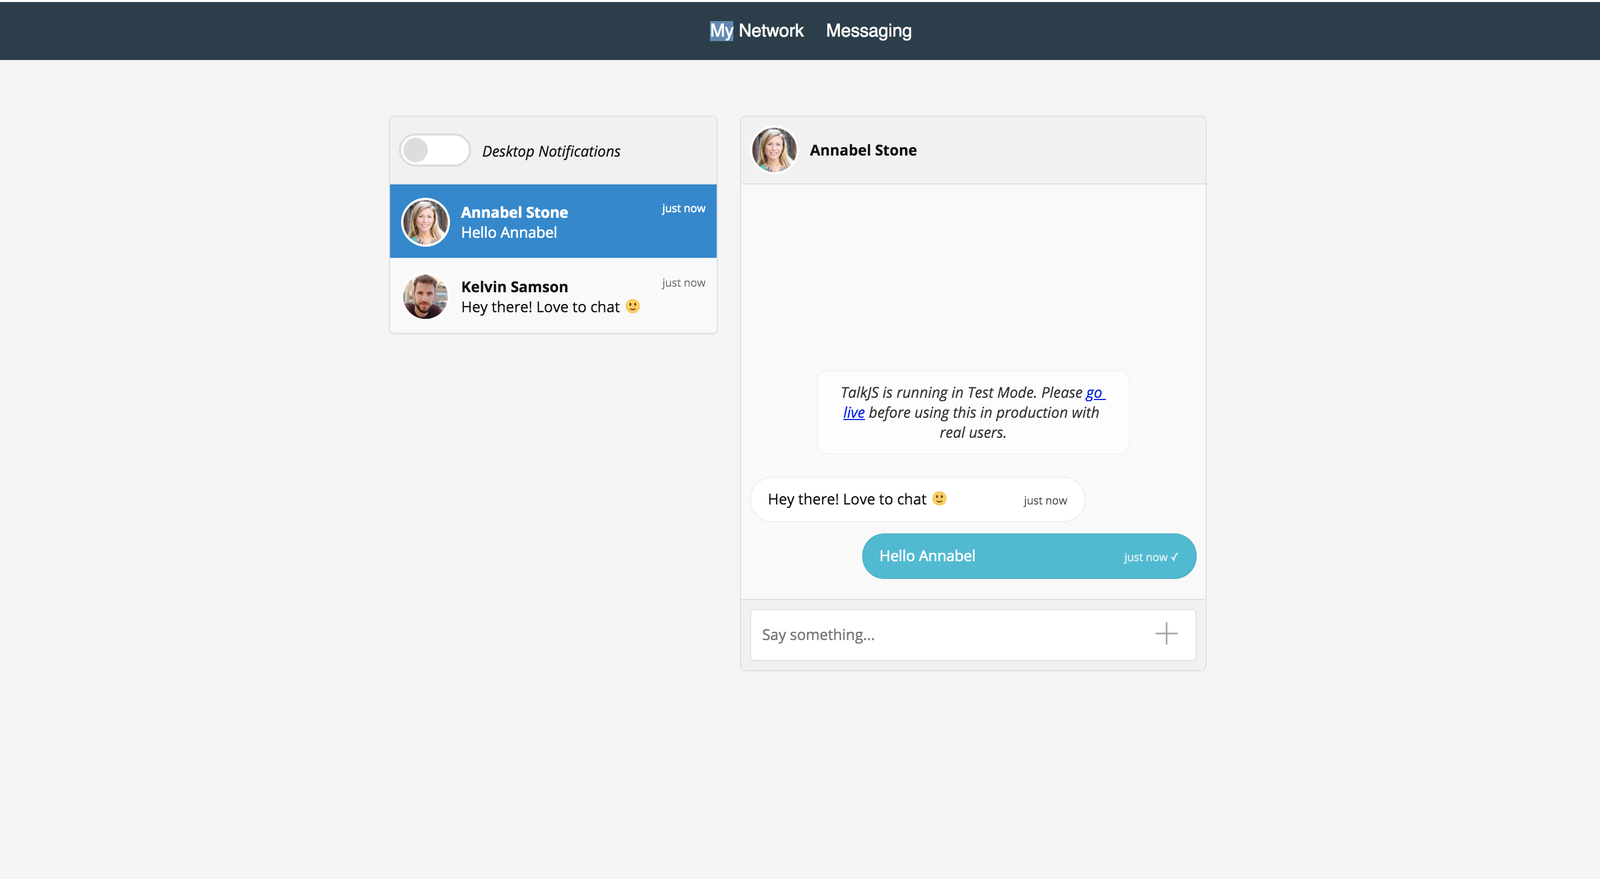
If you have added the above code, you should see the inbox now. If you started any conversation using the chatbox, you should see it in the inbox. Otherwise, it displays the message: “You have not started any conversation”.
Congrats for making it this far. You have built yourself a LinkedIn-like messaging app.
Conclusion
In this tutorial, we have seen how easy it is to use TalkJS to add a messaging feature to your React app. TalkJS removes all the complex work of using APIs and building a user interface for your messages.
We built a login page to retrieve the current user’s data. We also built a “MyNetwork” page which is similar to the LinkedIn "MyNetwork”. On this page, we displayed a list of users and a button which enables the user to send messages to any user on the list. We used TalkJS to setup the chatbox. Lastly, we built the Messaging component using TalkJS Inbox.
I hope you had fun building this because I did. You can check the Github repo for the code.
For further reading, you can refer to the following documents:
If you have a question, don't hesitate to drop by our support chat.


