For tutorials using other LLM providers, check out AI chatbot integration.
In this post, I will demonstrate how you can connect TalkJS's classic JavaScript SDK with a chatbot service like Dialogflow. A chatbot is a software application used to conduct an online chat conversation via text or text-to-speech instead of providing direct contact with a live human agent.
Chatbots can be a fantastic way to add rich functionality to your chat integration by enabling automatic and application-aware responses to user inquiries.
While TalkJS doesn't provide an out-of-the-box AI chatbot that can interact with your users without any further operations, we provide a way for chatbots to interface with the chat by combining our webhooks feature which allows you to create a URL to monitor events from users.
For example, when a user sends a message, our REST API can be used by your chatbot to directly interact with your users by sending messages. It is up to your application to appropriately process incoming events and generate relevant responses.
Prerequisite
Before going any further, complete our Getting Started guide to set up a simple conversation between two users.
Dialogflow Setup
Let’s set up a simple Dialogflow project that will allow us to integrate with TalkJS.
Step 1 - Go to Dialogflow and select Dialogflow ES, the standard agent type suitable for small and simple agents.
Thankfully the documentation for this application is excellent. Finish the setup as instructed, which involves:
Step 2 - Build your agent using this guide. Finish the required steps to create your intent. I added a training phrase of “What is the best Chat API and SDK?” with the response being “TalkJS is the best Chat API and SDK!”.
This concludes our Dialogflow setup. Let’s set up our webhook in TalkJS, which will allow us to receive messages.
Using webhooks to receive messages in TalkJS
So, what exactly is a webhook? A webhook (also called a web callback or HTTP push API) is a way for an app to provide other applications with real-time information. A webhook delivers data to other applications as it happens, meaning you get data immediately.
Before we can use webhooks we need to set up a server for our application. If you have a server URL already set up, you can move on to Enabling the TalkJS Webhook.
Setting up our server
We will be using Node.js, and ngrok to set up our server.
You may be wondering, what is ngrok?
Your development machine may be connected to a secure network behind a firewall. To work around access restrictions, ngrok runs a small client process on your machine which creates a private connection tunnel to the ngrok cloud service. Your localhost development server is mapped to an ngrok.io sub-domain, which a remote user can then access. There’s no need to expose ports, set up forwarding, or make other network changes. The connection tunnel established by ngrok is secure and can only transmit data to the localhost port you have open.
Make sure you have both of these installed before proceeding. Extract the ngrok executable to your project folder, or add it to your PATH.
In the terminal for your project, type npx express-generator to quickly create a skeleton for our local server.
Once this operation is complete you should now see a routes directory.
In the routes directory, open the file users.js
Replace the existing code:
router.get('/', function(req, res, next) {
  res.send('respond with a resource');
});
With the new code:
router.post('/', function(req, res) {
  var body = req.body;
  var message = body.data.message.text;
  console.log("Message Text: " + message);
  res.status(200).send();
});
In the bin directory open the file www. Change the line:
var port = normalizePort(process.env.PORT || '3000');Time to launch our ngrok server. Open the Command Prompt or shell, and change (cd) into the directory of your project.
Run the command: ngrok http 3000
Copy the https protocol version of the URL. This URL is used to forward all of the messages from your ngrok server to your local server:
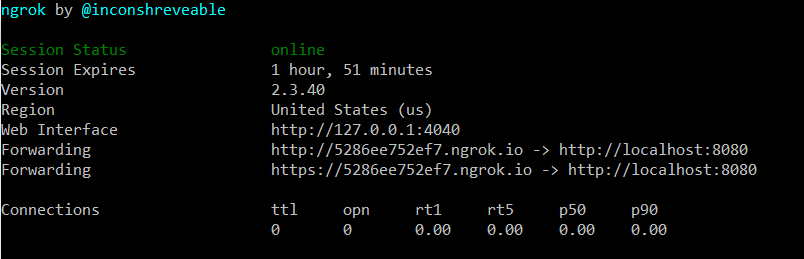
For my server, I have a value of https://5286ee752ef7.ngrok.io
Note: this URL will be different for you.
Now append the “/users” section to this URL.
My final result looks like the following: https://5286ee752ef7.ngrok.io/users
This is the URL we will use for our webhook.
Enabling the TalkJS Webhook
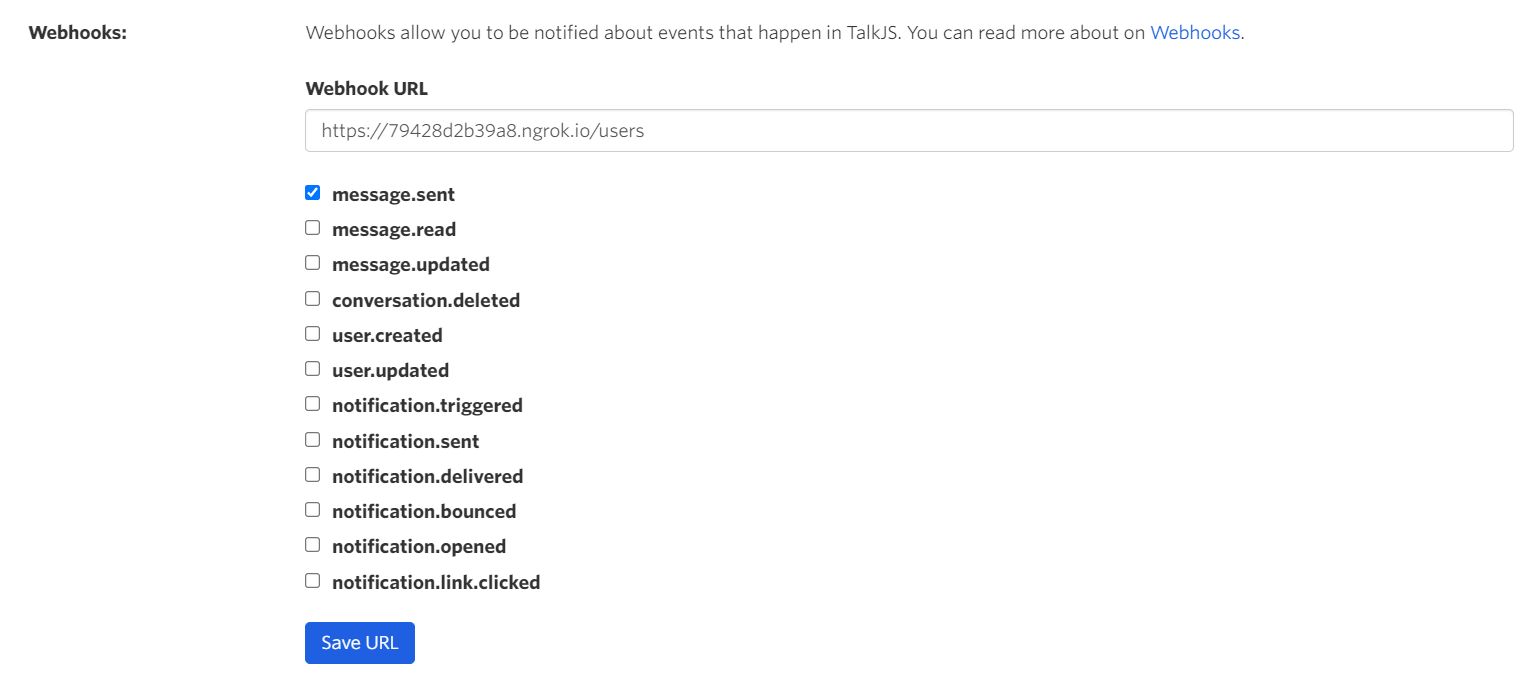
You can enable the TalkJS webhook in the dashboard. Enter the https URL from ngrok and enable the messages sent checkbox
When webhooks are enabled in the TalkJS dashboard, your server will receive HTTP POST requests from the TalkJS server notifying you about events that happen in your application between your users. If you’re interested in learning more about how TalkJS webhooks work, read the Webhook Reference Guide.
From your dashboard, perform the following steps to enable webhooks:
- Enable the use of webhooks by setting the Webhook toggle to enabled. You should now have the option to enter a URL.
- Enter the URL of your server, or the ngrok server you created from the previous section (in my case, it’s:
https://5286ee752ef7.ngrok.io/users). - Enable the message.sent checkbox
- Click the Save URL button
Your final result should look something like this:
Time to test out what we have done so far.
In the terminal of your project, type the command npm install to ensure all dependencies are installed.
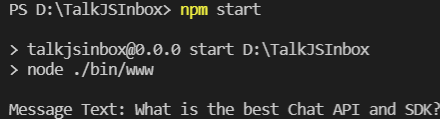
Finally, run npm start and launch your application so that you can see the inbox you previously created in the Getting Started guide.
Type a message into the conversation, and go back to your terminal to check the logs. Look for the output of console.log("Message Text: " + message); It should match the text you have typed in.
In my case, the logs look like the following snippet:
There you have it, we have successfully used webhooks to receive messages in TalkJS. But how do we send this message to Dialogflow? Let’s find out!
Sending a message to Dialogflow
At this stage, we have the message our user has typed in. This could be a question about a product or service we offer.
In order to see our Dialogflow response, ensure the text you enter into the TalkJS conversation the same as the training phrase you set up for your intent. In this example, the training phrase of “What is the best Chat API and SDK?” with the response being “TalkJS is the best Chat API and SDK!”.
To accomplish sending our message to Dialogflow, we must first ensure we are authenticated to do so.
Authentication for Sending messages to Dialogflow
Follow the steps to get authenticated here:
https://cloud.google.com/docs/authentication/getting-started#cloud-console
For me my final command looked like:
set GOOGLE_APPLICATION_CREDENTIALS=C:\Users\Admin\Downloads\chatbot-talkjs-5ee64d42fcbbYour value will be different.
If you run into issues with this method, specifically this error:Error: Could not load the default credentials. You can try this alternate method of authenticating.
Visit: https://cloud.google.com/sdk/install and perform the following steps:
- Install the Google SDK.
- Open the gcloud shell.
- Run the command: gcloud auth application-default login
- Log in to your associated Gmail account.
You should now be authenticated. Time to add the code that sends our text to Dialogflow.
Sending messages to Dialogflow using the Node.js client library
We can send messages to Dialogflow using the Node.js client library.
The following code sends the message we type in the TalkJS inbox to Dialogflow.
const dialogflow = require('@google-cloud/dialogflow');
const uuid = require('uuid');


async function sendMessageToDialogflow(talkjsText) {
  // A unique identifier for the given session
  const sessionId = uuid.v4();


  // Create a new session
  const sessionClient = new dialogflow.SessionsClient();


// Pass the cloud project ID here
const sessionPath = sessionClient.projectAgentSessionPath('chatbot-talkjs', sessionId);


  // The text query request.
  const request = {
    session: sessionPath,
    queryInput: {
      text: {
        // The query to send to the dialogflow agent
        text: talkjsText,
        // The language used by the client (en-US)
        languageCode: 'en-US',
      },
    },
  };


  // Send request and log result

  const responses = await sessionClient.detectIntent(request);
  console.log('Detected intent');
  const result = responses[0].queryResult;
  console.log(`  Query: ${result.queryText}`);
  console.log(`  Response: ${result.fulfillmentText}`);

  if(result.queryText != "TalkJS is the best Chat API and SDK!")
   return result.fulfillmentText;

  if (result.intent) {
    console.log(`  Intent: ${result.intent.displayName}`);
  } else {
    console.log(`  No intent matched.`);
  }
}
We add the line: if(result.queryText != "TalkJS is the best Chat API and SDK!") to make sure our application does not interpret this reply as a new message to reply to.
In reality, you would have more than a single reply set up, so this would not be necessary.
Re-open the file user.js and add a call to sendMessageToDialogflow here:
router.post('/', function(req, res) {
  var body = req.body;
  var message = body.data.message.text;
  console.log("Message Text: " + message);
  res.status(200).send();
  var replyFromDialogFlow = sendMessageToDialogflow(message);
});
Before we run this code and test out our new feature, run the following commands the install the required packages:
- npm install @google-cloud/dialogflow
- npm install uuid
Let’s launch our application, this time writing a message that matches our training phrase exactly.
To see our new feature in action we need to check the logs!
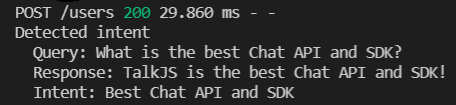
This is exactly the result we want. It is recognizing our intent and sending the appropriate response to our query.
We now have the message from our TalkJS conversation being sent to Dialogflow and correctly generating a response. Let’s look at how we get this response to appear as a reply in our TalkJS conversation.
Sending Dialogflow responses to TalkJS
We have the response generating correctly, but we need to show this response in the TalkJS conversation. This can be accomplished through the TalkJS REST API, specifically a POST request to the Messages endpoint.
To send our POST request in Node.js we will use axios. Axios is a promise-based HTTP client for the browser and Node. js. Axios makes it easy to send asynchronous HTTP requests to REST endpoints and perform CRUD operations.
To install axios, simply run npm install axios in your terminal console.
Time to add the code that will allow us to send the Dialogflow response to our conversation.
You will need to change several things with the code below:
- APP_ID - you can find your app id on the dashboard.
- CONVERSATION_ID - you can find the ID of a conversation using conversation.id
- USER_ID - This can be found wherever you created your user, like this example.
- SECRET_KEY - you can find your secret key on the dashboard.
function sendReplyToTalkJS(responseFromDialog) {
  axios
.post('https://api.talkjs.com/v1/<APP_ID>/conversations/<CONVERSATION_ID>/messages',
  '[{"text": "' + responseFromDialog + '", "sender": "<USER_ID>", "type": "UserMessage"}]',
  {
    headers: {
      'Authorization': 'Bearer <SECRET_KEY>,
      'Content-Type': 'application/json'
    }
  })
  .then(res => {
    console.log(`statusCode: ${res.statusCode}`);

  })
  .catch(error => {
    console.error(error)
  })
  .catch((error) => console.log( error.response.request._response ) );
}
Let’s call this method.
Re-open the file user.js and add a call to sendReplyToTalkJS here:
router.post('/', function(req, res) {
  var body = req.body;
  var message = body.data.message.text;
  console.log("Message Text: " + message);
  res.status(200).send();
  var replyFromDialogFlow = sendMessageToDialogflowrunSample('chatbot-talkjs', message);
sendReplyToTalkJS(replyFromDialogFlow);
});
Launch your application and enter your training phrase again.
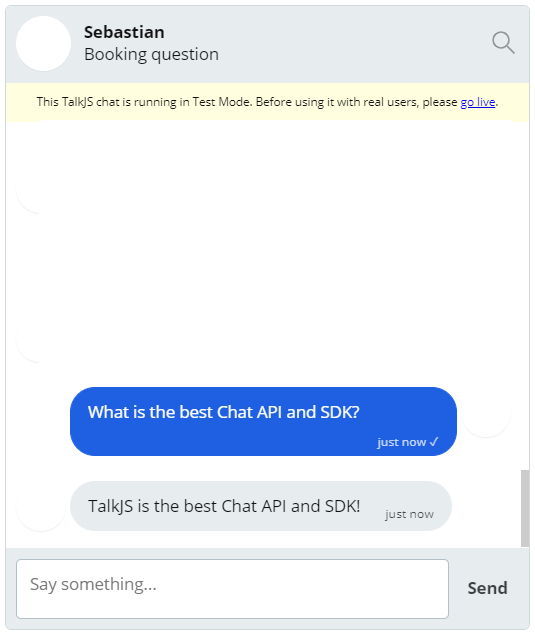
This time you should see the response from Dialogflow appearing as a reply in your conversation!
How to use TalkJS with websockets and chatbots!
Using a combination of websockets and our REST API has allowed us to integrate Dialogflow into the TalkJS workflow. However, you are not limited to Dialogflow. The principles we have learned today apply to many different offerings in the market. So what are you waiting for? Go and build the best chatbot you can, with a little help from TalkJS!


