
This guide uses the classic JavaScript SDK. If you're starting a new project, consider using TalkJS Chat UI components, which are more customizable.
AI chatbots like OpenAI's ChatGPT are increasingly popular, providing automated, context-aware responses to all kinds of user queries. TalkJS lets you create a customizable chat application that integrates chatbot responses seamlessly into your user chat.
This tutorial will show you how to make a simplified version of the interactive chatbot demo on TalkJS's website – try it out there to see how it works in practice! You'll learn how to use OpenAI's API to generate replies to user messages with the language model that powers ChatGPT, and how to add them to your chat with TalkJS's API:
To follow along with this tutorial, you’ll need:
- A TalkJS account. TalkJS provides a ready-to-use chat client for your application. Your account gives you access to TalkJS's free development environment.
- An existing TalkJS project using the classic JavaScript SDK. See the associated Getting Started guide for an example of how to set this up.
- An installation of Node.js along with the npm package manager. We’ll use this to create our backend server.
- An Open AI account and API key
We’ll build up the feature step by step in the following sections. If you would rather see the complete example code, see the Github repo for this tutorial.
Start a conversation
First, we'll set up a TalkJS chat in our frontend code. The details will depend on exactly how you integrate TalkJS into your current application, but for our example we'll use TalkJS's JavaScript SDK to create a conversation between a user and a bot, and display it with our prebuilt chatbox UI:
Talk.ready.then(function () {
  const me = new Talk.User({
    id: "chatbotExampleUser",
    name: "Alice",
    email: "alice@example.com",
    role: "default",
    photoUrl: "https://talkjs.com/images/avatar-1.jpg",
    welcomeMessage: "Hey there! How can I help?",
  });
  const talkSession = new Talk.Session({
    appId: "<APP_ID>", // replace with your TalkJS app ID
    me: me,
  });

  const bot = new Talk.User({
    id: "chatbotExampleBot",
    name: "Bot 🤖",
    email: "bot@example.com",
    role: "default",
    photoUrl: "https://talkjs.com/new-web/talkjs-logo.svg",
    welcomeMessage: "Hey there! How can I help?",
  });

  var conversation = talkSession.getOrCreateConversation(
    "chatbotExampleConversation"
  );
  conversation.setParticipant(me);
  conversation.setParticipant(bot);

  const chatbox = talkSession.createChatbox();
  chatbox.select(conversation);
  chatbox.mount(document.getElementById("talkjs-container"));
});
We've included a welcomeMessage for the bot to start the conversation off.
Get notified about new messages
We'll eventually want the bot to reply to any messages that the user sends in the conversation. To do this, we'll first enable TalkJS webhooks, which allow the TalkJS server to notify your server when a message is sent.
Webhooks let you use an event-driven architecture, where you get told about events when they happen rather than having to constantly check for new messages. There are lots of events you can listen for, but we’re only interested in new messages being sent.
Webhooks are server-side only, so you’ll need a web server. We’ll be using Express in this tutorial, but feel free to use your favorite web server library instead. The following code sets up an Express server with a POST endpoint at /onMessageSent that logs incoming events from the TalkJS server to the terminal:
import express from "express";
const app = express().use(express.json()); // creates http server

app.listen(3000, () => console.log("Server is up"));

app.post("/onMessageSent", (req, res) => {
  console.log(req.body);
  res.status(200).end();
});
For TalkJS to communicate with your server, you must expose it to the internet. This can be very difficult when developing locally, with endless firewalls and port forwarding to set up. Instead, we’ll use ngrok to create a secure tunnel to your local server. See our tutorial on How to integrate ngrok with TalkJS for instructions on how to install ngrok.
Once you have installed ngrok, run the following command:
ngrok http 3000
This command starts a secure tunnel to your local port 3000. The output should include the URL that ngrok exposes:
Forwarding https://<YOUR_SITE>.ngrok-free.app -> http://localhost:3000
You’re now ready to enable webhooks. You can do this in the Settings section of the TalkJS dashboard, under Webhooks. Paste the ngrok URL into the Webhook URL field, including the /onMessageSent path: https://<YOUR_SITE>.ngrok-free.app/onMessageSent.
Select the message.sent option:
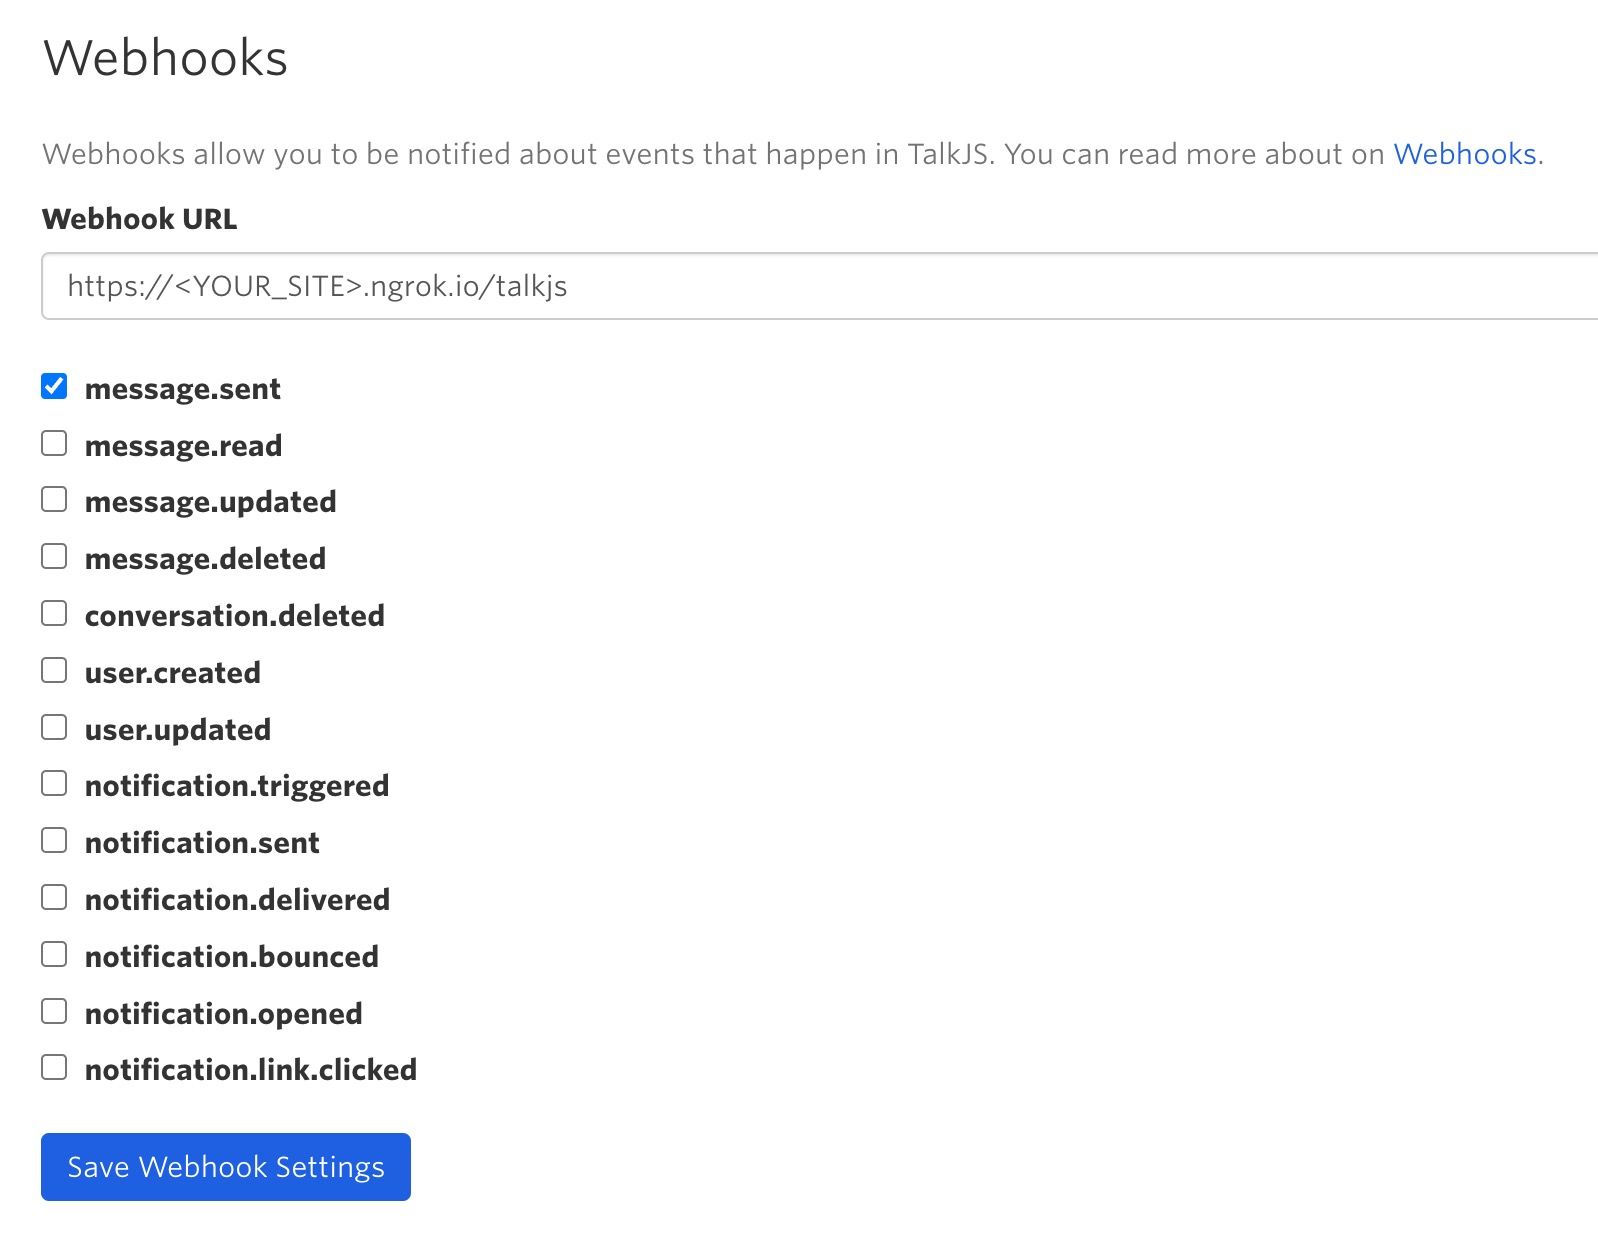
TalkJS will now send a web request to your server when a message is sent. To test this, write a message in your chat UI. You should see the event in your server’s console.
Call the OpenAI API
Next, we'll call the OpenAI API to generate replies to the user's messages. We'll use the chat completions API, which returns a list of potential responses to a given conversation.
The API call uses a secret key, so you'll need to call it from your backend server to avoid exposing the key.
As a first test of the API, add the following to your server code:
import OpenAI from "openai";

const openAISecretKey = "<OPENAI_SECRET_KEY>";
const openai = new OpenAI({ apiKey: openAISecretKey });

const messageHistory = [
  {
    role: "system",
    content:
      "You are a helpful assistant. Please provide short, concise answers.",
  },
];

async function getCompletion() {
  const completion = await openai.chat.completions.create({
    messages: messageHistory,
    model: "gpt-4o-mini",
  });

  const reply = completion.choices[0].message.content;

  return reply;
}
The getCompletion function calls the OpenAI API to create a completion given a messages list that represents the conversation so far.
In this first test example, we send a messageHistory list with only one message, a "system" message that is not displayed to the user, but gives some context on the type of reply we want ("You are a helpful assistant. Please provide short, concise answers."). See the OpenAPI reference docs for more information on the format for messages.
We also need to select one of OpenAI's language models to generate the completion. In this example, we use gpt-4o-mini, a fast, affordable small model. You can switch this out for a different model if you like. See Open AI's list of models for more choices.
The model returns a list of choices for completions. We'll return the first one as our chat response.
Next, update your app.post call to call the getCompletion function:
const botId = "chatbotExampleBot";

app.post("/onMessageSent", async (req, res) => {
  if (senderId != botId) {
    const reply = await getCompletion();
    console.log(reply);
  }
  res.status(200).end();
});
We do not call the OpenAI API for messages from the bot, to stop it getting stuck in a loop of responding to itself.
Restart your server, and send another message. You should see a response logged to your terminal. At the moment, the response is very generic (something like "How can I assist you today?"), because it only has the instructions in the system message to work with. We want to instead give it the full conversation so far, so that it can reply with something relevant. To do this, replace your app.post call with the following code, which creates a message history for each conversation:
const allMessageHistory = {};

app.post("/onMessageSent", async (req, res) => {
  const convId = req.body.data.conversation.id;
  const messageText = req.body.data.message.text;
  const senderId = req.body.data.sender.id;

  if (!(convId in allMessageHistory)) {
    allMessageHistory[convId] = [
      {
        role: "system",
        content:
          "You are a helpful assistant. Please provide short, concise answers.",
      },
    ];
  }
  const messageHistory = allMessageHistory[convId];

  if (senderId != botId) {
    messageHistory.push({ role: "user", content: messageText });
    const reply = await getCompletion(messageHistory);
    messageHistory.push({ role: "assistant", content: reply });
    console.log(reply);
  }

  res.status(200).end();
});
You should now see a relevant reply logged to the terminal when you send a message.
Call the TalkJS API
The final step is to display the bot's replies as messages in the chatbox, instead of in the console. To do this, we create a function to call the TalkJS REST API to send messages from the bot:
const appId = "<APP_ID>";
const talkJSSecretKey = "<TALKJS_SECRET_KEY>";
const basePath = "https://api.talkjs.com";

async function sendMessage(conversationId, text) {
  return fetch(
    `${basePath}/v1/${appId}/conversations/${conversationId}/messages`,
    {
      method: "POST",
      headers: {
        "Content-Type": "application/json",
        Authorization: `Bearer ${talkJSSecretKey}`,
      },
      body: JSON.stringify([
        {
          text: text,
          sender: "chatbotExampleBot",
          type: "UserMessage",
        },
      ]),
    }
  );
}
As with the OpenAI API, you should call the TalkJS API from your backend server to avoid exposing your secret key. You can find your secret key along with your app ID in the TalkJS dashboard under Settings.
Now you can call the sendMessage function after getCompletion:
app.post("/getMessages", async (req, res) => {
  // ...

  if (senderId != botId) {
    messageHistory.push({ role: "user", content: messageText });
    const reply = await getCompletion(messageHistory);
    await sendMessage(convId, reply);
    messageHistory.push({ role: "assistant", content: reply });
  }

  res.status(200).end();
});
The responses from the OpenAI API now appear in the chatbox as messages from the bot:
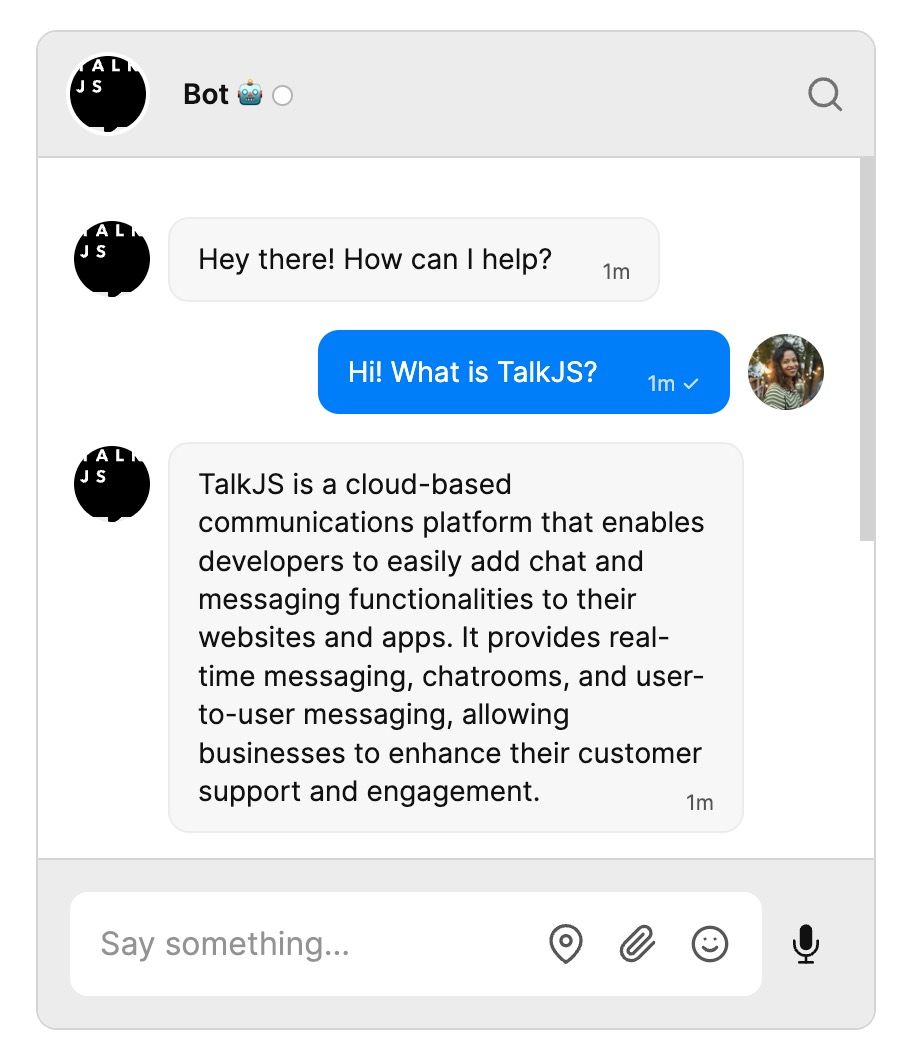
You now have a working chatbot that you can use in your application!
(Optional) Add a typing indicator
This last optional section shows you how to add a custom typing indicator for the bot, so that you know that it's generating a response. You can do this with the TalkJS Theme Editor, and some updates to your server code.
First, go to the Themes tab, and select to Edit the theme you currently use. (In this tutorial we'll edit the default theme, but it would work similarly for the other themes.)
Select the UserMessage component from the list of Built-in components. Replace the existing MessageBody component with the following:
<div t:if="{{ custom.isTyping == 'true' }}" class="typing-indicator">
    <TypingIndicator />
</div>

<MessageBody  t:else
    body="{{ body }}"
    timestamp="{{ timestamp }}"
    floatTimestamp="auto"
    showStatus="{{ sender.isMe }}"
    isLongEmailMessage="{{isLongEmailMessage}}"
    darkenMenuArea="{{ darkenMenuArea }}"
    hasReferencedMessage="{{ hasReferencedMessage }}"
/>
This code adds TalkJS's TypingIndicator component to the user message if an isTyping custom message property is set on the message (we'll add the logic for this to the server code next). Otherwise, it displays the MessageBody as normal. If you wanted you could instead create a custom typing indicator component for the bot in the Theme Editor, but we'll use the standard one that comes with the theme.
Next we'll update the server code. In your server.js file, replace your sendMessage function with this sendInitialMessage function:
async function sendInitialMessage(conversationId) {
  const response = await fetch(
    `${basePath}/v1/${appId}/conversations/${conversationId}/messages`,
    {
      method: "POST",
      headers: {
        "Content-Type": "application/json",
        Authorization: `Bearer ${talkJSSecretKey}`,
      },
      body: JSON.stringify([
        {
          text: "_Let me think for a bit..._", // Placeholder text that the theme will replace with a typing indicator
          sender: botId,
          type: "UserMessage",
          custom: { isTyping: "true" },
        },
      ]),
    }
  );
This function creates a placeholder message with isTyping set to true and the text "Let me think for a bit...". Our Theme Editor code above will replace this with a typing indicator.
Next, add a new updateBotMessage function:
async function updateBotMessage(conversationId, messageId, text) {
  return fetch(
    `${basePath}/v1/${appId}/conversations/${conversationId}/messages/${messageId}`,
    {
      method: "PUT",
      headers: {
        "Content-Type": "application/json",
        Authorization: `Bearer ${talkJSSecretKey}`,
      },
      body: JSON.stringify({
        text: text,
        custom: { isTyping: "false" },
      }),
    }
  );
}
This calls the TalkJS edit message endpoint to update the text of a given message and set isTyping to false.
Now update the if (senderId != botId) section inside app.post to call the sendInitialMessage and updateBotMessage functions:
if (senderId != botId) {
  messageHistory.push({ role: "user", content: messageText });
  const messageId = await sendInitialMessage(convId);
  const reply = await getCompletion(messageHistory);
  await updateBotMessage(convId, messageId, reply);
  messageHistory.push({ role: "assistant", content: reply });
}
This creates a placeholder message, gets the bot reply as before, then edits the placeholder message with the bot's response.
There's one final tweak that we need. Currently you can send more messages before the bot replies. As well as being potentially confusing, this can lead to having typing indicators appear above other messages. To prevent this, we'll set the message field to read only while the bot is generating its reply.
To do this, first add the following function to your server.js code:
async function setUserAccess(conversationId, userId, access) {
  return fetch(
    `${basePath}/v1/${appId}/conversations/${conversationId}/participants/${userId}`,
    {
      method: "PUT",
      headers: {
        "Content-Type": "application/json",
        Authorization: `Bearer ${talkJSSecretKey}`,
      },
      body: JSON.stringify({ access: access }),
    }
  );
}
This calls the participant API endpoint and sets the access field. Now update your logic inside app.post to call setUserAccess to set the message field to read only before you call the OpenAI API, and then back after the bot replies:
messageHistory.push({ role: "user", content: messageText });
const messageId = await sendInitialMessage(convId);
await setUserAccess(convId, senderId, "Read");
const reply = await getCompletion(messageHistory);
await updateBotMessage(convId, messageId, reply);
messageHistory.push({ role: "assistant", content: reply });
await setUserAccess(convId, senderId, "ReadWrite");
You now have a typing indicator for your chatbot:
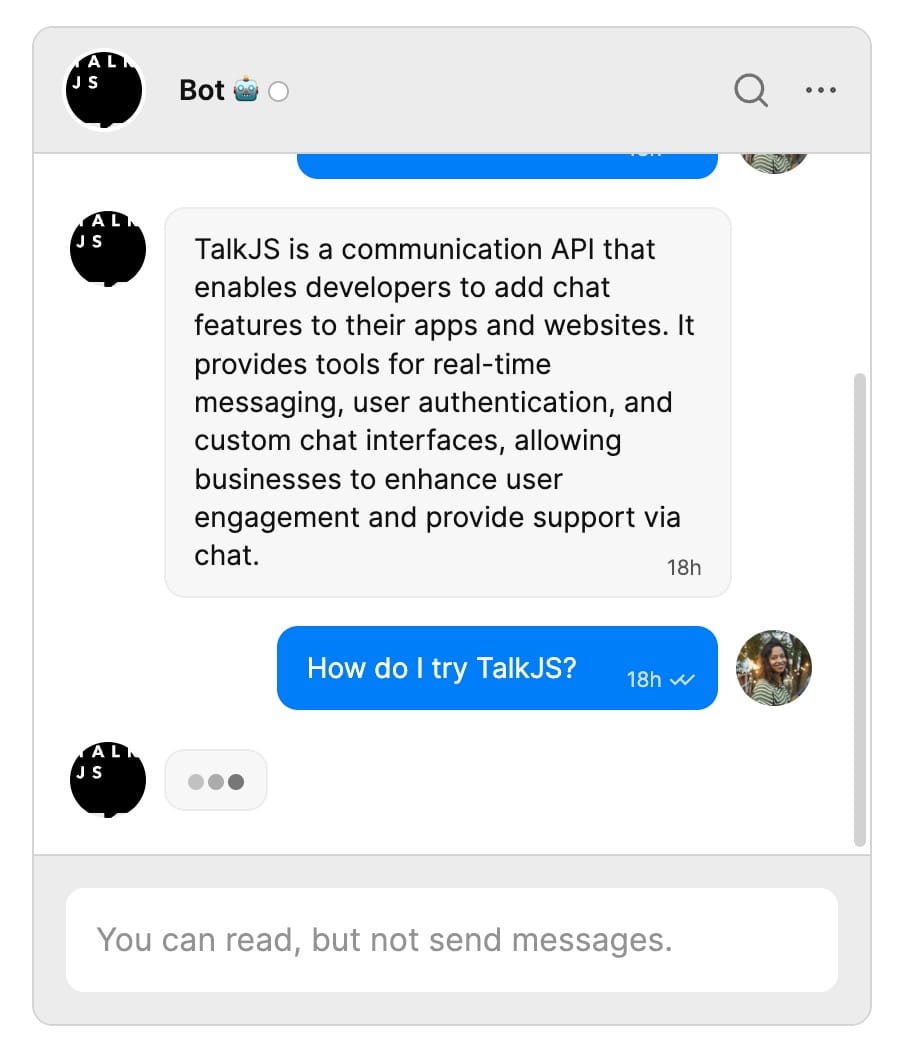
To see this behavior in action, try our interactive chatbot demo.
Customize your chat
You may want to customize your chat further. For example, you could include an indicator in your chat that the bot is generating a response. See our blog post on How to add a custom typing indicator for a chatbot for information on ways to do this.
You can also use all our other features, such as custom themes, action buttons and HTML Panels, to control exactly how you want the chat to look and behave.
Summary
To recap, in this tutorial we have:
- Created a chat between a user and a bot
- Set up a web server to receive webhook events from the TalkJS server when new messages are sent
- Called the OpenAI API to generate replies to new user messages
- Called the TalkJS API to send the replies as messages in the chat
For the full example code for this tutorial, see our Github repo.
If you want to learn more about TalkJS, here are some good places to start:
- The TalkJS Docs help you get started with TalkJS.
- TalkJS tutorials provide how-to guides for many common TalkJS use cases.
- The talkjs-examples Github repo has larger complete examples that demonstrate how to integrate with other libraries and frameworks.


