

This guide uses the classic JavaScript SDK. If you're starting a new project, consider using TalkJS Chat UI components, which are more customizable.
Webflow is a no-code or low-code website builder that allows you to build, ship, and manage sites collaboratively at scale. With TalkJS, you can seamlessly add delightful one-on-one conversations, group chat, or an AI chat bot directly into your Webflow site.
This guide will help you integrate TalkJS chat into your Webflow site. By the end of this guide you will have a working example of TalkJS chat in Webflow.
Prerequisites
To integrate TalkJS chat into Webflow, you’ll need the following:
- A TalkJS account. You can try TalkJS for free.
- A Webflow account with a site to which you would like to add TalkJS chat. To access the Embed code and Collections features required to integrate a working chat, you need to be on Webflow’s CMS site plan or higher.
Step 1: Load TalkJS on your site
Add the code to load TalkJS to your Webflow site.
- Login to your Webflow account.
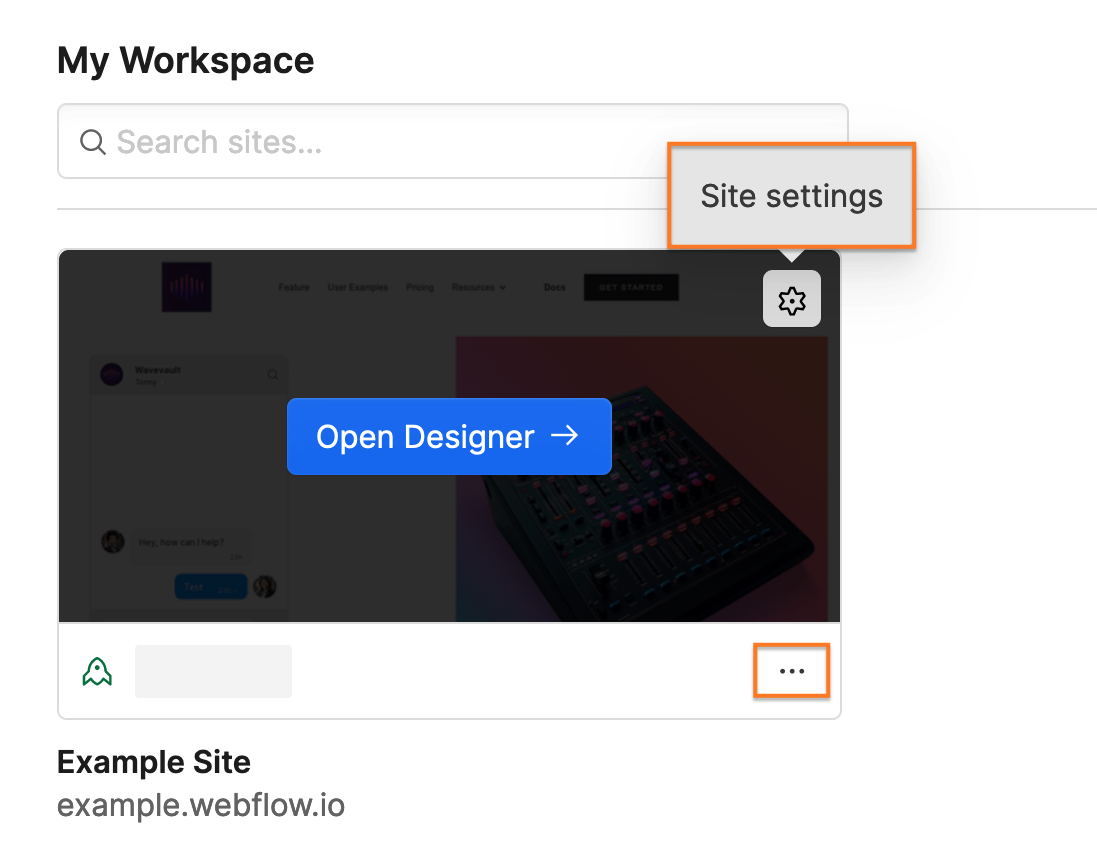
- From your Webflow dashboard, go to Site settings for the site to which you would like to add TalkJS chat.
- In the Custom code section, add the following code snippet, which loads TalkJS in your Webflow site:
<!-- minified snippet to load TalkJS without delaying your page -->
<script>
(function(t,a,l,k,j,s){
s=a.createElement('script');s.async=1;s.src="https://cdn.talkjs.com/talk.js";a.head.appendChild(s)
;k=t.Promise;t.Talk={v:3,ready:{then:function(f){if(k)return new k(function(r,e){l.push([f,r,e])});l
.push([f])},catch:function(){return k&&new k()},c:l}};})(window,document,[]);
</script>- Save your changes.
Step 2: Add chat to a page
Add code to initialize TalkJS on the page of your Webflow site where you’d like to make chat available.
- Go to the Designer for your site.
- From the Pages overview, select the page on which you’d like to add TalkJS chat.
- From the + Add elements option, in the Advanced section, select Embed and drag it onto your page. An empty HTML Embed Code Editor pop-up window will open in which you can add custom code.

- To create a container in which a TalkJS chat user interface (UI) is displayed, add the following code snippet into the HTML Embed Code Editor:
<!-- container element in which TalkJS will display a chat UI -->
<div id="talkjs-container" style="width: 90%; margin: 30px; height: 500px">
  <i>Loading chat...</i>
</div>- To create an active session with a conversation and users, paste the following TalkJS initialization code into a script:
Talk.ready.then(() => {
    const me = new Talk.User({
        id: '123456',
        name: 'Alice',
        email: 'alice@example.com',
        photoUrl: 'https://talkjs.com/images/avatar-1.jpg',
        welcomeMessage: 'Hey there! How are you? :-)',
    });

    const session = new Talk.Session({
        appId: 'APP_ID',
        me: me,
    });

    const other = new Talk.User({
        id: '654321',
        name: 'Toni',
        email: 'toni@example.com',
        photoUrl: 'https://talkjs.com/images/avatar-3.jpg',
        welcomeMessage: 'Hey, how can I help?',
    });

    const conversation = session.getOrCreateConversation(
        Talk.oneOnOneId(me, other)
    );
    conversation.setParticipant(me);
    conversation.setParticipant(other);

    const chatbox = session.createChatbox();
    chatbox.select(conversation);
    chatbox.mount(document.getElementById('talkjs-container'));
});- Replace
APP_IDwith your own app ID, which you can find on the Settings page of your TalkJS dashboard. - Save your custom code.
Script embeds don’t show up on the Webflow page preview, but only on a published or exported site. To preview and try out your working TalkJS chat, publish your page to a staging or a production environment, as follows:
- Select Publish from the top navigation bar, choose a publishing destination, and select Publish to selected domains. Wait until you get a confirmation that your site has been published.
- Select the domain that you published your site to. A preview will open in a new window or tab.
You now have a working TalkJS chat on your page.
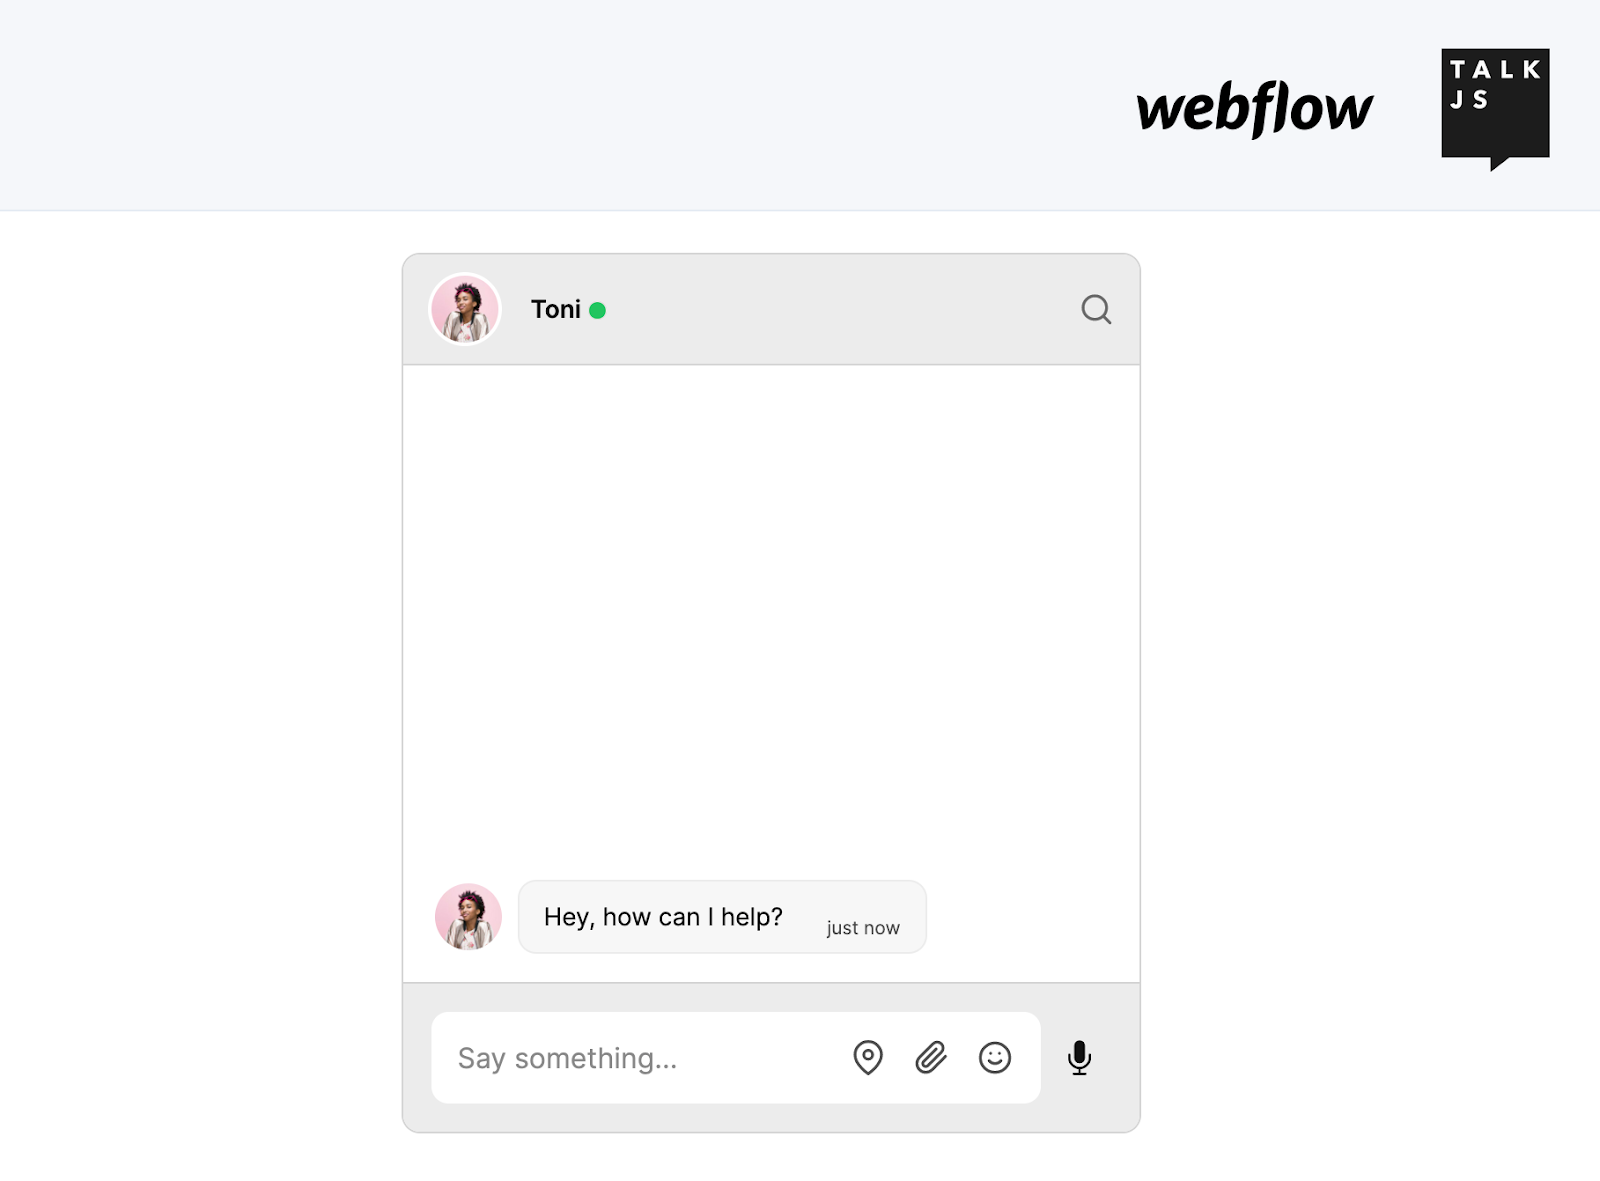
The current code creates a chat box UI. If you’d like to have a different chat UI, you can choose from a range of pre-built chat UIs, including an inbox with a list of conversations, and a pop-up widget.
In addition to one-on-one chats, you can also create group chats.
Step 3: Add your own user data
The current example of a TalkJS chat in your Webflow site works with hard-coded dummy data for both users and the conversation. To replace these hard-coded values with your own user data, you can use CMS collections, which offer database features in Webflow. Collections in Webflow are akin to a database table, and collection items are like individual records in a database.
Option 1: Create a user collection within Webflow
In Webflow you can use CMS collections with your own user data to load into your TalkJS chat dynamically. If you do not yet have a collection of users, you can create a collection of users as follows:
- In the Designer for your site, select CMS from the sidebar navigation.
- To create a new collection, at the top of the CMS Collections section, select Create New Collection.
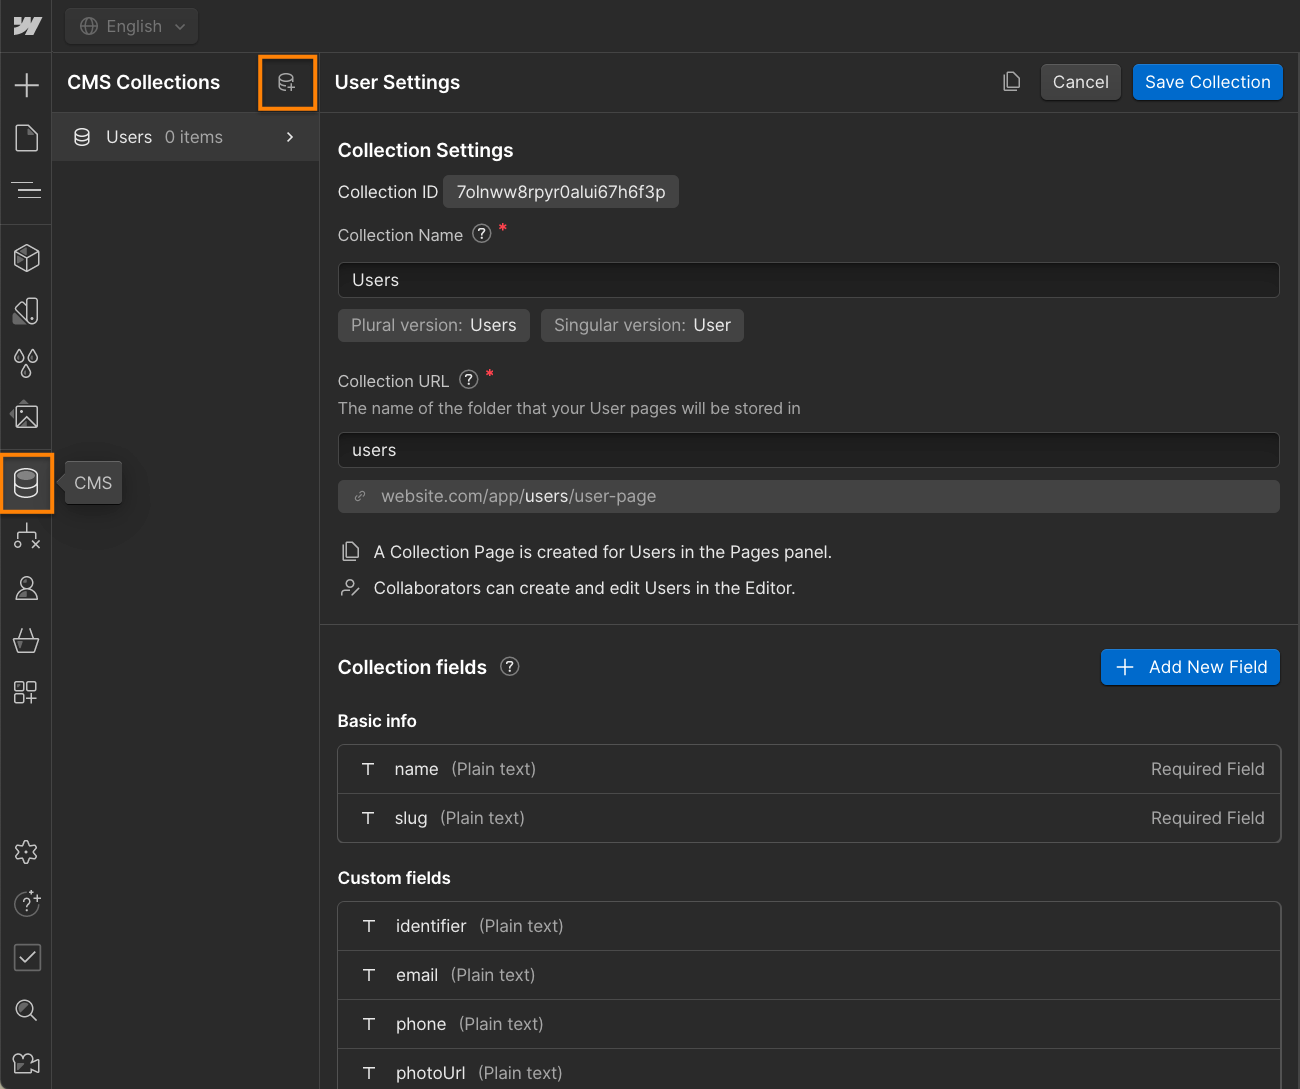
- In the Collection Settings section, fill out the Collection Name, for example with ‘Users’. Webflow automatically fills out a corresponding Collection URL, as well as the plural and singular names of items in the collection.
- In the Collection fields section, specify the structure of a user collection item by setting the fields that you want a user to have. Webflow automatically sets the ‘Name’ and ‘Slug’ fields as basic information, both of which are required in Webflow. To add a custom field, select the + Add New Field button. Users in TalkJS have the following fields (fields marked with * are required for the chat to function):
id*name*emailphonephotoUrllocalewelcomeMessagerolecustom
- Select the Create Collection button at the top of the New Collection interface. An empty collection of users is now created.
- To add records for actual users, you have several options. To add users to your collection one-by-one, select + New User. To import existing user data, select Import at the top navigation to upload a CSV file, or use Webflow’s Data API.
You now have a collection of user data in Webflow that you can dynamically load and access throughout your site, including in custom code. For example, you can use the purple + Add field button to reference fields such as a user’s name, ID, or photo from your Users collection in your custom code.

Outside of custom code, you could use collection lists to load a list of users to chat with. Or, using the collection pages that Webflow automatically generates for each collection item, you could offer an option to start a one-on-one chat with a specific user.
If you’re using the same TalkJS chat element on multiple pages, you can also make it into a component that can be reused anywhere in your Webflow site.
Option 2: Manage Webflow user data with Memberstack
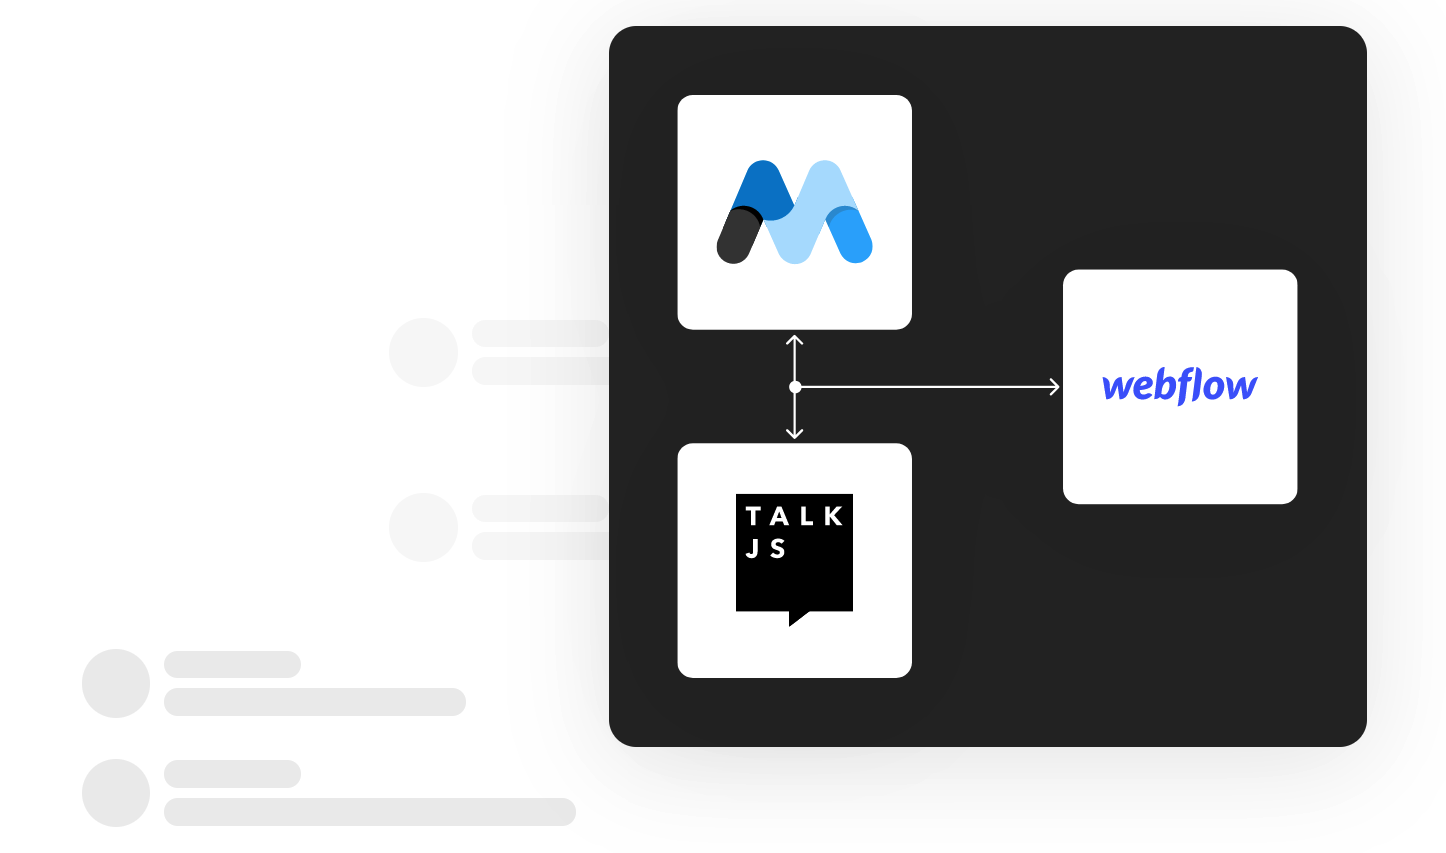
To manage anything related to users, you can also use an external service such as Memberstack when integrating TalkJS into Webflow. Among other things, Memberstack provides support for memberships and user authentication for Webflow.
Memberstack has a ready-to-go Webflow site template for TalkJS integration into Webflow that you can clone, as well as a video guide. Memberstack integration also makes use of custom code and CMS collections.
See also: How to build a member messaging feature with Webflow.
Do you have further questions about integrating TalkJS into Webflow? We’re happy to help. Get in touch.


