


Traditionally, TalkJS works by creating an iframe element on your website to our service located at app.talkjs.com . While the TalkJS domain won't be publicly visible to end users, it will appear in the network requests tab of browsers. Under some circumstances the availability app.talkjs.com domain may be undesirable. For example, corporate firewalls may accidentally consider TalkJS' solution a chat or instant messaging software, and for that reason block requests to *.talkjs.com
If you're on the Enterprise plan, you can mask all network requests to TalkJS by routing all traffic through your own domain, such as messages.yourdomain.com . This way, you can white-label TalkJS and bypass rudimentary domain-based blocking for corporate firewalls.
Note: Domain masking must be manually enabled by the TalkJS support team. If you'd like domain masking to be enabled for your account, get in touch.
Once domain masking has been enabled for your account, you will need to take a couple of steps on your side to proxy all network requests to TalkJS through your own subdomain.
The following guide uses Amazon CloudFront as an example to describe how to proxy all network requests to TalkJS through your own subdomain. However, Cloudfront is used here for illustration purposes only, and you can use any service that best fits your infrastructure.
Proxy network requests through your own subdomain using CloudFront
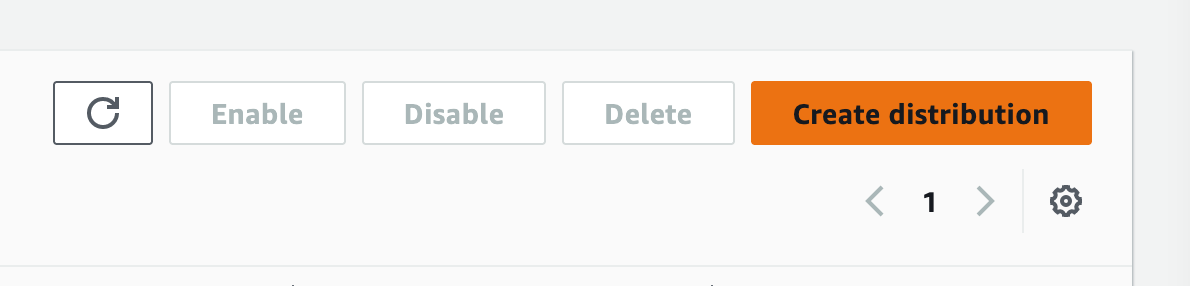
1. Login to your CloudFront service dashboard and select 'Create distribution'.
2. Change the origin settings to the following:
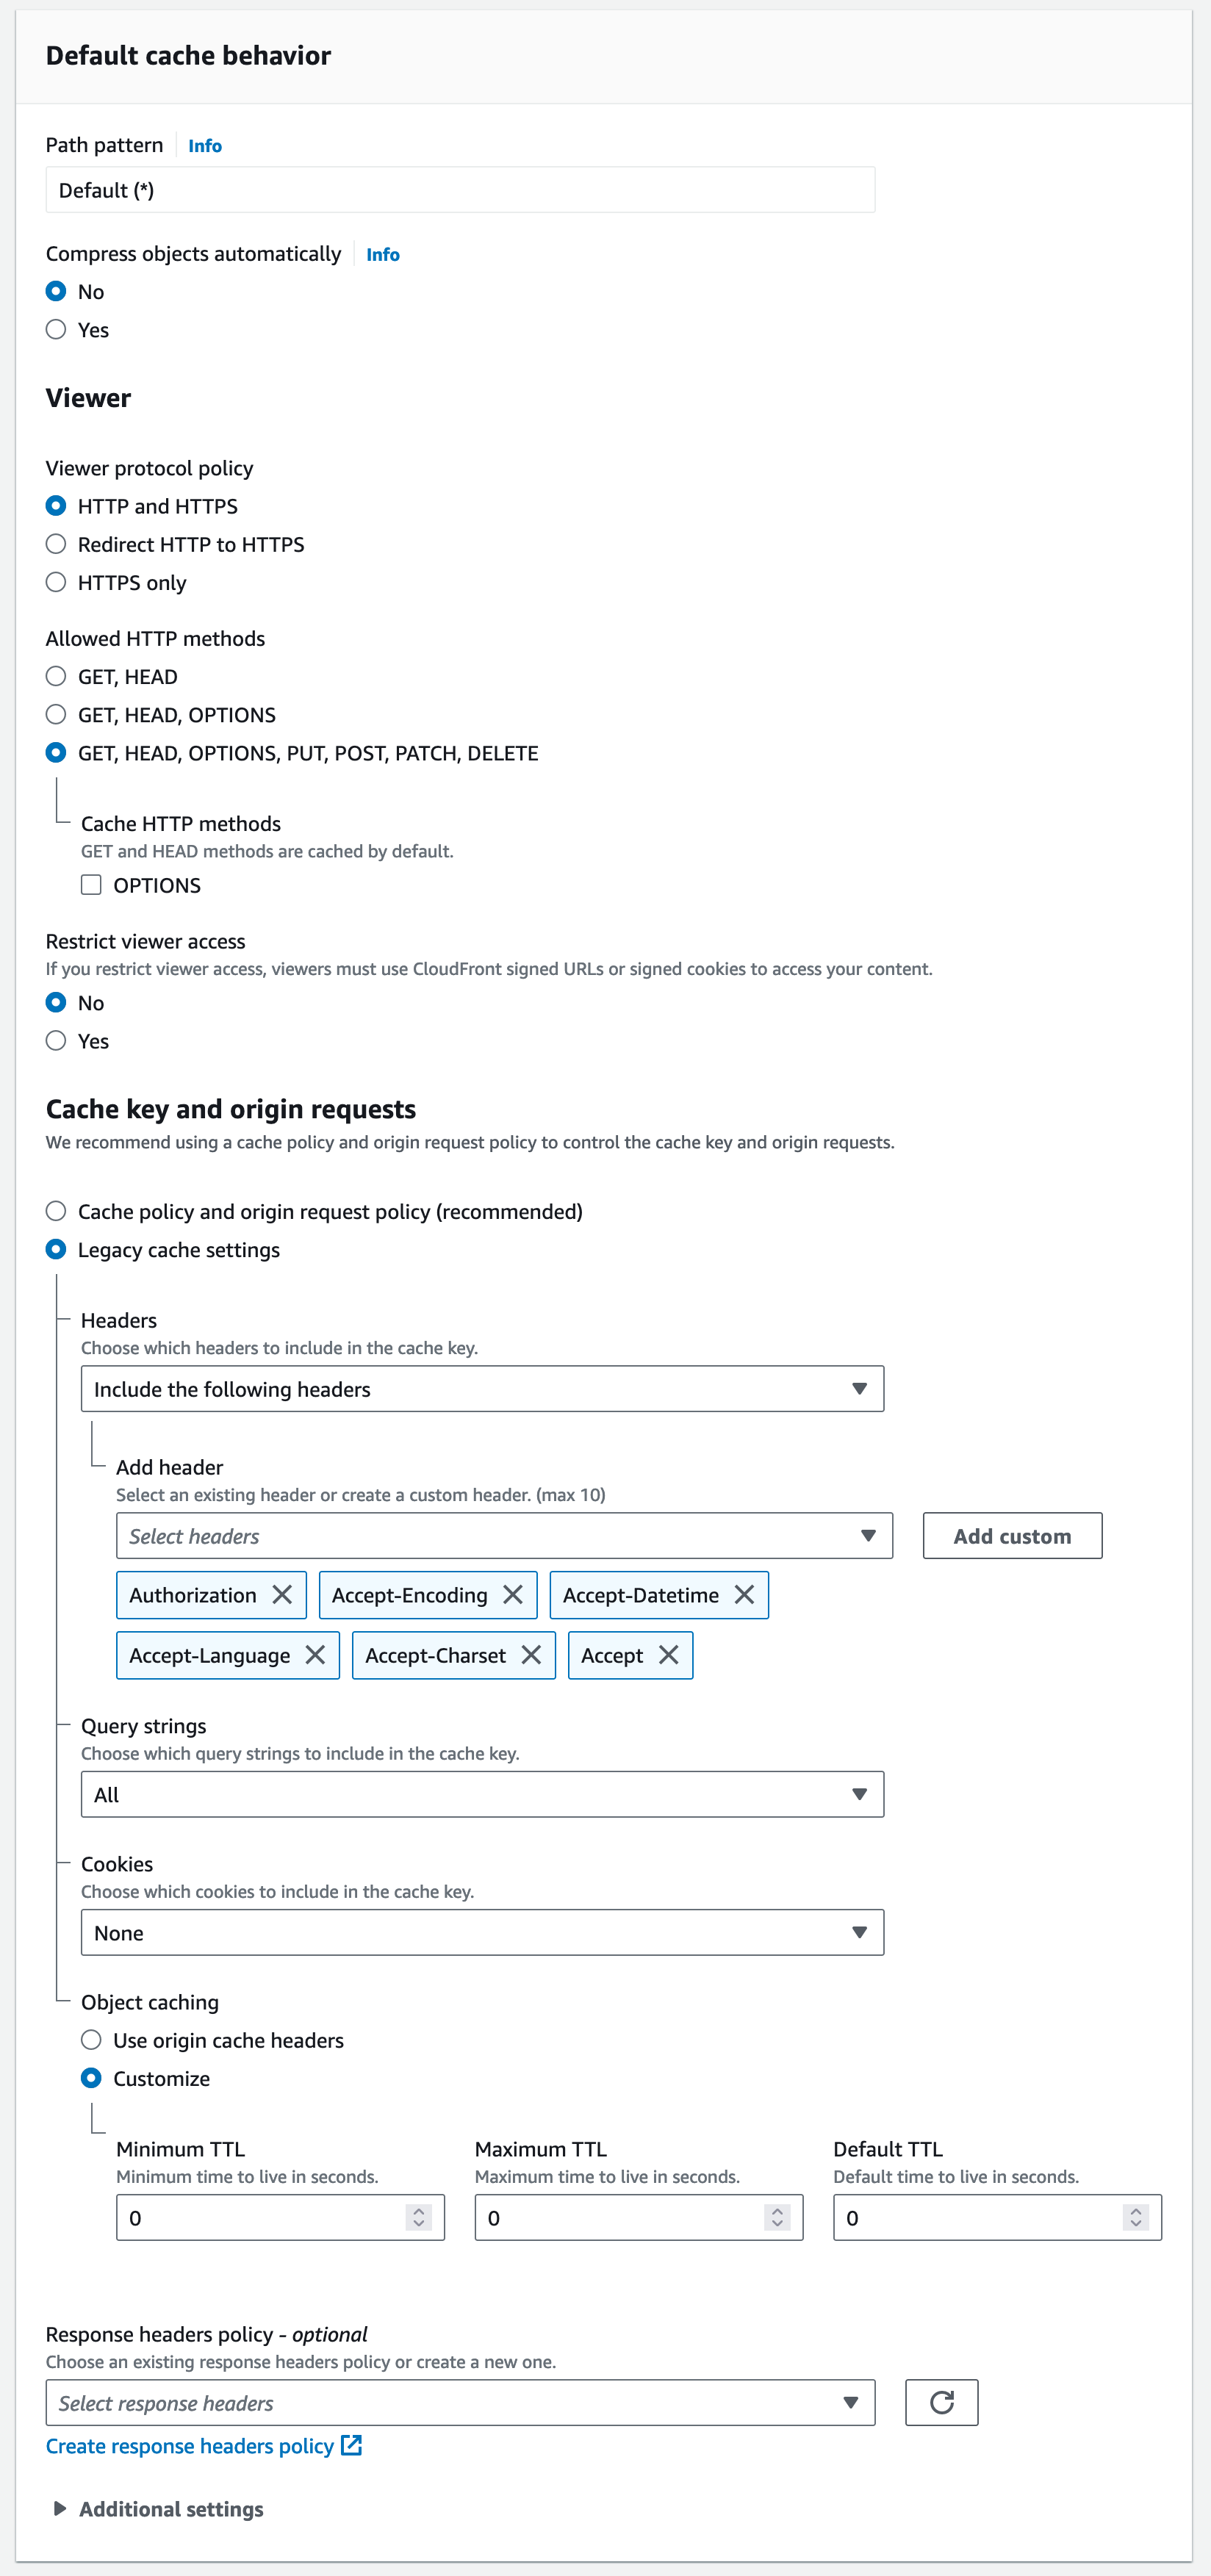
3. Change the default cache behaviour to allow additional HTTP methods, as follows:

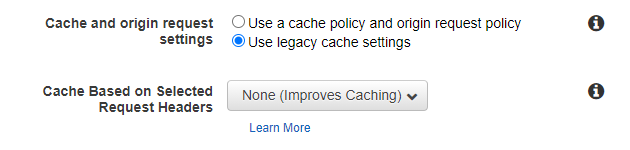
4. Change the 'Cache and origin request settings' to use the legacy cache settings so caching can be disabled (required).
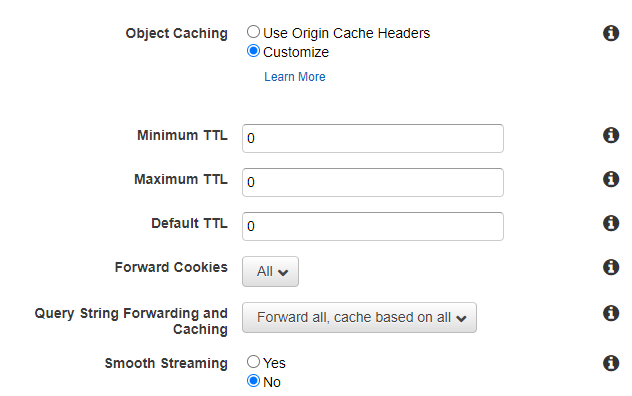
5. Change the default object caching rules, cache TTL and forwarding rules to the following:
6. Modify the distribution settings to add use your own subdomain, you may also need to configure a custom SSL certificate for your subdomain, as documented in the Cloudfront guide to using alternate domain names and HTTPS.
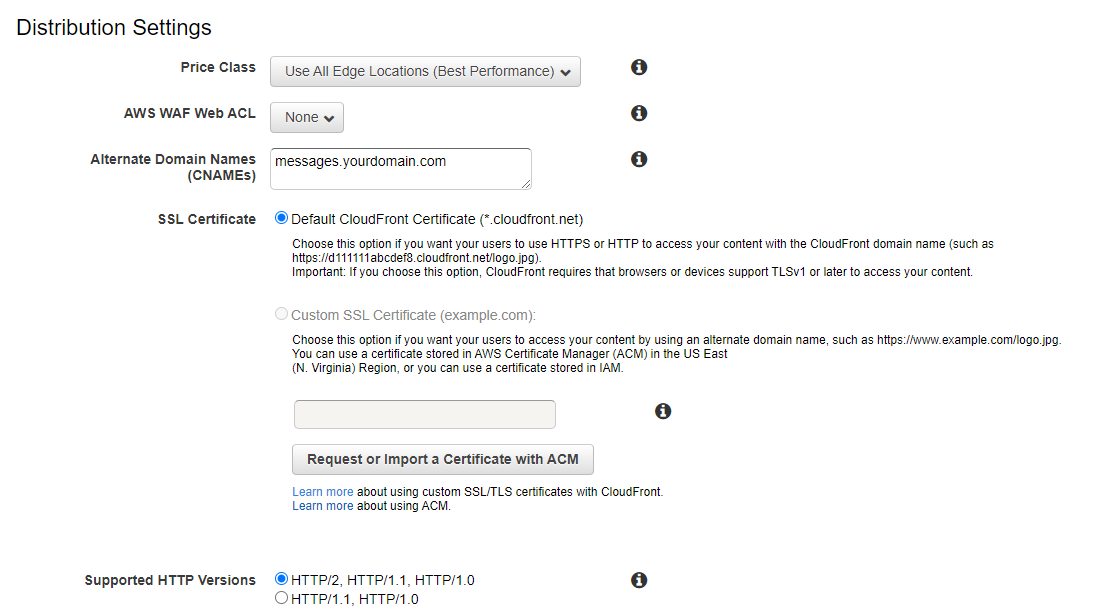
You can enable logging, but be aware that sensitive personally identifying information may appear in the log data.
7. In the SDK code snippet that loads TalkJS, replace https://cdn.talkjs.com/talk.js:
<script>
(function(t,a,l,k,j,s){
s=a.createElement('script');s.async=1;s.src="https://cdn.talkjs.com/talk.js";a.head.appendChild(s)
;k=t.Promise;t.Talk={v:3,ready:{then:function(f){if(k)return new k(function(r,e){l.push([f,r,e])});l
.push([f])},catch:function(){return k&&new k()},c:l}};})(window,document,[]);
</script>
with your own proxy subdomain, for example:
<script>
(function(t,a,l,k,j,s){
s=a.createElement('script');s.async=1;s.src="https://messages.yourdomain.com/__assets/cdn/talk.js";a.head.appendChild(s)
;k=t.Promise;t.Talk={v:3,ready:{then:function(f){if(k)return new k(function(r,e){l.push([f,r,e])});l
.push([f])},catch:function(){return k&&new k()},c:l}};})(window,document,[]);
</script>
Note: Pointing to the new subdomain can only be done using the SDK. That means that if you're use the TalkJS NPM package, to enable domain masking you'll need to change to using the snippet from the SDK instead.
Once you've enabled the distribution, the chat should load correctly. You should now see all requests being routed through your custom domain.
Do you have any questions, or are you running into issues? We're happy to help out. Get in touch.


