

This guide uses the classic JavaScript SDK. If you're starting a new project, consider using TalkJS Chat UI components, which are more customizable.
Chat messages often just contain text, images or files. But in TalkJS you can create a whole range of custom message types—from event invitations to payment requests, auction bids, contact cards, and anything else you can imagine.
In this tutorial, I'll guide you through the process of setting up custom message types. The guide focuses on sending event invitations, but the same idea can be applied to any of the other custom message types you might want.
Prerequisites
To follow along with the tutorial, you’ll need:
- A TalkJS account. Get started for free.
- A chat to which you’d like to add custom message types. If you don’t have a project yet, create one with one of the Getting Started guides.
Send messages with custom data
The easiest way to send messages with custom data is through the REST API. The custom metadata consists of a set of key-value pairs where both keys and values must be strings.
// Endpoint to handle sending info about an event to a conversation
app.post('/events/send', async (req, res) => {
    const { conversationId, eventId } = req.body;

    // In a real app, you'd probably load this data from a database, or some external API.

    const eventData = {
      eventId: eventId,
      eventTitle: "Virtual workshop: Coming Up with Dummy Data for Code Demos",
      eventImage: "https://shorturl.at/hhTDE",
      eventTime: "30-02-2026 at 13:37",
    };

    // Prepares the request body for the TalkJS REST API. It expects a list of one or more messages to be sent.
    const requestBody = [
        {
            "text": "Upcoming event:",
            "type": "SystemMessage",
            "custom": eventData
        }
    ];

    console.log(requestBody);

    // Constructs the URL to send a message to the selected conversation
    const url = `https://api.talkjs.com/v1/${APP_ID}/conversations/${conversationId}/messages`;

    try {
        // Makes a POST request to the TalkJS REST API to send the message
        const response = await fetch(url, {
            method: 'POST',
            headers: {
                'Content-Type': 'application/json',
                'Authorization': `Bearer ${SECRET_KEY}`
            },
            body: JSON.stringify(requestBody)
        });

        const responseText = await response.text();

        if (!response.ok) {
            console.error("TalkJS REST API error:", response.status, responseText);
            return res.status(response.status).json({ success: false, message: "Failed to send message", error: responseText });
        }

        const responseData = JSON.parse(responseText);
        console.log("Message sent successfully via the REST API:", responseData);

        // Responds back to the client
        res.json({ success: true, message: "Message forwarded and sent", data: responseData });
    } catch (error) {
        console.error("Error sending message via the REST API:", error);
        res.status(500).json({ success: false, message: "Internal server error" });
    }
});
In this code, replace:
APP_IDwith your own app IDSECRET_KEYwith your own secret key
You can find both your app ID and your secret key on the Settings page of your TalkJS dashboard.
You currently have some logic to send messages that include event information in the message, but none of that will show up in the chat yet. For that to work, you'll need to create or update a theme to render the data, which you'll do in the next step.
Show events in chat messages
To create or update a theme to render the data, go into the themes area of the TalkJS dashboard, and create a new theme named "events-demo". Next to your newly created theme, click "edit". Now, you'll see a list of all the components in your theme on the left. In both the UserMessage and SystemMessage components, you'll find a line like this:
<MessageBody body="{{ body }}" timestamp="{{ timestamp }}" floatTimestamp="right"/>Edit it to include a custom attribute, like this:
<MessageBody body="{{ body }}" custom="{{ custom }}" timestamp="{{ timestamp }}" floatTimestamp="right"/>This makes the custom data associated with a message available in the MessageBody component, which you'll edit next to display event information.
Find this section of code, which renders the message's text contents, and any link previews if you have them:
<span t:if="{{ body.type == 'text' }}" class="message-text">
  {{ body.formattedText }}
  <LinkPreviews links="{{ body.links }}" compact="{{ false }}" />
</span>
Below that span, add some markup like this:
<div t:if="{{custom.eventId}}" class="event">
    <img src="{{custom.eventImage}}" />
    <header>
        <strong>{{custom.eventTitle}}</strong>
    </header>
    <div class="info">
        <span>📅 {{custom.eventTime}}</span>
        <a href="https://example.com/events/{{eventId}}">More info</a>
    </div>
</div>
The t:if attribute on the outer div is part of the TalkJS template syntax, and means that an element will only be rendered if the expression inside it evaluates to a value that's not falseor nil. So in the example above, the div will only be shown if the value custom.eventId exists.
Inside of it you'll find several elements that make use of the custom data you're sending along with the message. Note the double curly braces {{ }}. Anything inside of those braces is treated as a template expression, letting you reference message data, and even add more expressive template logic.
Now you have the markup to display our event details, but it doesn't look very good yet. Let's style it with CSS. You can add your own CSS inside the <style> tag at the bottom of the MessageBody component. To style your event, add the following:
.event {
    margin-top: 0.5em;
}

.event img {
    width: 100%;
    max-height: 250px;
    object-fit: cover;
    object-position: center;
}

.event header {
    margin-top: 0.5em;
    font-size: 1.1em;
}

.info {
    display: flex;
    flex-direction: row;
    align-items: center;
    justify-content: space-between;
}

.info a {
    background-color: blue;
    color: white;
    padding: 0.5em;
    text-decoration: none;
    border-radius: 0.75rem;
}
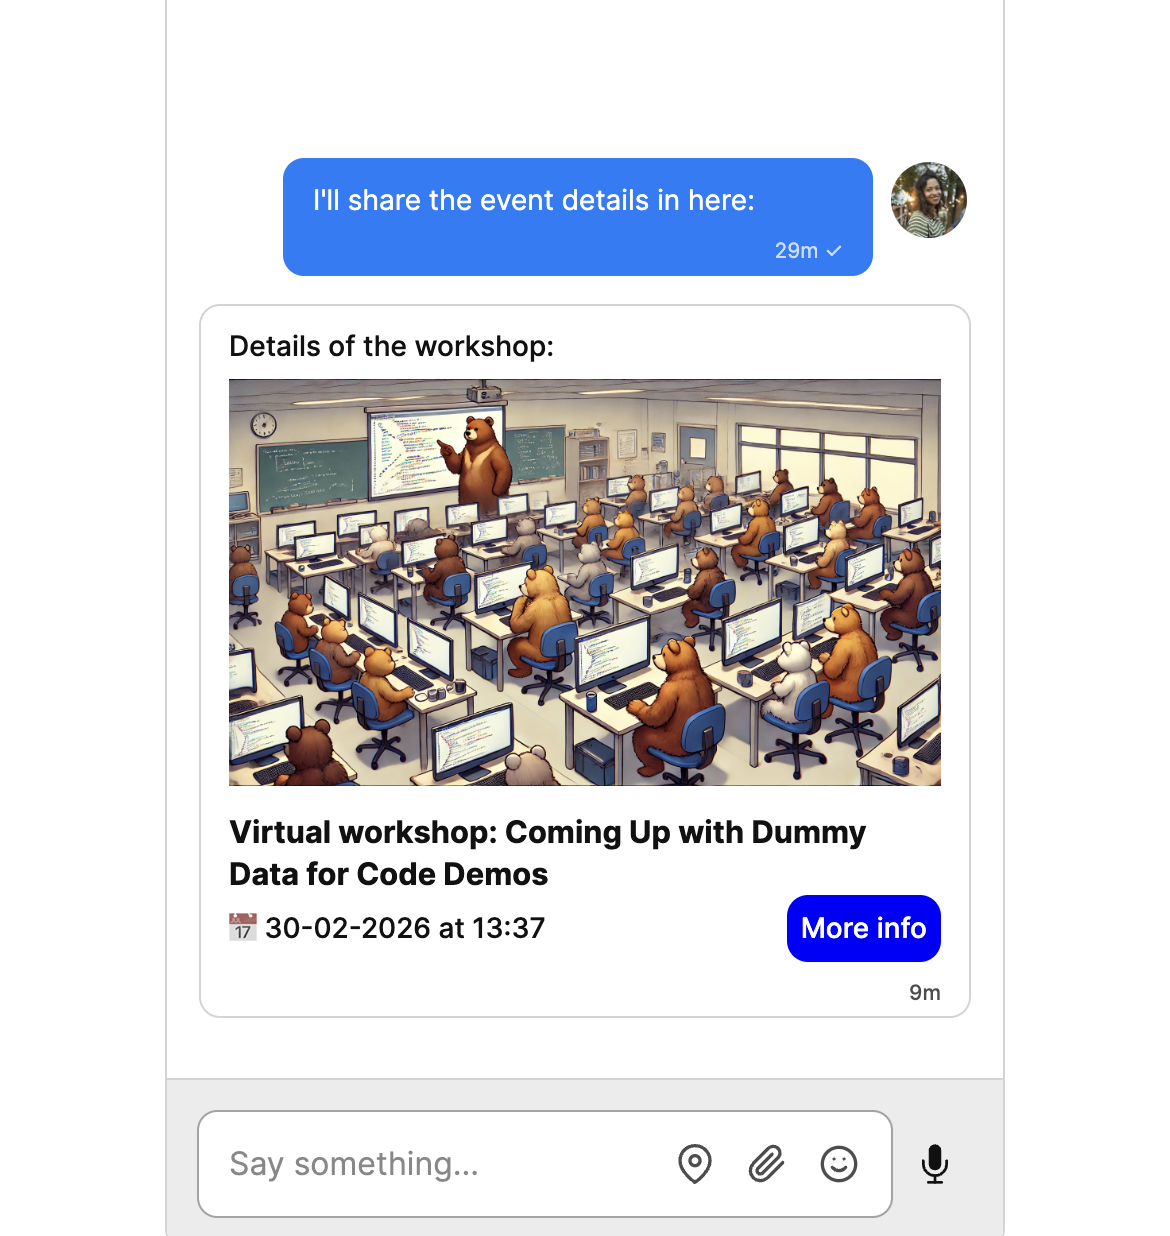
Your event details should come out looking something like this:
Summary
That’s it! You can now send event invitations in your chat, using custom message types. To sum up, in following this guide, you’ve:
- Set up code to send messages that include event information
- Customized your theme to show events in chat messages
Do you have questions about using custom message types in your TalkJS chat? We’re happy to help. Get in touch.


