

When you sign up for TalkJS, you immediately have access to a test mode for development, which is forever free to use.
Once you’re ready to take your chat into production, you need to subscribe to a plan and take your chat live. This guide covers the steps for how to go live with TalkJS chat in your website or app.
Prerequisites
- A TalkJS account. Sign up for free.
- A TalkJS plan. Find the plan that’s right for you.
Switch to live mode
Begin by switching to live mode. In your TalkJS dashboard, go to the Settings page. You can switch to live mode using the toggle in the top right corner of the page.

Replace the app ID and secret key in your code
Your test mode and live mode each come with a different app ID and secret key. Once you’re in live mode, you can find the app ID and secret key for your live environment on the Settings page of your dashboard, in the General section.
To go live, make sure that in your code, all instances of appID match the app ID for your live mode. If you already had the app ID for your test mode in your code, that means you have to replace all instances of the test mode app ID with your live mode app ID.
For example, in the following code snippet, replace <APP_ID> with your live mode app ID:
const session = new Talk.Session({
    appId: '<APP_ID>', // replace with your own live mode app ID
    me: me,
});
For more information on this getting started code, check out one of the Getting Started guides.
If you use the REST API, make sure that you now use the secret key that belongs to your live mode.
Note: If your application or website has multiple environments, such as a test environment and a production environment, consider storing these TalkJS credentials as environment variables in your code. This way, you can try out any styling or functional changes in your test environment, before going live to production.
Publish your theme and chat UI settings to live mode
Next, publish both your selected theme and the chat UI settings to live mode.
Theme
To ensure that your chat looks exactly how you want it to look, publish your theme to your live app environment. To publish your theme to live, go to the Themes page on your dashboard.
From the overview of themes in the section UI themes, select the theme that you’d like to use in your live app, and select the Publish to live button.

If you’re using multiple themes, repeat the process of publishing to live for each theme.
Chat UI
To use the relevant chat UI settings in your live app, publish the chat UI settings for each role that you want to use in your live app to the live environment. To publish the chat UI settings for a role, go to the Chat UI page of your dashboard, and select the Publish to live button.
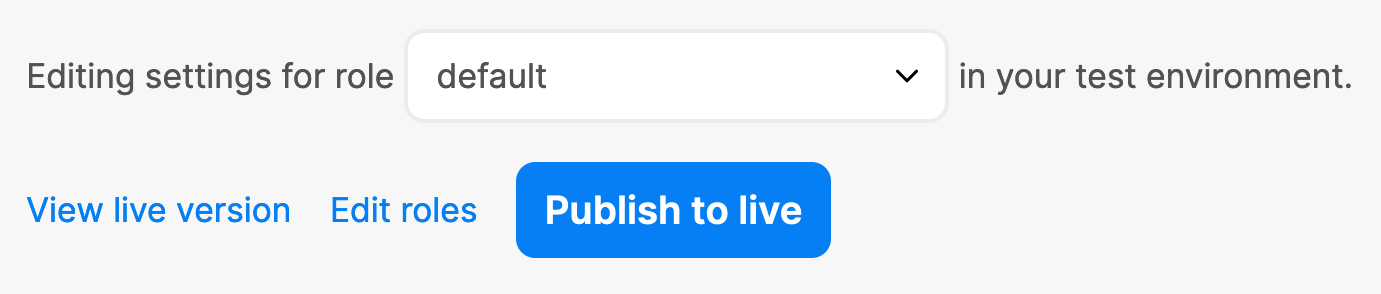
For example, to publish the chat UI settings for the default role, make sure that default is selected in the section ‘Editing settings for role <ROLE> in your test environment.’, and publish this to live.
Note: Chat UI settings always apply to a specific user role. If you don’t specify anything else, your users get the default role. You can leave the role at default and never think about it again. However, if you want different chat UI settings to apply to different user types – for example buyer and seller, or student and teacher – then you could create different roles, and assign different UI settings to each role.
If you are using multiple roles, make sure to publish the chat UI settings for each of those roles to live.
That’s it! You can now start using TalkJS chat live in production on your website or app.
Do you have any questions about going live? We’re happy to help. Get in touch.


