

This guide uses the classic JavaScript SDK. If you're starting a new project, consider using TalkJS Chat UI components, which are more customizable.
When you're dealing with a cluttered inbox, it can be useful to have a way to archive old messages. This tutorial walks you through how to add an "Archive this conversation" menu option to your TalkJS inbox with Conversation Actions, webhooks and the REST API.
To follow along, you’ll need:
- A TalkJS account. TalkJS provides a ready-to-use chat client for your application. Your account gives you access to TalkJS's free development environment.
- An existing TalkJS project using the classic JavaScript SDK. See the accompanying Getting Started guide for an example of how to set this up.
- An installation of Node.js along with the npm package manager. We’ll use this to create our backend server.
We’ll build up the feature step by step in the following sections. If you would rather see the complete example code, see the GitHub repo for this tutorial.
Add archive and unarchive options to the menu
First, we need add a way to trigger the archive actions in the frontend. You can configure which actions a user is able to take based on their user role. In this example we'll add a custom conversation action to the "default" role.
In the Roles tab of the TalkJS dashboard, select the "default" role option. In the Custom conversation actions section, add a new custom conversation action with a Name of "archive" and a Label of "Archive conversation". The name will be used in our code, while the label is what appears in the UI:
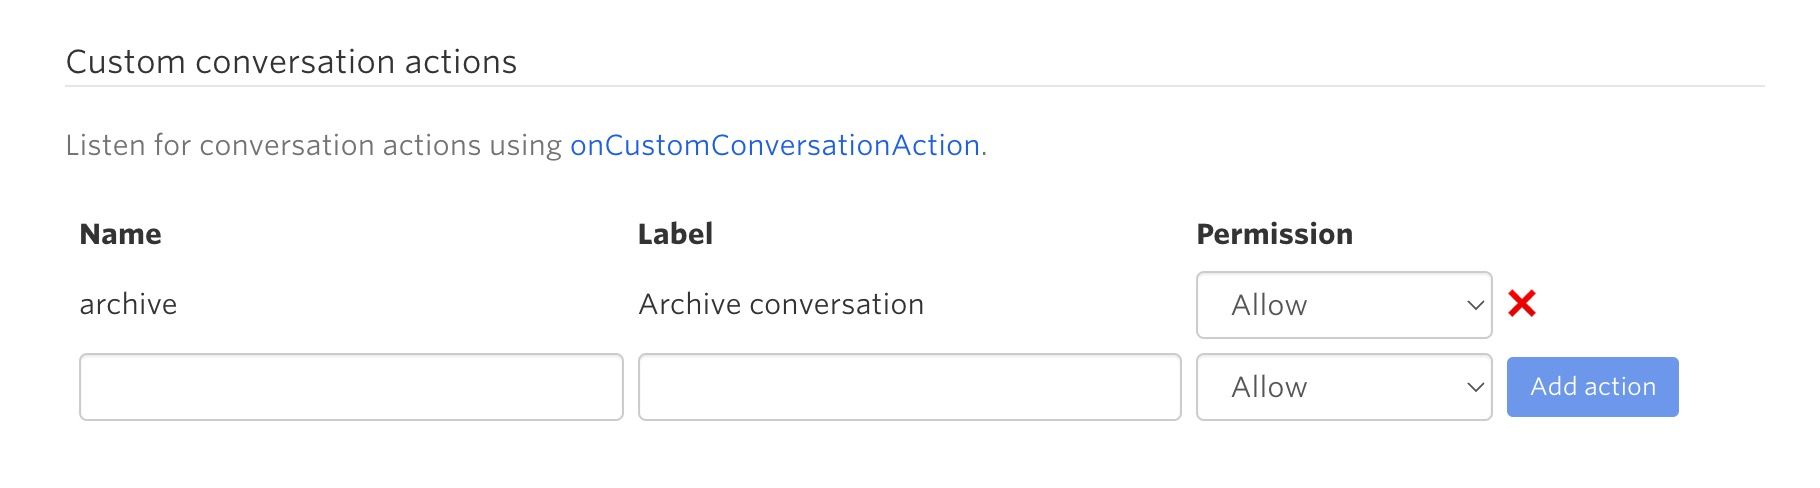
Now add a second custom conversation action with a Name of "unarchive" and a Label of "Unarchive conversation".
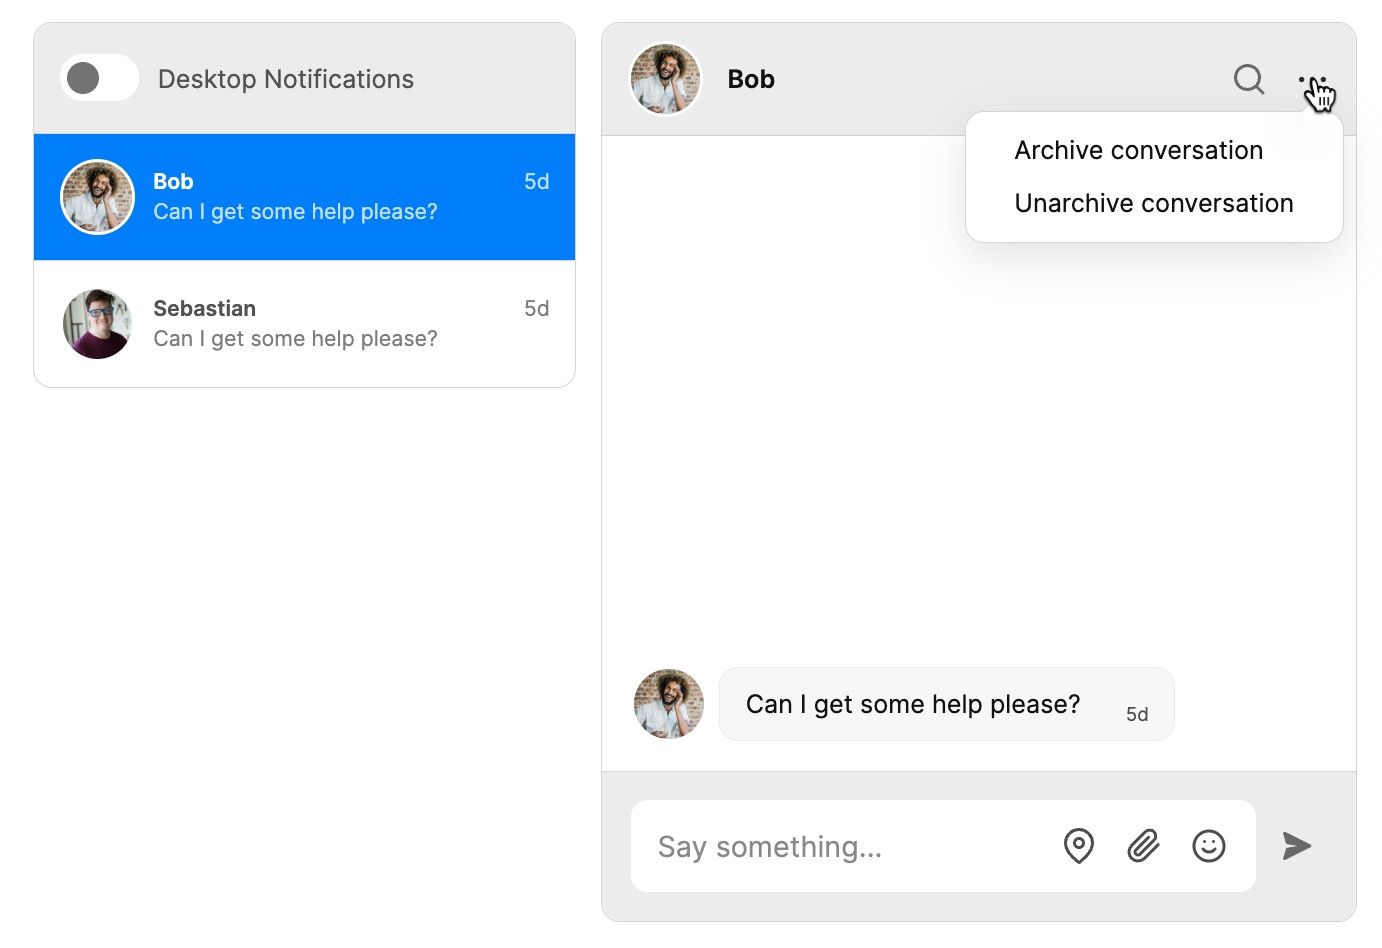
If you're using a preset theme, you should now see new Archive conversation and Unarchive conversation options in the menu at the top of your conversation:
If you're using a legacy theme, or customized a theme before the custom conversation actions feature was released, you'll need to add this menu to your theme before it will show up. See our docs for details on how to edit the theme.
Mark the conversation as archived
You can now listen for your new conversation actions using the onCustomConversationAction method in TalkJS's JavaScript SDK.
As a test, add the following to your TalkJS code:
inbox.onCustomConversationAction("archive", (event) => {
  console.log("Archived conversation with id:", event.conversation.id);
});
You should now see the conversation ID logged to your browser console when you click the Mute conversation menu option.
Next, update your call to onCustomConversationAction to call the setAttributes method on the conversation. We'll use this to add a custom archived field and set it to true:
inbox.onCustomConversationAction("archive", async (event) => {
  let conv = talkSession.getOrCreateConversation(event.conversation.id);
  conv.setAttributes({ custom: { archived: "true" } });
  inbox.select(conv);

  console.log("Archived conversation with id:", event.conversation.id);
});
TalkJS only updates the conversation's details when it gets passed to the inbox, so this code recreates the current conversation, adds the custom field and then calls the [select] method on the inbox to sync your changes. Note that if you have browser synchronization disabled, you will instead need to send the conversation ID to your backend server and call the REST API from there to set a custom field on the property.
Similarly, listen for unarchive events and set archived to false:
inbox.onCustomConversationAction("unarchive", async (event) => {
  let conv = talkSession.getOrCreateConversation(event.conversation.id);
  conv.setAttributes({ custom: { archived: "false" } });
  inbox.select(conv);

  console.log("Unarchived conversation with id:", event.conversation.id);
});
Filter the inbox
Next, we want to filter conversations so that only unarchived ones appear in the inbox. To do this, use the setFeedFilter method on the inbox.
Add the following line before mounting your inbox, to only show conversations where custom.answered is not true. This means that any pre-existing conversations that are missing the archived property will still appear:
inbox.setFeedFilter({ custom: { answered: ["!=", "true"] } });
Now, test your archive feature by selecting Archive a conversation from the menu. The conversation should be removed from your inbox.
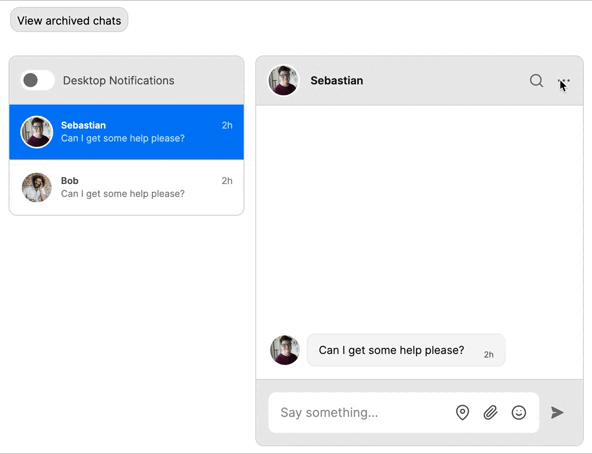
Add an archived conversations view
We also need a way of viewing the archived conversations. To do this, we'll add a button that toggles the state of the inbox between archived and unarchived conversations.
First, update your chat UI to include a View archived chats button. The details of the layout will depend on your site, but for this example we'll wrap the "talkjs-container" div in a "chat-container" div that also contains a button, and apply some basic styling:
  <body>
    <div id="chat-container">
      <div id="button-row">
        <button type="button" id="archive-button">View archived chats</button>
      </div>
      <!-- container element in which TalkJS will display a chat UI -->
      <div id="talkjs-container" style="margin: 30px; height: 500px">
        <i>Loading chat...</i>
      </div>
    </div>
  </body>
</html>
Next we'll listen for button click events. Replace your previous setFeedFilter call with the following code:
const button = document.getElementById("archive-button");
let isArchived = false;

button.addEventListener("click", (event) => {
  if (isArchived) {
    inbox.setFeedFilter({ custom: { archived: ["!=", "true"] } });
    button.innerHTML = "View archived chats";
    isArchived = false;
  } else {
    inbox.setFeedFilter({ custom: { archived: ["==", "true"] } });
    button.innerHTML = "Back to inbox";
    isArchived = true;
  }
});
When you click the View archived chats button, it filters the inbox to show chats with the archived field set to true. Clicking it again toggles you back to the normal inbox view, which shows all other messages.
Finally, we'll style the button to match the rest of the TalkJS default theme UI by adding the following to the <head> section:
<link
  rel="stylesheet"
  href="https://fonts.googleapis.com/css2?family=Inter:wght@400;600;700"
/>

<style>
  button {
    font-family: "Inter", sans-serif;
    font-size: 14px;
    background-color: #ececec;
    border: 1px solid #d4d4d4;
    border-radius: 0.75rem;
    padding: 0.5rem;
  }

  button:hover {
    background-color: #d0d8dc;
  }

  #button-row {
    width: 100%;
    max-width: 750px;
    margin: auto;
    height: 2em;
    display: flex;
  }
</style>
For more on themes, see our documentation on the Themes.
Conclusion
You now have a working demonstration of how to archive a conversation! To recap, in this tutorial you have:
- Added new "Archive conversation" and "Unarchive conversation" custom conversation actions.
- Used TalkJS's JavaScript SDK to add a custom
archivedfield to the conversation. - Added a button to filter the inbox to show archived or unarchived conversations.
For the full example code for this tutorial, see our GitHub repo.
If you want to learn more about TalkJS, here are some good places to start:
- The TalkJS Docs help you get started with TalkJS.
- TalkJS tutorials provide how-to guides for many common TalkJS use cases.
- The talkjs-examples Github repo has larger complete examples that demonstrate how to integrate with other libraries and frameworks.


