This guide uses the classic JavaScript SDK. If you're starting a new project, consider using TalkJS Chat UI components, which are more customizable.
In this article, we’ll look at how we can use the classic JavaScript SDK and TalkJS Themes to mimic the appearance and functionality of Discord. Themes allow you to change the look and feel of user interfaces to match your site or app's particular style. Let’s set up our project.
Setting up our project
There are a few steps we need to complete before we can start playing using themes. We need to do the following:
- Create a simple conversation
- Create a role
- Create a theme for that role and activating that theme.
Creating a simple conversation
First of all, we’ll set up a simple conversation. Follow this Getting Started guide. You may also want to change the photoUrl of each user to an actual image address. You can use free images to act as the profile pictures of your users.
For this tutorial, we will use a chatbox (a single conversation) instead of an inbox that allows you to swap between conversations. Make sure you change this code from the Getting Started guide from:
const inbox = session.createInbox({selected: conversation});
inbox.mount(document.getElementById("talkjs-container"));
To the new code for a chatbox:
var chatbox = session.createChatbox(conversation);
chatbox.mount(document.getElementById("talkjs-container"));
You will also need to change the role of both users from “default” to “discord”. Your end result will look like this:
const me = new Talk.User({
    id: "123456",
    name: "Alice",
    email: "alice@example.com",
    photoUrl: "https://demo.talkjs.com/img/alice.jpg",
    welcomeMessage: "Hey there! How are you? :-)",
    role: "discord"
});
Add some more users so we can have a realistic conversation. You will want to update the photoUrl of each user to an actual image address. You can use free images to act as the profile pictures of your users.
Another feature we should add is a group chat. Follow this documentation to set up your group chat.
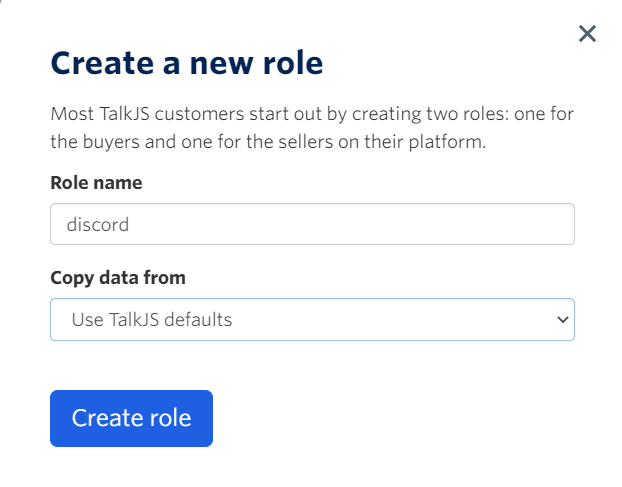
Creating our role
Now we need to create this role in our dashboard. In the header of the dashboard click Roles and add a role called “discord”:
Activating a theme
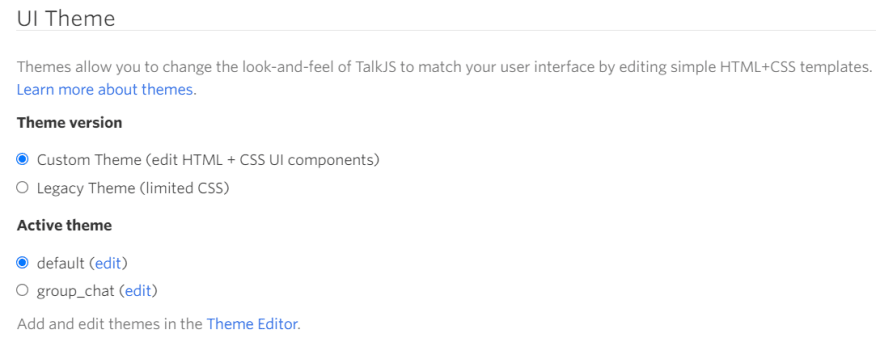
Which theme is used when displaying the TalkJS UI depends on the current user's role. When a user has no role set, the TalkJS default theme will be used.
To configure a theme for a role, go to the dashboard, and click Roles. Then, create or select a role, and scroll down to the "UI Theme" section:
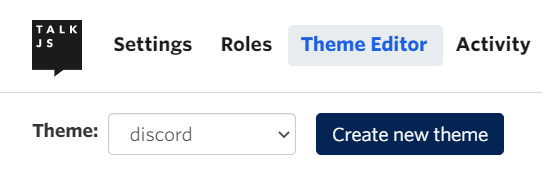
Next, navigate to the Theme Editor and click the Create new theme button:
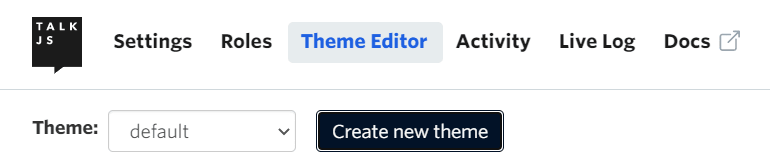
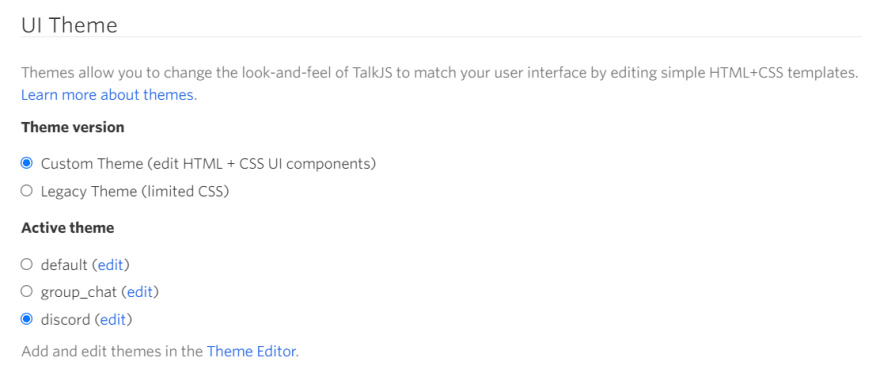
Create a theme named “discord”. To make this theme active, go to the dashboard, and click Roles. Then, create or select a role, and scroll down to the "UI Theme" section, and select your new theme.
Run your program to ensure it works. After all of this work you should have a chat resembling the screenshot below:
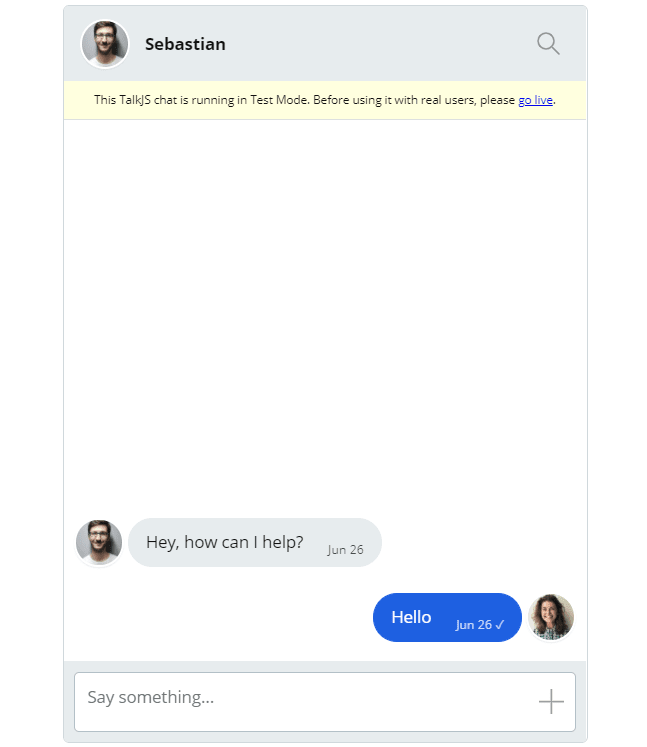
We are now ready to start customizing our theme!
Make a chat like Discord using TalkJS themes
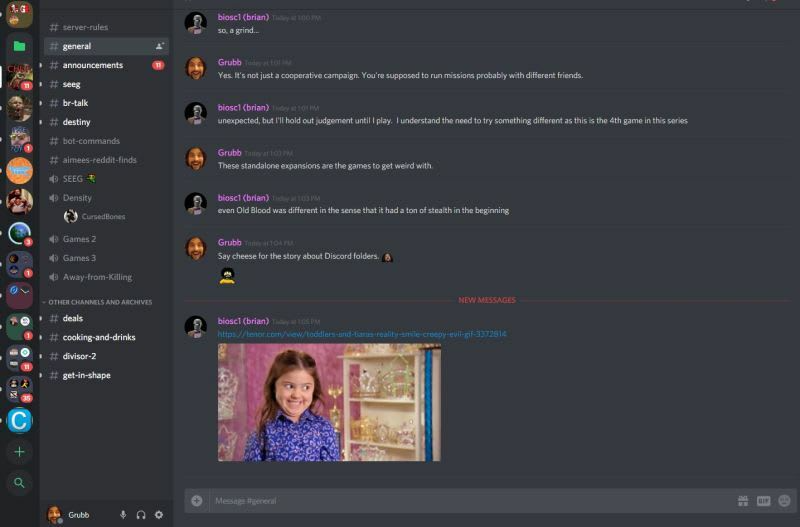
For those unfamiliar with Discord, it is a popular chatting application like Skype or Telegram. A chat in Discord looks like the following screenshot:
We will be using themes to make our existing TalkJS chat look like this. Let’s get started!
First, go to the Theme Editor and make sure you have our new “discord” theme selected.
Changing the fonts
We will make our first set of changes in the layout section.
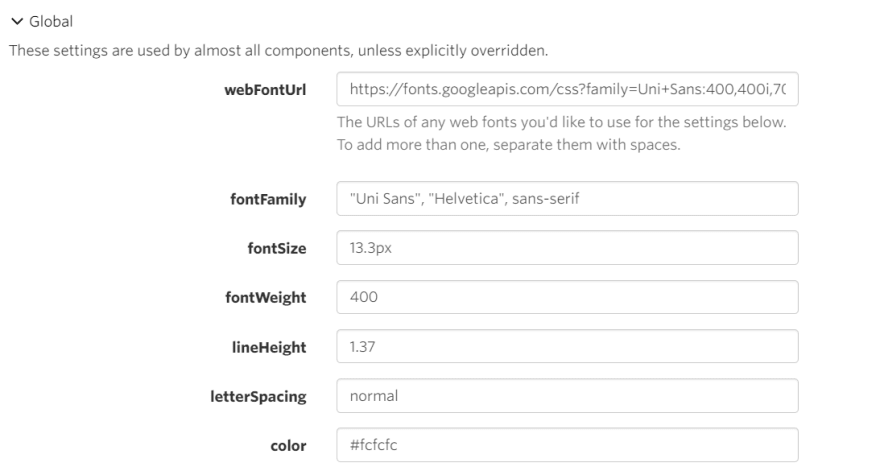
Click on Global under Layout Settings and make the following changes:
- Change the value of webFontUrl from
https://fonts.googleapis.com/css?family=Open+Sans:400,400i,700,700i&subset=cyrillic,cyrillic-ext,greek,greek-ext,latin-ext,vietnamesetohttps://fonts.googleapis.com/css?family=Uni+Sans:400,400i,700,700i&subset=cyrillic,cyrillic-ext,greek,greek-ext,latin-ext,vietnamese - Change the value of fontFamily from
"Open Sans", "Helvetica", sans-serifto"Uni Sans", "Helvetica", sans-serif. - Change the color from
#111(black) to#fcfcfc(a grey-ish white).
We’ve updated the font to the exact font used by discord. You should now have the following values for the Global section:
Let’s see what our app looks like now:
We made it look worse! Don’t worry we’ll fix this with the next set of changes. Discord is known for its dark theme, and use of purple and grey colors. Let’s update our theme to feature these darker colors.
Changing Panel colors
In the Panels section of Layout Settings, update the value of backgroundColor to #3d4454.
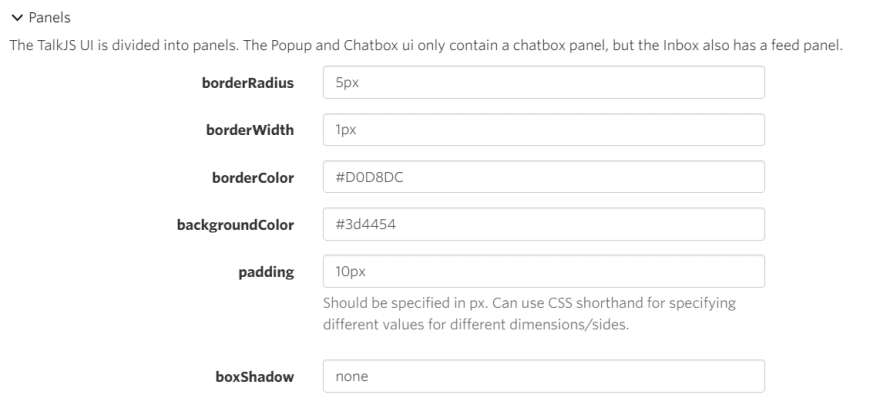
In Discord, the panel header is the same color as the panel itself, separated by a black border.

We will replicate this. In the Panel headers section of Layout Settings, make the following changes:
- Change the value of backgroundColor from
#e7eceeto#3d4454. - Change the value of borderBottomColor from
transparenttoblack.
We’ll make similar changes to the Panel footer. In the Panel footers section of Layout Settings, change the value of backgroundColor from #e7ecee to #3d4454.
Let’s see the effect of these changes by launching our application again:
Wow, that looks much better! However, there are still some things we need to address.
- The message bubbles are not needed at all, Discord does not have these.
- The input box (showing the prompt Say something) should be a light grey, not white.
Let’s start making these improvements!
Removing the chat bubbles in TalkJS
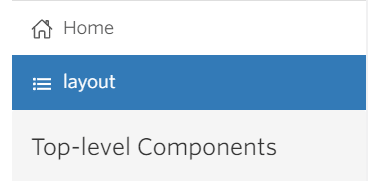
The properties of the messages are handled by the UserMessage component. Under the Top-level Components section, click on UserMessage. This will open the CSS for this component. Navigate to the .message class and make the following changes:
- Delete
border-style: solid; - Delete
border-color: #E7ECEE; - Delete
background-color: #E7ECEE; - Change color from
color: #111;tocolor: #fff;
After making these changes your final code should look like the following snippet:
.message {
    white-space: normal;
    overflow: hidden;
    border-radius: 1.5rem;
    border-width: 1px;
    word-wrap: break-word;
    position: relative;
    display: inline-block;
    max-width: calc(100% - 6rem - 0.25rem - 0.25rem);
    color: #fff;
}
Let’s see the effect this has on our chat:
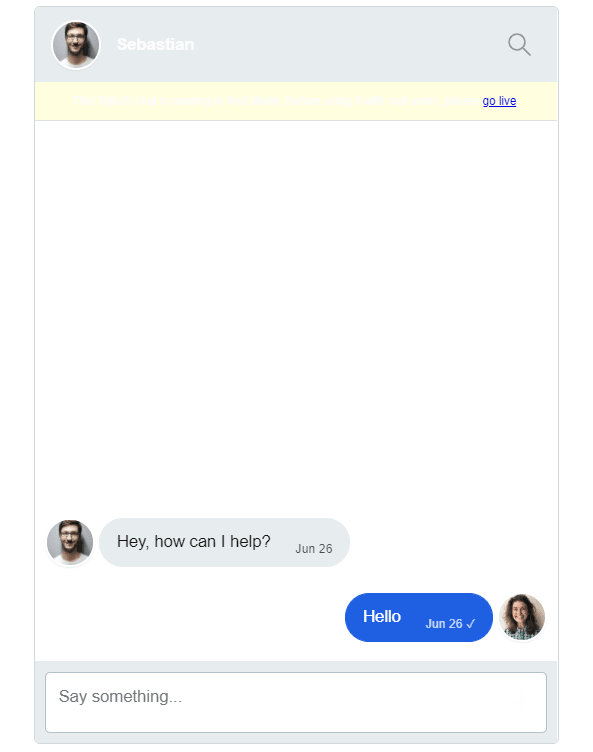
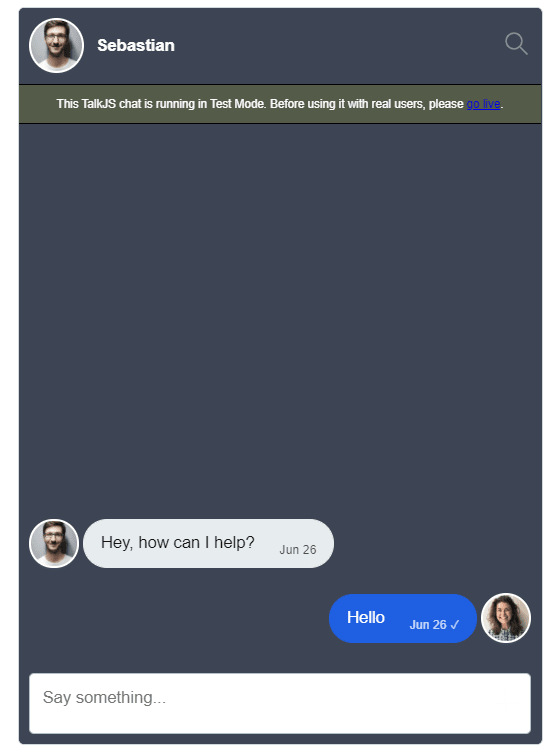
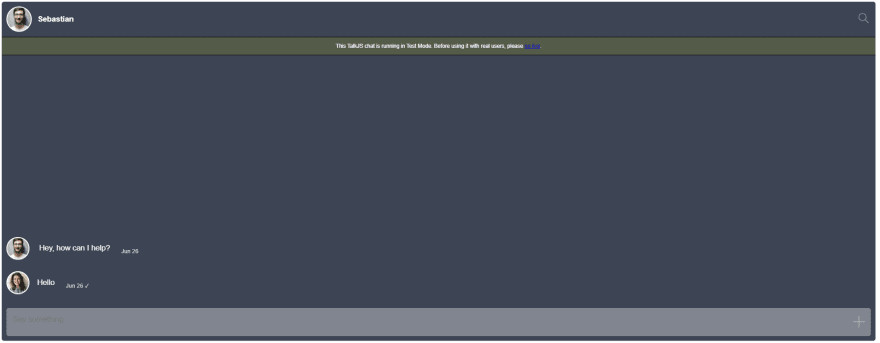
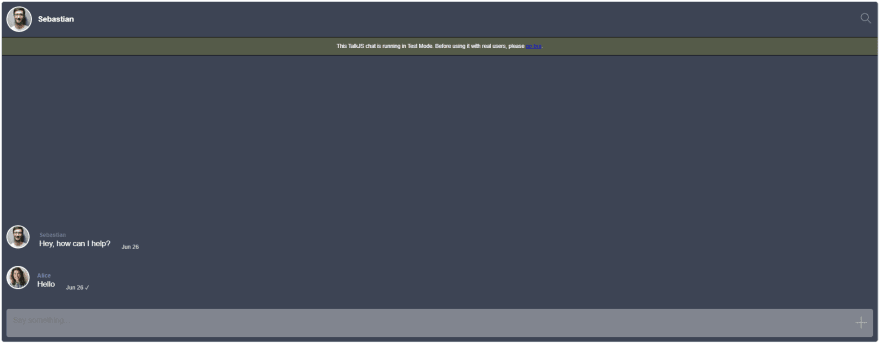
Fantastic! This is what we wanted. However, you can see the bubble still appears for the messages that we send. The message also appears on the other side of the chat. Discord displays all messages on the left side of the chat, so we need to change this. Let’s make these changes:
- To make all messages appear on the left side of the chat, open the
UserMessagecomponent and find the class.message-row.by-me. Remove the lineflex-direction: row-reverse; - In the
UserMessagecomponent, find the class.by-me .message. Deleteborder-colorandbackground-color.
Open our application again.

That’s more like it!
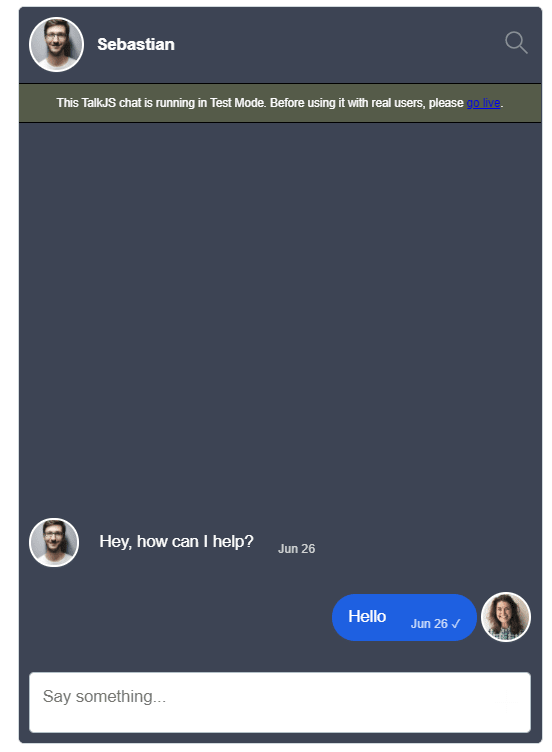
Changing the text input box in TalkJS
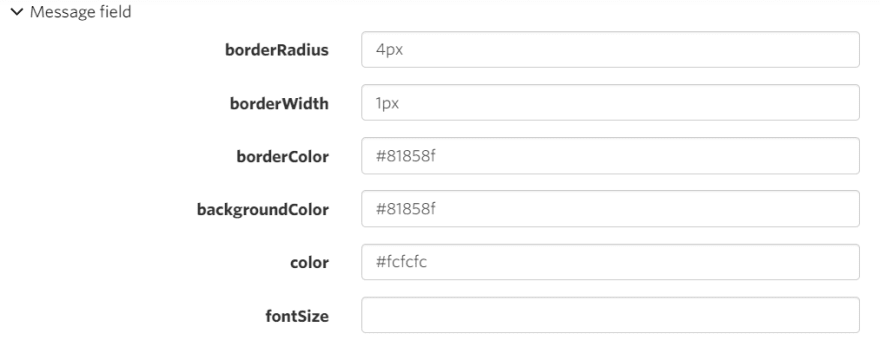
The next change concerns the input box (showing the prompt Say something) should be grey, not white. To change this, select layout in the left pane and click on the Message field dropdown. Change the backgroundColor and borderColor to #81858f. Change the color to #fcfcfc.
Let’s launch the application again, and see our new input box:
Great, this is what we wanted! So far our chatbox has been small, taking up only a portion of the screen. What if we wanted to make it bigger, and have it act as a full-screen application?
Making the TalkJS chatbox bigger
The first thing that influences the size of the chat inbox is the div you instantiated to act as the container for the inbox. For example, when following the guide we used the following div:
<!-- container element in which TalkJS will display a chat UI -->
    <div id="talkjs-container" style="width: 90%; margin: 30px; height: 500px">
        <i>Loading chat...</i>
    </div>
You can see we’ve set the width and height here. Change this code to:
<div id="talkjs-container" style="width: 100%; height: 100%">
        <i>Loading chat...</i>
</div>
Our height and width will no longer be restricted.
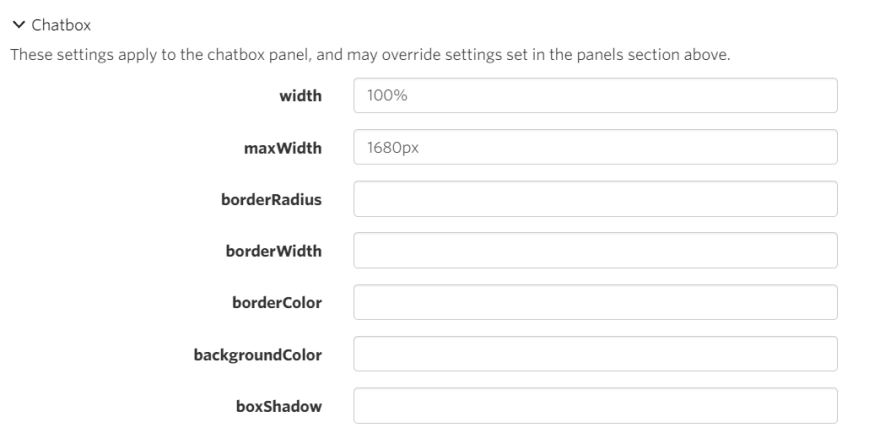
Go back to our Theme Editor. Click on ‘layout’ in the left pane. Click on the chatbox dropdown.
Customize these heights as you see fit. For this example, I changed the maxWidth of the chatbox from 420px to 1680px.
Relaunch the application to view the effect of this change:
Fantastic, it’s even closer to Discord! You can continue to remove margins and make panels even wider if you want the application to take up more of the screen.
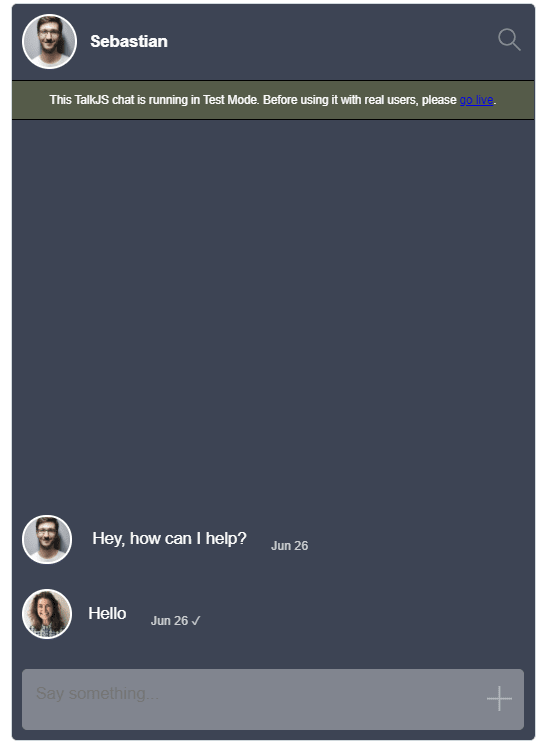
Another feature of Discord is how it always displays the usernames in the conversation. The default for TalkJS is to only show the user names of other people in group chats. Let’s update this user name setting.
How to always show user names in a TalkJS chat
To have the usernames constantly showing in a TalkJS chat, click on the UserMessage component under the Top-level Components heading in the left pane.
Find the code:
<div t:if="{{ sender.isMe == false and conversation.others.length > 1 }}"
                 class="message-author"
                 style="color: {{ sender.id | random_color }}">
                {{ sender.name }}
            </div>
You can see the conditions being checked, the default being to only show the usernames of other people in group chats. Change this by updating the code to:
<div t:if="{{ conversation.others.length > 0 }}"
                 class="message-author"
                 style="color: {{ sender.id | random_color }}">
                {{ sender.name }}
            </div>
The new condition will show a username as long as there is a single user in a conversation. It doesn’t matter if it is a group chat or not.
Let’s see the effect of this code change on our application:
Our usernames are always on display, in both 1-on-1 conversations and group chats. This is exactly what we wanted!
Adding a channel list
Channel lists are common to applications like Slack and Discord. Let’s introduce a channel list to our application. For your own applications, it is likely that you will retrieve the list of relevant channels for a user from a database or as an API response, but for the sake of this tutorial, we’ll be using a hardcoded list of channels.
We’ll be populating our channel list using an array. But first, we need a div to contain our channel list. Change your existing HTML code to the following:
<div style="display: flex; width:100%; height:100%">
        <div id = "channel-list">
            <h2>Channels</h2>
        </div>


        <div id="talkjs-container" style="width: 100%; height: 100%">
            <i>Loading chat...</i>
        </div>
    </div>
Great! Now we can populate this container with our list.
Create a new asynchronous function called makeList. The next thing we’ll do is create our array of channels like so:
const makeList = async function () {
    await Talk.ready;

    // Establish the array which acts as a data source for the list
    const channelData= [
    {name: "#general", id: 123},
    {name: "#gamer-squad", id: 456}
    ]
}
As you can see, each element has a name (the name of the channel) and an id(A unique identifier for each channel). The id of each channel will plays an important role. It must match your conversion id’s exactly. For example, When adding my earlier conversation I used the followings id values:
            const conversation2 = session.getOrCreateConversation("123");
            conversation2.setParticipant(me);
            conversation2.setParticipant(other1);
            console.log('conversation ID: ' + conversation.id);

            const groupchat = session.getOrCreateConversation("456");
            groupchat.setParticipant(me);
            groupchat.setParticipant(other);
            groupchat.setParticipant(other2);
            groupchat.setAttributes(
                {
                    photoUrl: "https://upload.wikimedia.org/wikipedia/commons/e/e0/Rocket_League_coverart.jpg",
                    subject: "Rocket League Squad"
                });
Note how the values of 123 and 456 match the values I provide to channelData:
const channelData= [
    {name: "#general", id: 123},
    {name: "#gamer-squad", id: 456}
]
Our data is now in place. Just below your channelData array, add the following code:
    // Get the container element for the list
    const listContainer = document.getElementById('channel-list');

    // Make the list
    const listElement = document.createElement('ul');

    // Add the list to the container
    listContainer.appendChild(listElement);

    // Set up a loop that goes through the items in channelData one at a time
    for (let channel of channelData) {
         // create a list item for each channel
         const listItem = document.createElement('li');

         // Add the channel text and id to the list item
         listItem.innerHTML = channel.name;
         listItem.id = channel.id;

         // Add the list item to listElement
         listElement.appendChild(listItem);
    }
Add a call to the makeList method outside of the function itself.
// Usage
makeList();
If you run your program you should now see an HTML like so:
Our list is populating correctly! However, it looks very basic at the moment. Let’s add some style to our list. Add the following code to a linked CSS file, or directly to <style></style> tags.
        #channel-list{
            width: 300px;
            font-family: arial;
      margin-right: 1rem;
        }

        #channel-list h2{
            position: relative;
            color: #fff;
            background: #1C2833;
            padding: 10px 20px;
            font-size:20px;
            font-weight: 700;
            border-top-left-radius: 10px;
            border-top-right-radius: 10px;
            margin: 0;
        }

        #channel-list ul{
            background:#212F3D;
            margin-top: 0;
            margin-bottom: 0;
        }

        #channel-list ul li{
            left:0;
            list-style: none;
            background: #212F3D;
            color: #999;
            transition: 0.5s;
            cursor: pointer;
            padding: 5px;
        }

        #channel-list li:hover {
            color: #fff;
        }
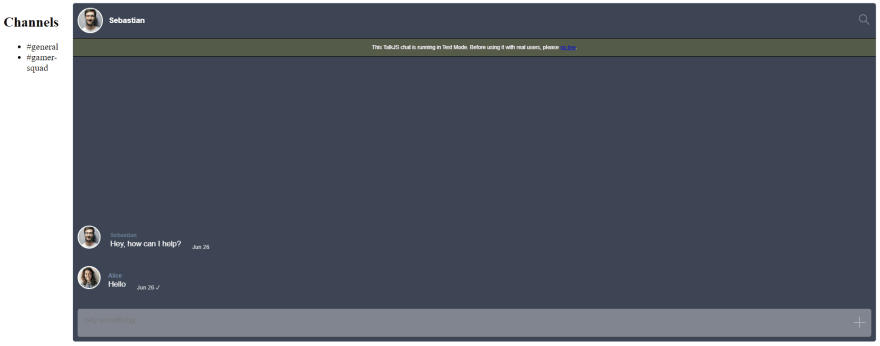
Change the color scheme as needed to fit the theme of your application. Run your application again to see the results:
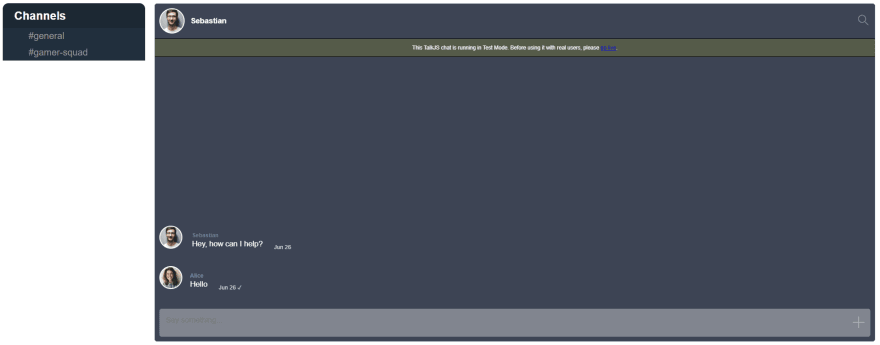
That looks much better! It looks like the type of channel list we would see in an application like Slack or Discord.
We have to make our list clickable, and enable it to swap between TalkJS conversations.
Go back to our makeList function. Modify the existing code from the snippet below:
listItem.innerHTML = channel.name;
listItem.id = channel.id;
To the new code that includes addEventListener:
listItem.innerHTML = channel.name;
listItem.id = channel.id;
listItem.addEventListener('click', clickList, false);
This adds an event listener to each item in our list, where it will call a function called clickList.
Let’s create this function:
function clickList() {
   inbox.select(this.id.toString());
}
Now run your application again, and use your channel list to select the active conversation.
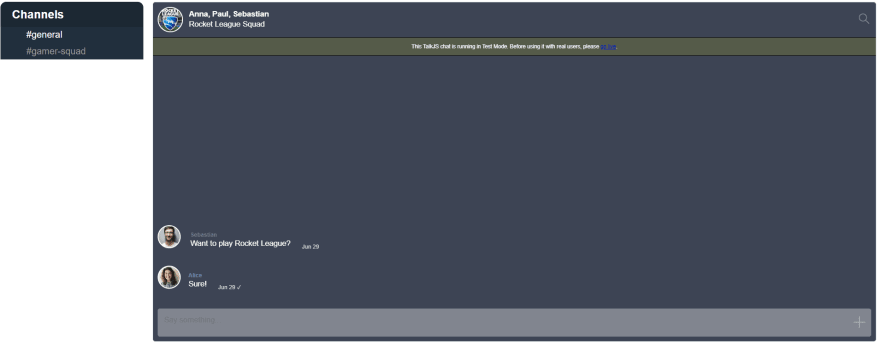
There we have it, our final result! We will make no further changes in this post. We have gotten very close to the appearance and functionality of Discord by making some very simple changes to our existing theme. You can see the flexibility of themes and how they can be quickly configured to fit your needs.


