

This guide uses the classic JavaScript SDK. If you're starting a new project, consider using TalkJS Chat UI components, which are more customizable.
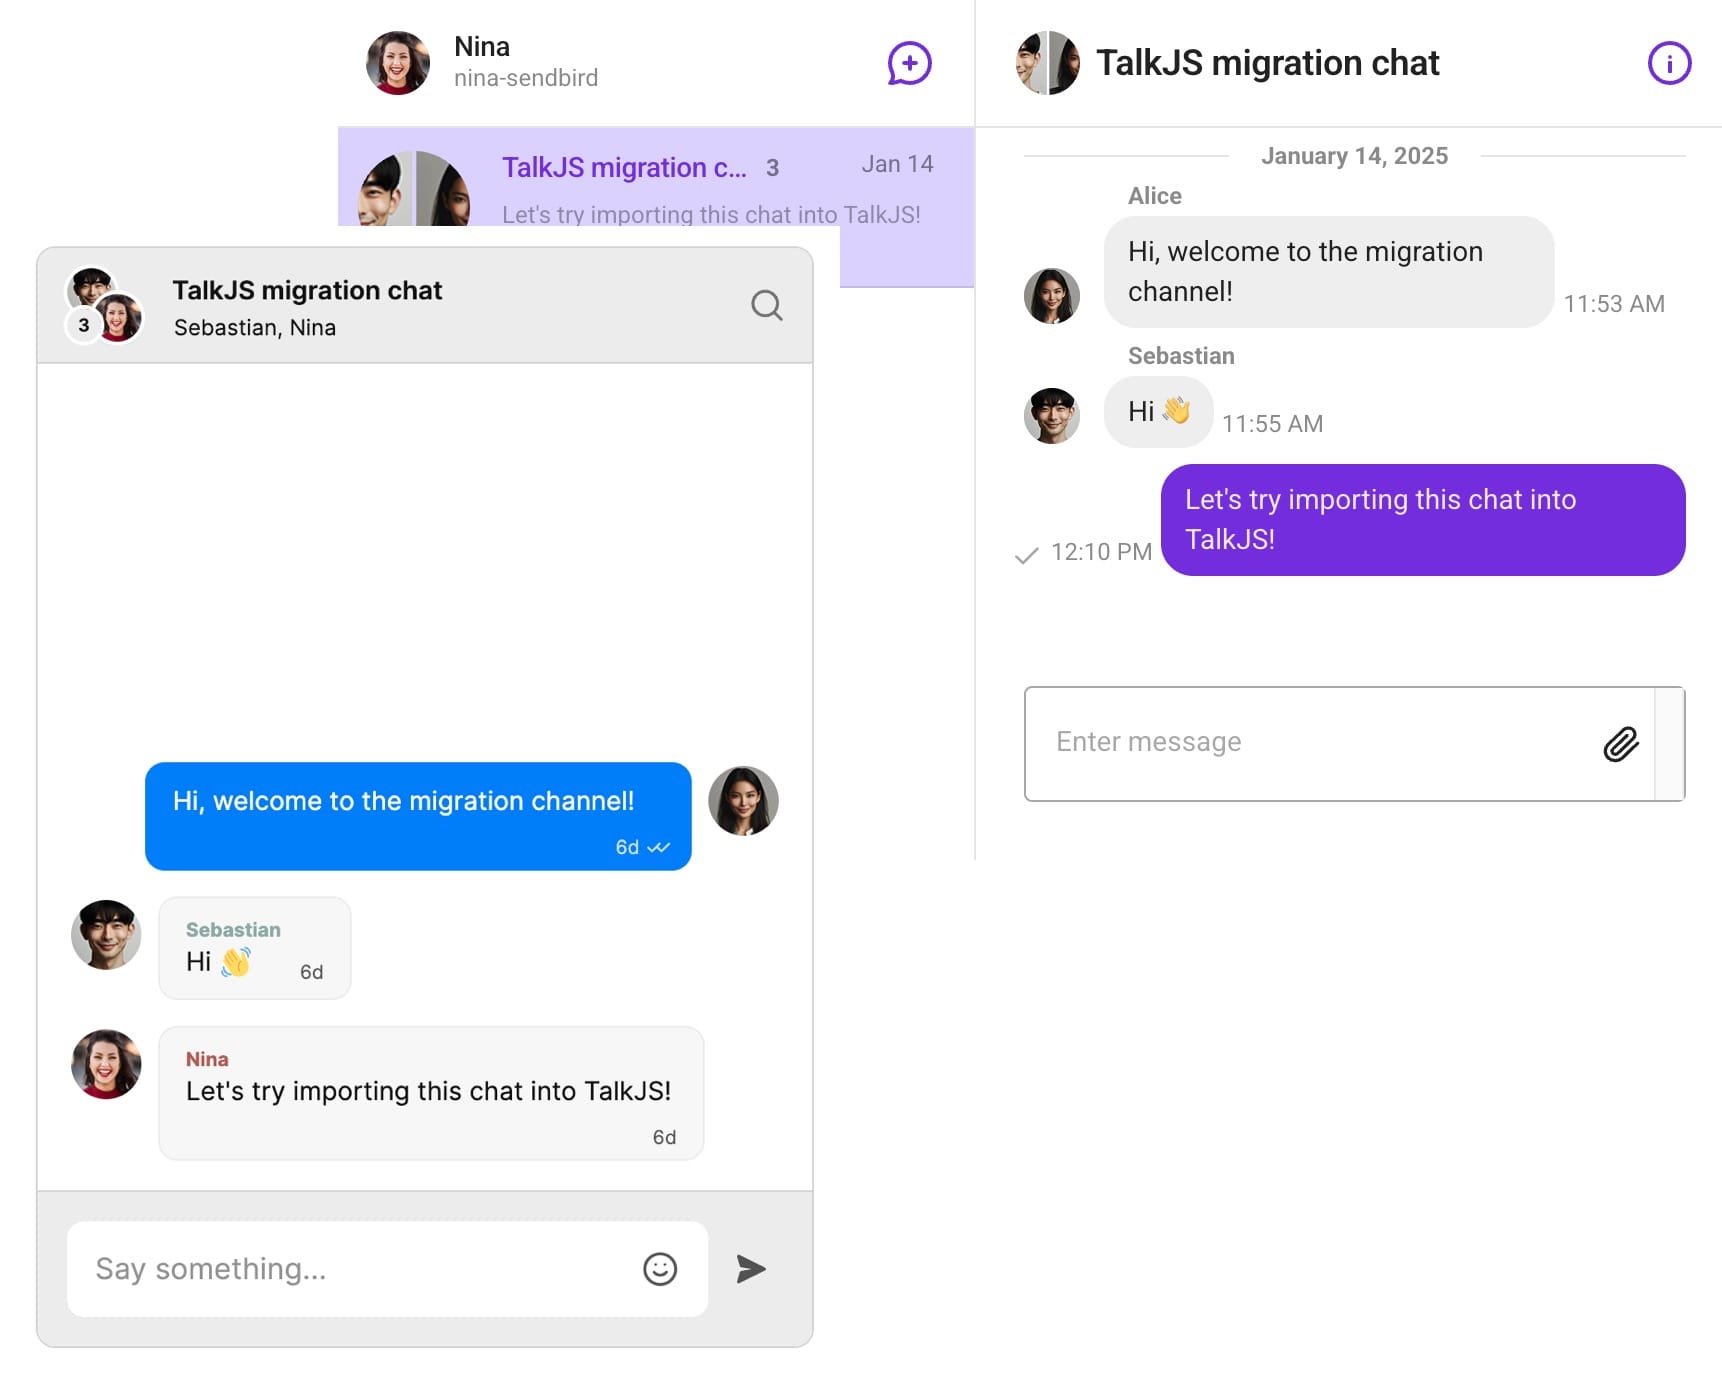
Looking to switch platforms and onboard with TalkJS? In this tutorial, we're going to show you how to export your data from Sendbird, import it into TalkJS with our import scripts, and try out viewing your imported data:
You can find the full source code for this project in our GitHub examples repo.
If you have any questions about this tutorial, or need help with your migration, get in touch with us in our support chat.
Contents
- Prerequisites
- Limitations
- Step 1: Export data from Sendbird
- Step 2: Import data to TalkJS
- Step 3: View your imported data
Prerequisites
To follow along with this tutorial, you’ll need:
- A TalkJS account. TalkJS provides a ready-to-use chat client for your application. Your account gives you access to TalkJS's free development environment.
- A Sendbird account that you want to export data from.
- An installation of Node.js along with the npm package manager. You’ll use this to import data to TalkJS.
Limitations
The message import script that we will use in this tutorial currently has the following limitations:
- You can only import messages with a Sendbird message type of
MESG. In TalkJS terms, these are user messages that are sent by a specific participant in the chat and that contain standard text rather than files. You currently can't uploadFILEorADMNtype messages. - You can only import messages from Sendbird group channels, not open channels. Users are added to conversations (the TalkJS equivalent of channels) as full participants rather than guests.
Step 1: Export data from Sendbird
As an example, we'll use a Sendbird group channel that we want to export:
Sendbird has three main types of entity that you must import to TalkJS: users, channels and messages. Users and messages are similar to the TalkJS concepts, while Sendbird's channels are similar to TalkJS conversations:
| Sendbird | TalkJS |
|---|---|
| Users | Users |
| Channels | Conversations |
| Messages | Messages |
There are two ways to export this data from Sendbird:
- With the Export option in the Sendbird dashboard
- With Sendbird's export APIs.
Both methods only allow you to download 7 days of data at a time. If you need longer periods of data, you will need to run them repeatedly.
The dashboard option is simpler to get started with, while the API option allows you to control the export programmatically and may be better if you are running a large number of exports. This tutorial will show you both methods – use the dashboard if you're unsure which to choose.
Method 1: Export data from the Sendbird dashboard
From your Sendbird dashboard, navigate to Chat > Data exports and click on Request:
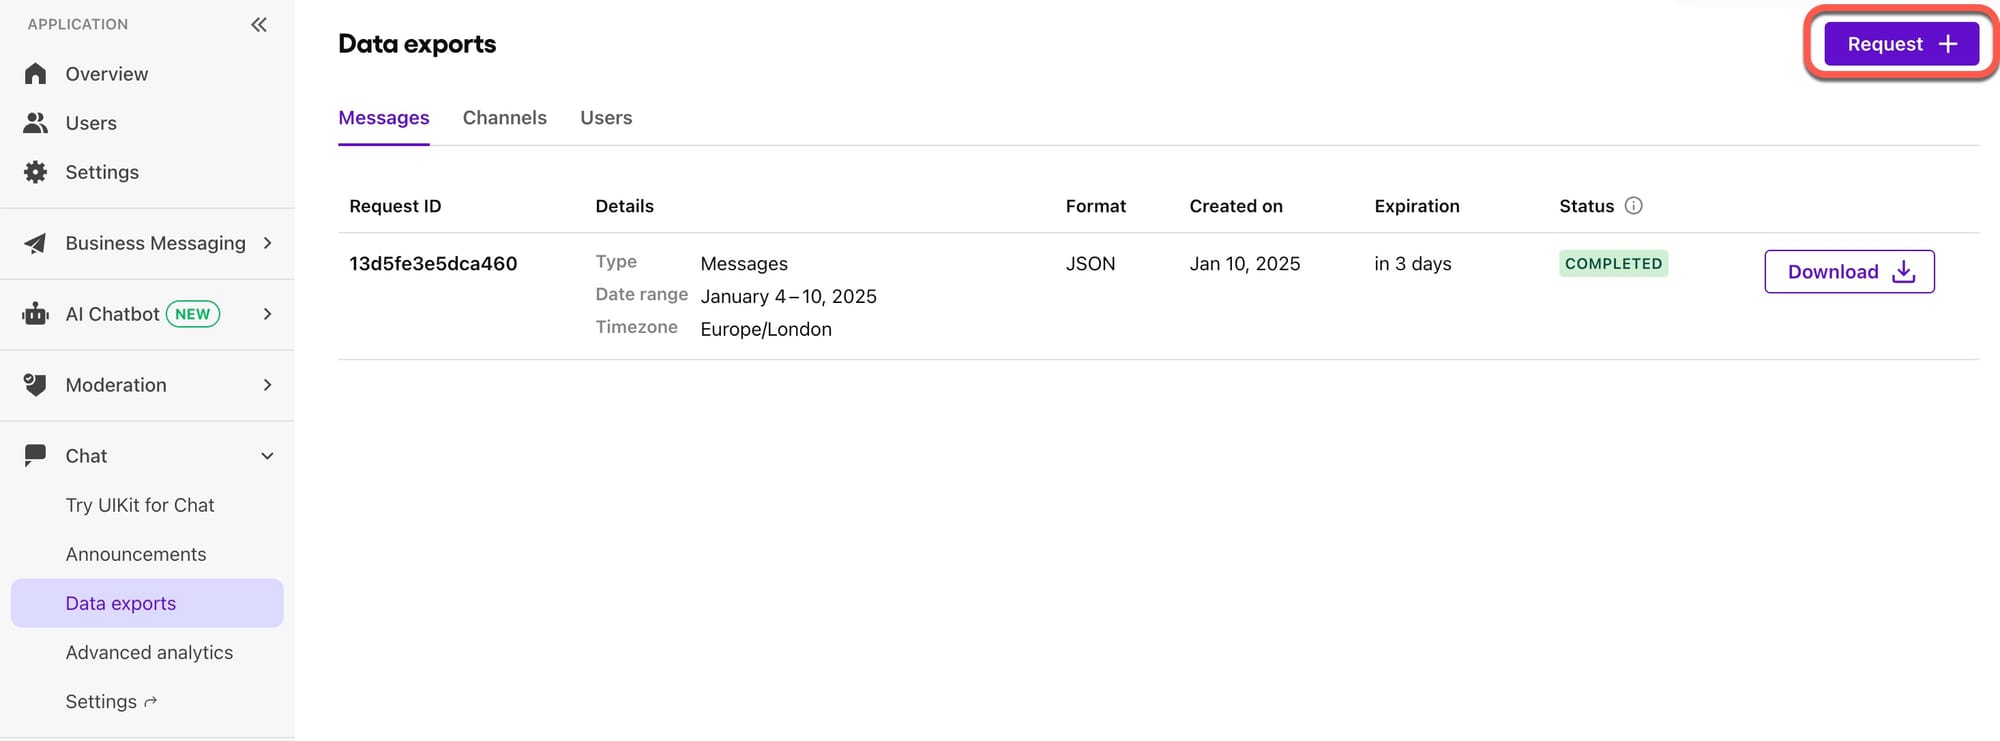
Select to export Messages in JSON format for the time frame you want (up to 7 days). You can choose to only export data for a given channel, or a given sender, or export all messages.
Wait until the scheduled job has a status of Completed, and then click on Download and save it to your local storage.
Repeat these steps for the Channels and Users tabs, again choosing to export in JSON format.
Method 2: Export data with the Sendbird API
You can also export data from Sendbird using the export data endpoint of their REST API.
Use the following curl command in your terminal to call the API:
curl --location 'https://api-<SENDBIRD_APP_ID>.sendbird.com/v3/export/<DATA_TYPE>' \
--header 'Api-Token: <SENDBIRD_API_TOKEN>' \
--header 'Content-Type: application/json' \
--header 'Accept: application/json' \
--data '{
	"start_ts": "<START_TIME>",
	"end_ts": "<END_TIME>"
Alternatively, you could call the API with an API client such as Postman.
Replace the placeholders with the following:
<SENDBIRD_APP_ID>: your application ID, which you can find in the Overview tab of the Sendbird dashboard, under Application > Application ID.<SENDBIRD_API_TOKEN>: your API token, which you can find in the Settings tab of the Sendbird dashboard, under Application > General > API tokens.<DATA_TYPE>: this is eitherusers,channelsormessages, depending on which export you want.<START_TIME>and<END_TIME>: the start and end time in Unix milliseconds, up to 7 days apart. If you want more data, you will need to submit multiple requests.
The request must be an HTTP POST and the body requires just two parameters, the ‘start_ts’ and ‘end_ts’. Both of these are in UNIX milliseconds. Sendbird allows you to fetch messages within a 7-day timeframe only, even when using the API, so if you have more data, you must submit multiple requests.
You should get a response similar to this:
{
  "request_id": "<REQUEST_ID>",
  "status": "scheduled",
  "data_type": "users",
  "start_ts": "<START_TIME>",
  "end_ts": "<END_TIME>",
  "user_ids": [],
  "format": "json",
  "created_at": "<CREATED_TIME>",
  "timezone": "UTC"
}
Once the export is complete, you can retrieve the file with a request to the Get data export endpoint:
curl --location 'https://api-<SENDBIRD_APP_ID>.sendbird.com/v3/export/users/<REQUEST_ID>' \
--header 'Api-Token: <SENDBIRD_API_TOKEN>' \
--header 'Accept: application/json'
This request returns a URL in the response which you can use to download the data. The download has an expiry time of 7 days.
Step 2: Import data to TalkJS
Now you have your Sendbird data, you're ready to import it in to TalkJS. To do this, you'll use our migration script to import your data.
Note: Try importing your data to your TalkJS test environment first. Once you are happy that works as expected you can import to the live environment.
The migration script calls the TalkJS REST API to first:
- import users with the create user endpoint
- import conversations with the create conversation endpoint
- import messages with the import messages endpoint. We'll use this endpoint rather than the send messages one because it allows you to set the timestamp of the message, preserving the original time the imported message was sent
For more information on how the script works, see the project README.
Set up the project
First, either clone the whole talkjs-examples GitHub repo, or download the Sendbird migration example as a zip file.
In config.js, update <APP_ID> and <SECRET_KEY> with your TalkJS app ID and API secret key, which you can find on the Settings tab of the dashboard. Make sure to use your test environment credentials.
Then run the following in your terminal from the top-level directory of the example:
npm install
This installs the dependencies you'll need to run the import script.
Copy over your data
Next, add the data files you want to import to the sendbird-data directory, under users, channels and messages. You can either copy over the files you exported from Sendbird in Part 1, or test the import out first with the example data files for the group channel shown above. You'll find these in the example-data directory.
Run the import script
To run the script, run the following in your terminal:
npm run start
If successful, the script should produce output similar to:
Found 1 user files to process...
Read file: </path/to/user-file.json>
Parsed JSON data with 3 users
Imported user: alice-sendbird
Imported user: sebastian-sendbird
Imported user: nina-sendbird
Completed import of users from: <user-file.json>

Found 1 channel files to process...
Read file: </path/to/channel-file.json>
Parsed JSON data with 1 channels
Imported conversation: sendbird_group_channel_<channel_id>
Completed import of channels from: <channel-file.json>

Found 1 message files to process...
Read file: </path/to/message-file.json>
Parsed JSON data with 4 messages
Found 1 unique conversations
Imported messages for conversation: sendbird_group_channel_<channel_id>
Completed import of messages from: example-messages.json

Import process completed
Note: The script does not remove duplicate messages. If you run the script twice you will end up with two imported copies of the message, even if the messages have the same timestamp.
Step 3: Test your import
Next, test the import by viewing your imported data.
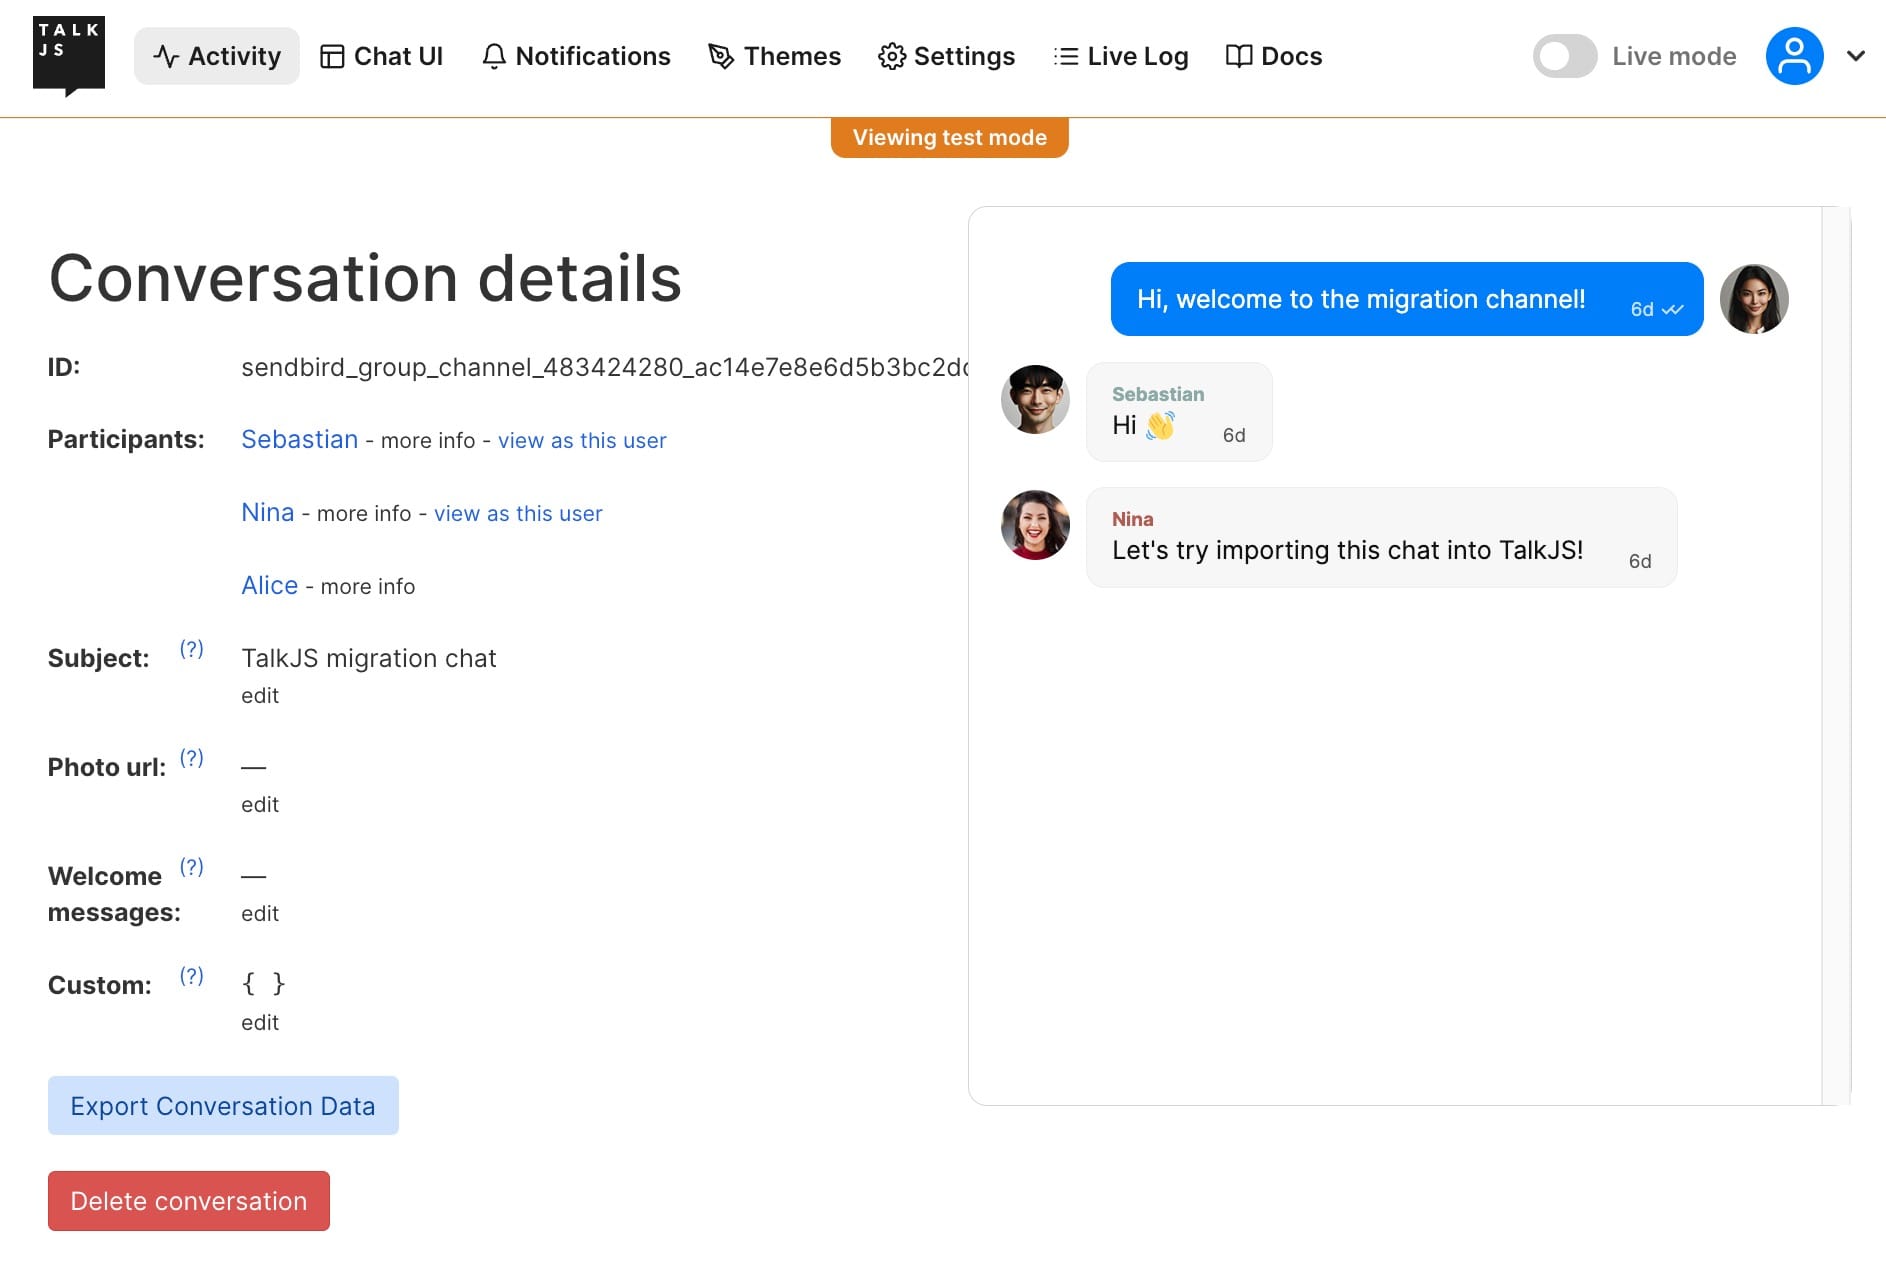
As a quick first check, go to the Activity tab of your TalkJS dashboard. Under Conversation history, you'll see a list of recent conversations. Click View for one of the conversations you imported to see a TalkJS chatbox with your imported messages:
You can also try running your own TalkJS code to view a chatbox. To help you get started, our GitHub example contains a script.js file that you can modify:
const appId = "<APP_ID>"; // replace with your app ID

Talk.ready.then(function () {
  var alice = new Talk.User("alice-sendbird");
  var sebastian = new Talk.User("sebastian-sendbird");
  var nina = new Talk.User("nina-sendbird");
  window.talkSession = new Talk.Session({
    appId: appId,
    me: alice,
  });

  var conversation = window.talkSession.getOrCreateConversation(
    "sendbird_group_channel_483424280_ac14e7e8e6d5b3bc2dd3979fb360ad432ae0d6e8"
  );
  conversation.setParticipant(alice);
  conversation.setParticipant(sebastian);
  conversation.setParticipant(nina);

  var chatbox = window.talkSession.createChatbox(conversation);
  chatbox.mount(document.getElementById("talkjs-container"));
});
Update appId with your TalkJS app ID, which you can find in the Settings tab of your TalkJS dashboard.
This example uses the user and conversation IDs you'll see if you import the data from the example-data directory. If you imported your own data, you'll have to update the script to use your own user and conversation IDs. See our Getting started guides for more details.
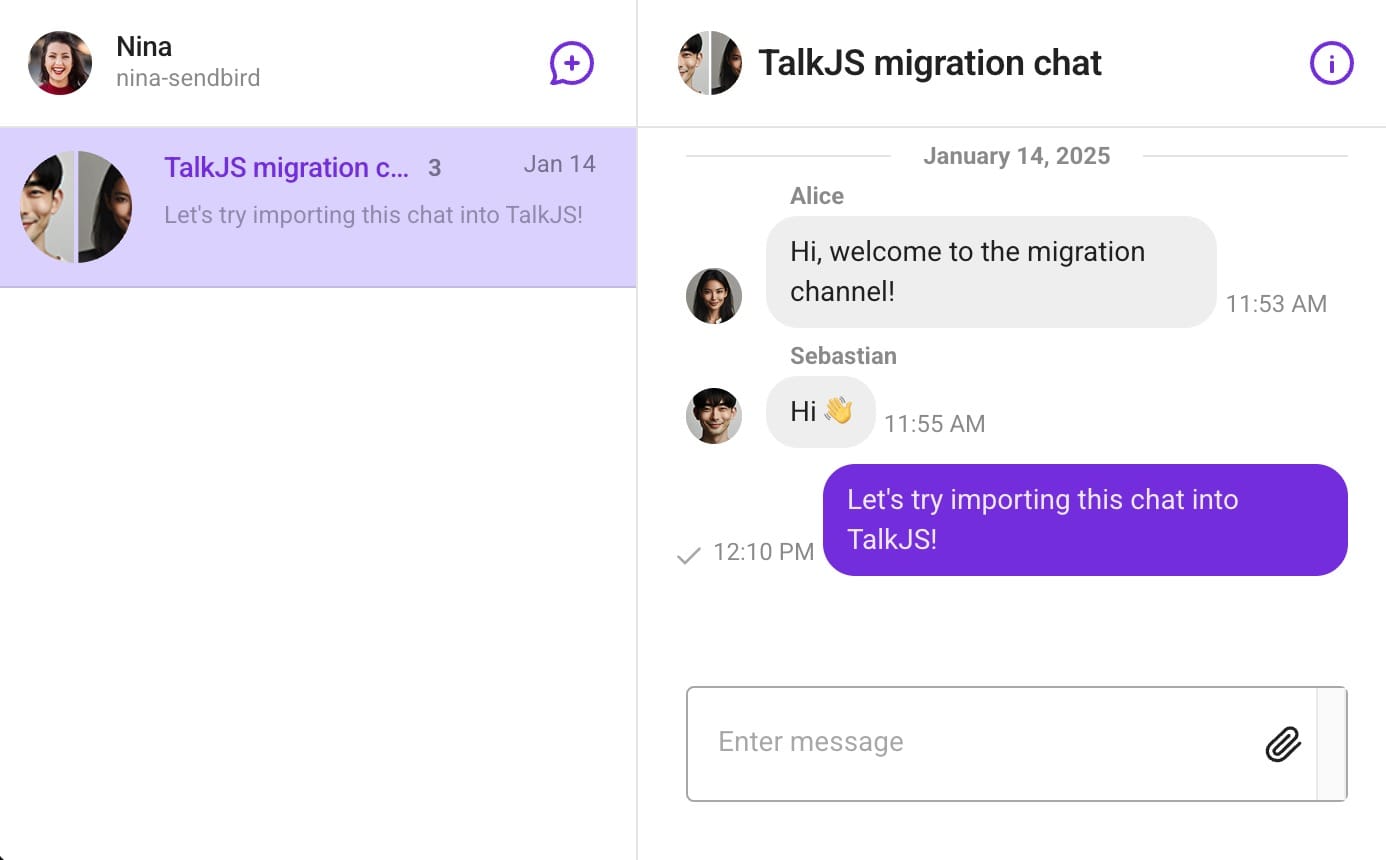
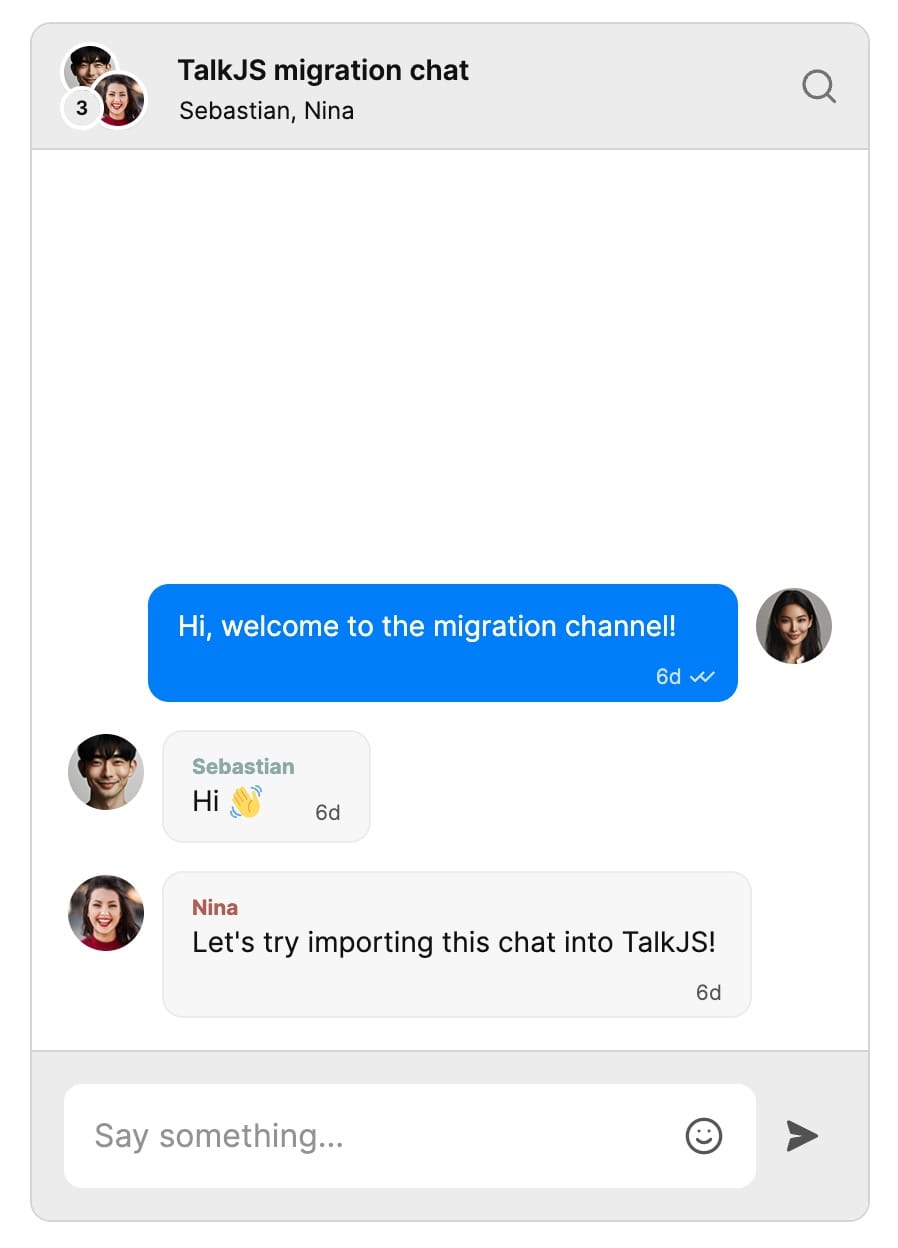
To view your chatbox, open index.html in your browser. You should see a TalkJS chatbox with a conversation between participants:
Conclusion
You've now migrated your data to TalkJS! In this tutorial you've:
- Exported your data from Sendbird
- Imported your data into TalkJS with our import script
- Tested your import
For the full example code for this tutorial, see our GitHub repo.
If you want to learn more about TalkJS, here are some good places to start:
- The TalkJS docs help you get started with TalkJS.
- TalkJS tutorials provide how-to guides for many common TalkJS use cases.
- The talkjs-examples Github repo has larger complete examples that demonstrate how to integrate with other libraries and frameworks.
Do you have any questions about migrating from Sendbird? Get in touch, we're happy to help.


