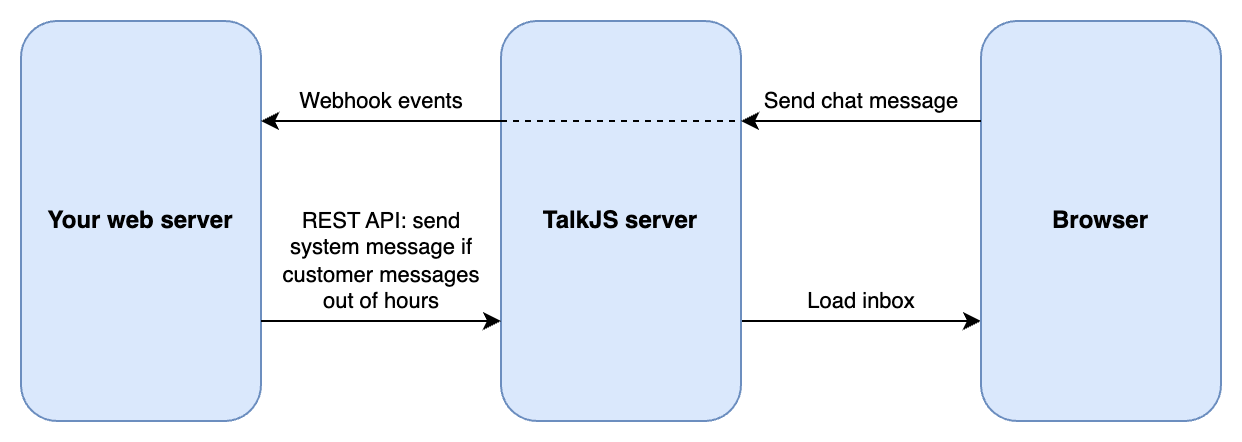
If you are away from your inbox and currently unable to reply to a message, you may want to send an automatic message to let customers know when they can expect a reply. For example, a support team might want to send an automatic reply to queries received outside support hours.
This tutorial explains how to add automatic out-of-hours replies to your TalkJS chat client using TalkJS's webhooks and REST API.

To follow along, you’ll need:
- A TalkJS account. TalkJS provides a ready-to-use chat client for your application. Your account gives you access to TalkJS's free development environment.
- An existing TalkJS project using the JavaScript Chat SDK. See our Getting Started guide for an example of how to set this up.
- An installation of Node.js along with the npm package manager. We’ll use this to create our backend server.
We’ll build up the feature step by step in the following sections. If you would rather see the complete example code, see the Github repo for this tutorial.
Getting notified about new messages
First we’ll enable TalkJS webhooks, which allow the TalkJS server to notify your server when a message is sent. Webhooks let you use an event-driven architecture, where you get told about events when they happen rather than having to constantly check for new messages. There are lots of events you can listen for, but we’re only interested in new messages being sent.
Webhooks are server-side only, so we’ll need a web server. We’ll be using Express in this tutorial, but feel free to use your favorite web server library instead:
import express from "express";
const app = express().use(express.json()); // creates http server

app.listen(3000, () => console.log("Server is up"));

app.post("/talkjs", (req, res) => {
  console.log(req.body);
  res.status(200).end();
});
This sets up a POST endpoint at /talkjs that monitors incoming events from the TalkJS server.
For TalkJS to communicate with your server, you must expose it to the internet. This can be very difficult when developing locally, with endless firewalls and port forwarding to set up. Instead, we’ll use ngrok to create a secure tunnel to your local server. See our tutorial on How to integrate ngrok with TalkJS for instructions on how to install ngrok.
Once you have installed ngrok, run the following command:
ngrok http 3000
This command starts a secure tunnel to your local port 3000. The output should include the URL that ngrok exposes:
Forwarding https://<YOUR_SITE>.ngrok-free.app -> http://localhost:3000
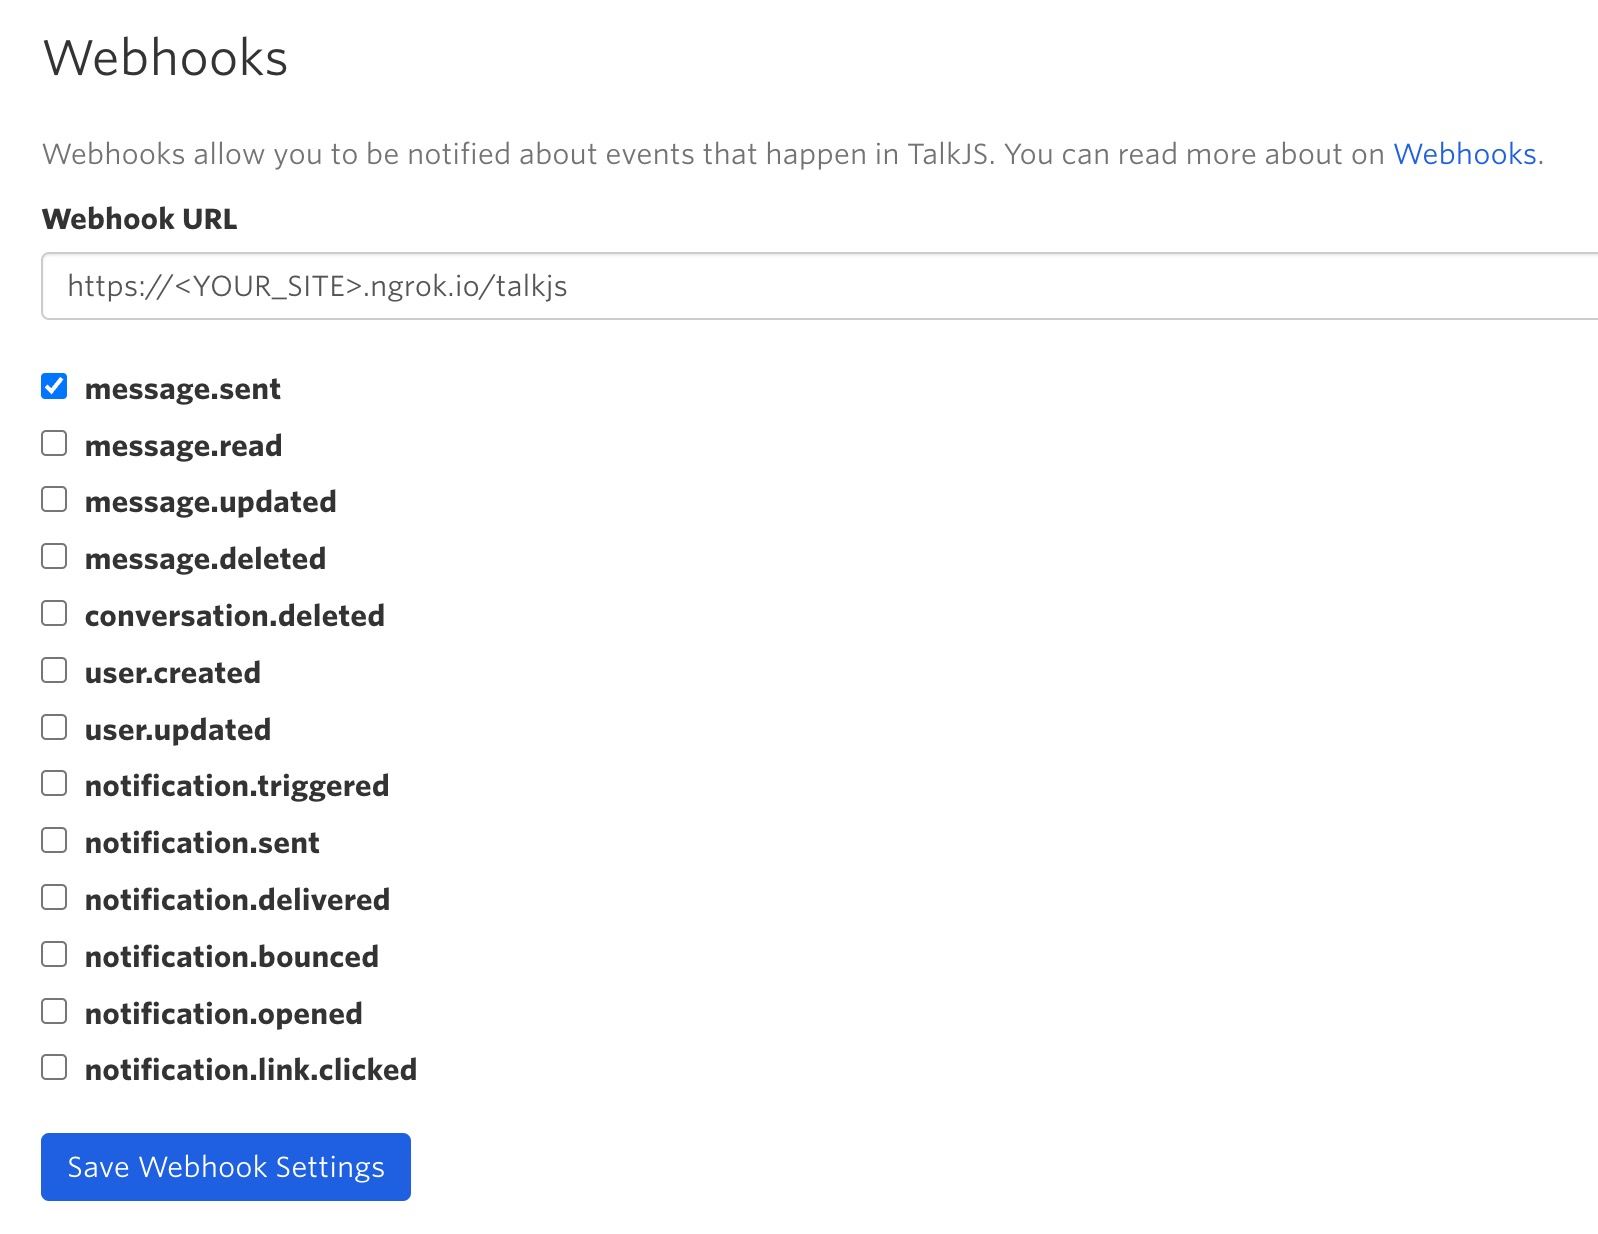
You’re now ready to enable webhooks. You can do this in the TalkJS dashboard under Webhooks. Paste the URL above into the Webhook URL field, including the /talkjs path: https://<YOUR_SITE>.ngrok-free.app/talkjs.
Select the message.sent option:

TalkJS will now send a web request to your server when a message is sent. To test this, write another message in your chat UI. You should see the event in your server’s console:
{
  createdAt: 1683276915840,
  data: {
    conversation: {
      createdAt: 1683275536667,
      custom: [Object],
      id: '15966c817cb1473d9b0a',
      // ... more fields here ...
    },
    message: {
      // ... message fields here ...
    },
    sender: {
      // ... sender fields here ...
    }
  },
  id: 'evt_AVL7tDG9V7CPSXBfG4',
  type: 'message.sent'
}
Send a reply message
Next, we’ll react to the events by calling the TalkJS REST API to send an automatic reply to any out-of-hours messages from customers.
In this tutorial we will use the node-fetch module to send the HTTP requests, but you can use another library if you prefer.
import fetch from "node-fetch";

const appId = "<APP_ID>";
const secretKey = "<SECRET_KEY>";

const basePath = "https://api.talkjs.com";
const path = basePath + "/v1/" + appId + "/conversations/";
This code imports the node-fetch module and sets up the URLs you will need to call. Fill in the app ID and secret key with the values from your TalkJS dashboard. Make sure you protect that secret key and never expose it in frontend code – it has full admin access to your TalkJS account.
You'll need to check that the message is from a customer before sending the automatic reply. In this example, we’ll assume you are using TalkJS’s Roles feature to define support and customer roles for users. You will then see these roles in the role field of the user data you receive from the sent message event. Alternatively, you could use the custom data for each user to indicate whether they are a member of the support team, and check that property here instead.
You'll also need some logic in your server code to check when a message is received out of hours. The details will depend on your specific needs, but for the purposes of this tutorial we'll keep things simple and assume that the support team work from 09:00 to 17:00 in the server's local time, Monday to Friday:
function isOutOfHours(date) {
  // Sunday
  if (date.getDay() === 0) return true;

  // Saturday
  if (date.getDay() === 6) return true;

  // Before 9am
  if (date.getHours() < 9) return true;

  // After 5pm
  if (date.getHours() >= 17) return true;

  // Otherwise
  return false;
}
Now replace your previous app.post call with the following:
async function sendReply(conversationId) {
  console.log("Autoreply to conversation ID:", conversationId);

  return fetch(
    `${basePath}/v1/${appId}/conversations/${conversationId}/messages`,
    {
      method: "post",
      headers: {
        "Content-Type": "application/json",
        Authorization: `Bearer ${secretKey}`,
      },
      body: JSON.stringify([
        {
          text: "We're currently out of the office and will get back to you during our support hours.",
          type: "SystemMessage",
        },
      ]),
    }
  );
}

app.post("/talkjs", async (req, res) => {
  const data = req.body.data;
  const conversationId = data.conversation.id;
  const role = data.sender?.role;
  const date = new Date(data.message.createdAt);

  if (isOutOfHours(date) && role === "customer") {
    await sendReply(conversationId);
  }

  res.status(200).end();
});
This code sends an automatic system message if the message is from a user with the customer role and is received out of hours.
Improve the reply logic
Currently, if a customer sends multiple messages in a row, we'll reply to each one. That could get annoying, so we should only reply to the first of their messages.
To do this, we'll keep track of messages we've already replied to with an alreadyReplied object. We'll add conversation IDs to this as keys, with the date as the value, and only send automatic replies to conversations that aren't yet stored in alreadyReplied.
Once a support agent has replied, we'll remove the keys from alreadyReplied, so that if the customer messages again out-of-hours, they'll get another automatic reply.
// Track when we auto-replied to each conversation ID so we don't send multiple replies in a row
const alreadyReplied = {};

app.post("/talkjs", async (req, res) => {
  const data = req.body.data;
  const conversationId = data.conversation.id;

  const role = data.sender?.role;
  const date = new Date(data.message.createdAt);

  if (isOutOfHours(date) && role === "customer") {
    if (!(conversationId in alreadyReplied)) {
      await sendReply(conversationId);
    }
    alreadyReplied[conversationId] = new Date();
  }

  if (role === "support") {
    delete alreadyReplied[conversationId];
  }

  res.status(200).end();
});
Note that when running in production you may need to remove keys from alreadyReplied eventually even if support never responds. Otherwise the code will slowly consume more and more memory over time. This is a simplified demonstration for the tutorial.
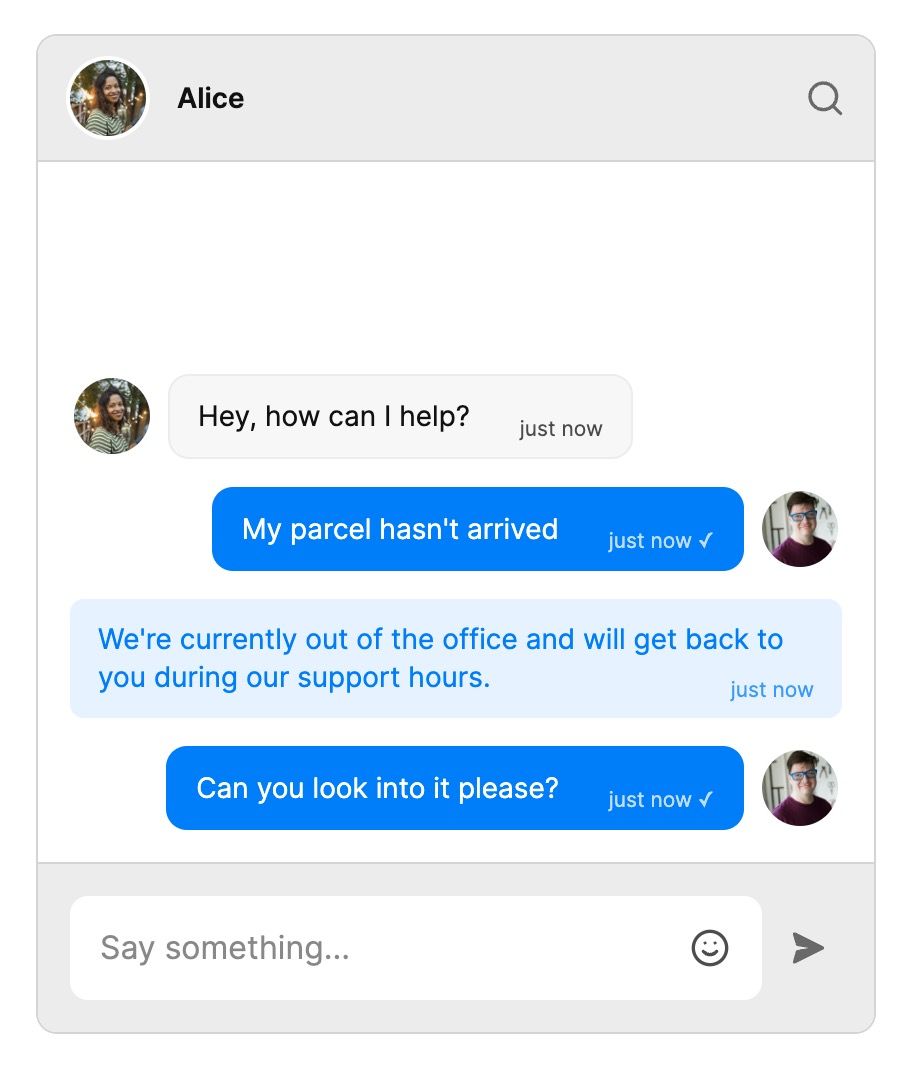
You can now test your application. You should receive an automatic system reply to your first customer message when you send it out of support hours:

Conclusion
You now have a working demonstration of how to send an automatic reply message! To recap, in this tutorial we have:
- Set up a web server to receive webhook events from the TalkJS server
- Called the REST API to send a system message to customers out of support hours
- Updated the reply logic to avoid sending too many messages in the same conversation
For the full example code for this tutorial, see our Github repo.
If you want to learn more about TalkJS, here are some good places to start:
- The TalkJS Docs help you get started with TalkJS.
- TalkJS tutorials provide how-to guides for many common TalkJS use cases.
- The talkjs-examples Github repo has larger complete examples that demonstrate how to integrate with other libraries and frameworks.


