
This guide uses the classic JavaScript SDK. If you're starting a new project, consider using TalkJS Chat UI components, which are more customizable.
Today, we'll show you how to create a group chat feature and embed it into your website or app by using the TalkJS' classic JavaScript SDK. The API works with any platform or programming language so you can be sure it will work well with your stack.
Setting up the group chat
We will try to build a group chat for this tutorial that will allow students to discuss homework with the teacher.
Before we start work on the group chat, let’s create a simple one-to-one chat following the Getting Started guide.
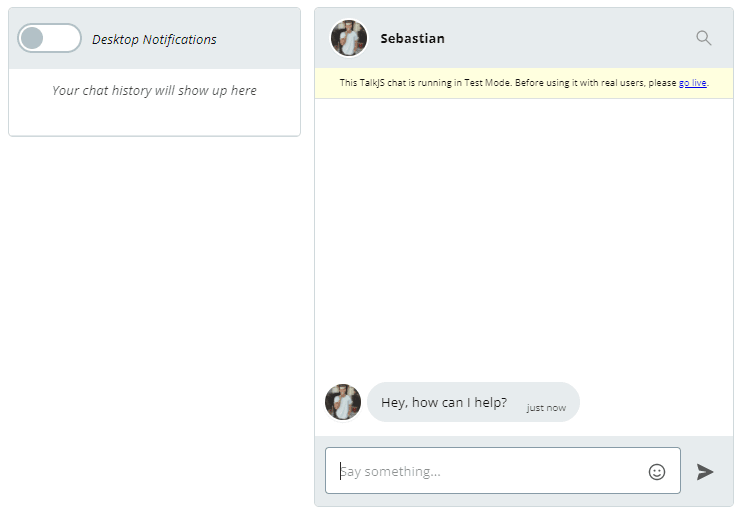
Your first chat app will look as above.
But this is a 1-on-1 chat. So we need to make some changes to the code to create a group chat.
The first step is to update your code by adding new users as below. We will add one teacher and two students as our users.
Don’t forget to enter your own appId you can find in the TalkJS Dashboard.
Talk.ready.then(function() {
    var teacher = new Talk.User({
        id: "123456",
        name: "Alice",
        email: "alice@example.com",
        photoUrl: 'https://images.pexels.com/photos/3671083/pexels-photo-3671083.jpeg?auto=compress&cs=tinysrgb&dpr=1&w=500'
    });

    window.talkSession = new Talk.Session({
        appId: "YOUR_APP_ID",
        me: teacher
    });

    var student1 = new Talk.User({
        id: "654321",
        name: "Sebastian",
        email: "sebastian@example.com",
        photoUrl: 'https://images.pexels.com/photos/775358/pexels-photo-775358.jpeg?auto=compress&cs=tinysrgb&dpr=1&w=500'
    });

    var student2 = new Talk.User({
        id: "456789",
        name: "Steve",
        email: "steve@example.com",  photoUrl:'https://images.pexels.com/photos/3748221/pexels-photo-3748221.jpeg?auto=compress&cs=tinysrgb&dpr=1&w=500'
    });
 });
Once you have added the users, it’s time to create the conversations. Update your code like below.
const conversation = talkSession.getOrCreateConversation("CONVERSATION_ID");
conversation.setParticipant(teacher);
conversation.setParticipant(student1);
conversation.setParticipant(student2);
conversation.setAttributes({
    photoUrl: "https://i.picsum.photos/id/971/200/300.jpg?hmac=13ePfSXGucrfsPCzPjUZtNe5jYo83FTet0dk-Lk2Q4E",
    subject: "homework_assignment"
});
The CONVERSATION_ID is the parameter used to identify each conversation uniquely. To avoid security risks, we do not use simple numbers and letters when setting up actual conversation ids as a best practice. Instead, you can compute an HMAC of your conversation ID the same way you generate your Identity Verification signature. You can then use the HMAC as your conversation ID. You can find more information about securing the conversation ID in our docs.
The next step is to mount the chatbox into your user interface. Add the following code to mount your chatbox.
const chatbox = talkSession.createChatbox();
chatbox.select(conversation);
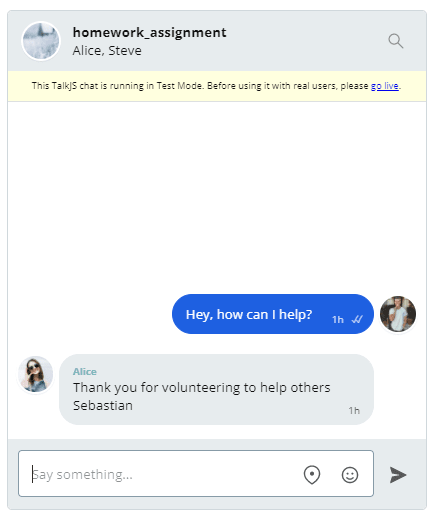
chatbox.mount(document.getElementById("talkjs-container"));Go to your application and try to load the chatbox. It will load as below.
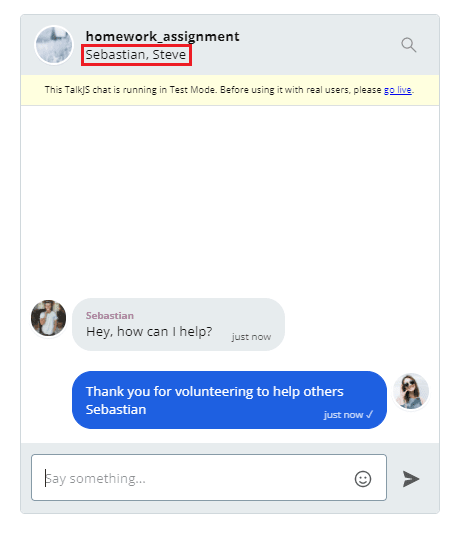
In the code above, the value of me property is ‘teacher.’ So right now, what we are seeing is what the teacher, Alice, can see. Notice how the names of the other two members in the conversation are displayed at the top.
Creating roles
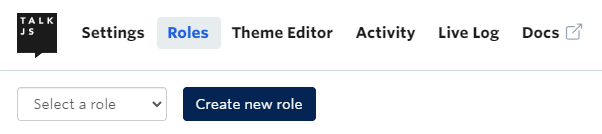
TalkJS provides the ability to create user roles. These user roles may come in handy, especially when you want to control user behavior and privileges. You can create these roles using the TalkJS dashboard. Click on Roles to add a role.
Let’s create two roles: teacher and student. Click on the Create New Role button to create the role ‘teacher.’ Click on the “Create role” button. You will be redirected to your role’s settings page.
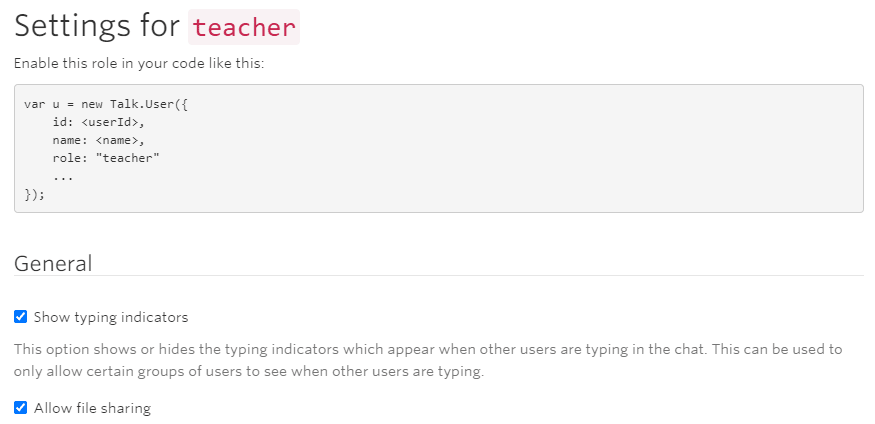
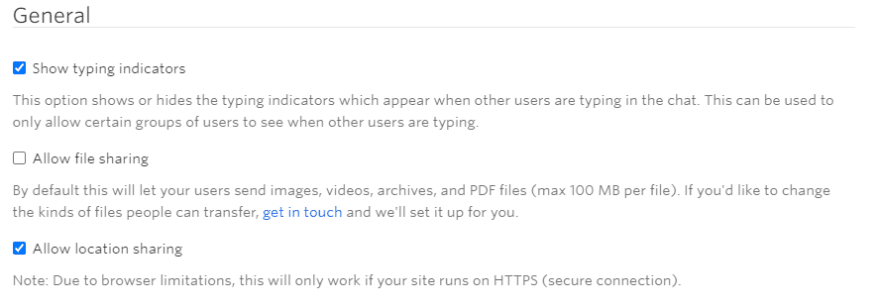
Click on the Create New Role button again to create the ‘student’ role. Assume you don’t want the students to share their assignments or papers in the chat to prevent copying. All you have to do is disable the file-sharing option in student role settings as below and save.
You can add those roles into your user object as below.
var teacher = new Talk.User({
    id: "123456",
    name: "Alice",
    email: "alice@example.com",
    photoUrl: 'https://images.pexels.com/photos/3671083/pexels-photo-3671083.jpeg?auto=compress&cs=tinysrgb&dpr=1&w=500',
    role: "teacher"
});
Customizing the UI with TalkJS Themes
Once you have created the roles, you can customize the TalkJS UI based on the user role. TalkJS uses the default theme when a role is not defined.
To create a role-specific theme, go to the Theme Editor in the TalkJS dashboard.
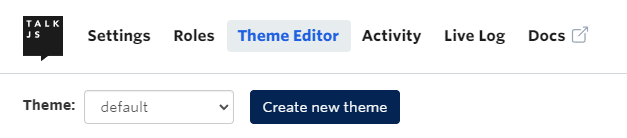
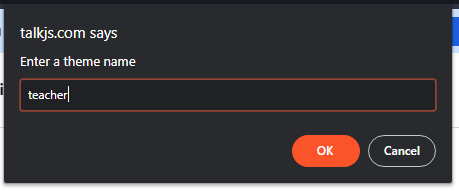
Click on Create new theme and give it a name.
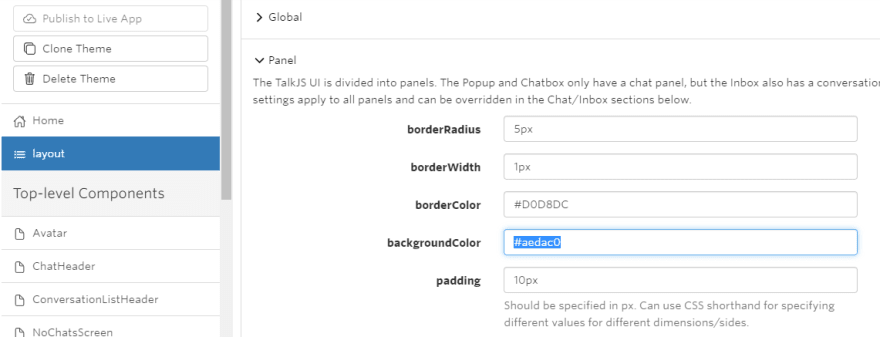
Inside the teacher theme, go to the Layout tab.
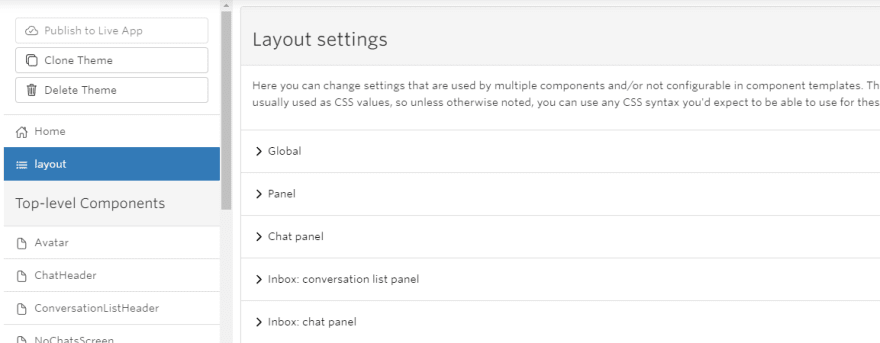
Click on the collapsible panels (Global, Panels, Chat Portal, etc.) on the right to customize the teacher’s interface. As an example, let’s change the background color of the teacher’s chatbox.
To apply the theme to the role, we need to go back to our teacher role’s settings.
Under UI Theme, select ‘Custom Theme’ as ‘Theme version’ and ‘teacher’ as the ‘Active theme.’
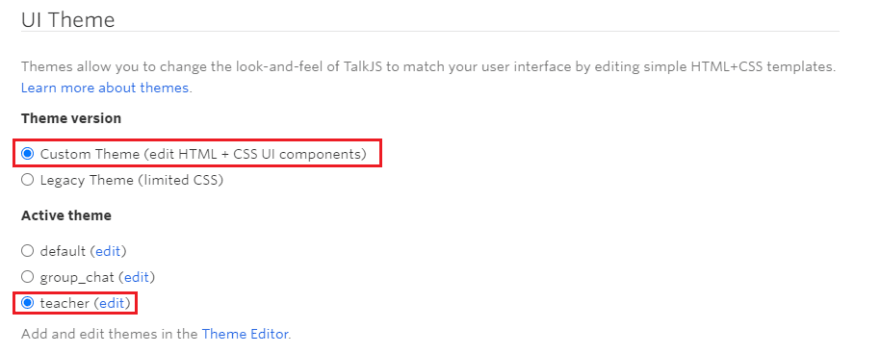
Save the change and reload the chatbox.

As you can see, the background color of the chatbox has changed as updated for our teacher role. However, if we log in as the student Sebastian, the background color is still white as the student role still uses the default theme.
There it is. A simple group chat in a few steps. As you can see, it’s very easy to create roles and assign privileges and customize the UI based on the role. You may have also noticed how easy it is to edit the themes with TalkJS Theme Editor. So have fun creating group chats!


