
This guide uses the classic JavaScript SDK. If you're starting a new project, consider using TalkJS Chat UI components, which are more customizable.
In this tutorial, we'll show you how to use Firebase Cloud Messaging (FCM) with TalkJS to send web push notifications to your users' browsers when they receive a new message in their TalkJS chat:
TalkJS can be set up to send a variety of types of notifications when you're away from your chat, including email, SMS, and browser notifications. In this tutorial we'll send web push notifications with Firebase Cloud Messaging. Firebase Cloud Messaging is a cross-platform messaging solution that comes as part of Google's Firebase platform, which provides tools for web and mobile applications such as authentication, hosting and cloud storage.
We'll then set up a web page with a TalkJS chatbox, along with a service worker that can handle FCM notifications. Service workers only run over HTTPS for security reasons. In this tutorial we'll host our service worker and webpage with Firebase Hosting, which provides secure HTTPS by default, but you can use a different service if you prefer.
If you'd rather get started with a working example, you can find the full source code for this project in our GitHub examples repo.
Note: This tutorial assumes you're already familiar with TalkJS basics. If you're new to TalkJS, we recommend starting with our getting started guide.
Contents
Prerequisites
To follow along with this tutorial, you'll need:
- A TalkJS account
- A Firebase account with a Firebase project set up. If you don't yet have a Firebase project, follow the Firebase fundamentals guides to get started.
- Firebase Cloud Messaging configured for your TalkJS account. For instructions on how to set this up in the TalkJS dashboard, see Configure Firebase Cloud Messaging.
- The Firebase CLI
Set up Firebase
In this section, you'll initialize Firebase Hosting with the Firebase CLI, create a new Firebase app and generate a key to encrypt push notifications.
Step 1: Initialize Firebase Hosting
Log in to Firebase with the Firebase CLI if you haven't already:
firebase login
Next, create a new directory for your code for this project and run the following command inside it:
firebase init hosting
Answer the questions when prompted:
- Select to associate your new project directory with an existing Firebase project or create a new one. If you create a new one, or you haven't yet set up Firebase Cloud Messaging in the TalkJS dashboard, see Configure Firebase Cloud Messaging in our docs.
- Select to use the default (
public) as your public directory. - Select whether to configure as a single-page app (in this example we've selected "Yes", but you can use either).
- Choose whether to set up automatic builds and deploys with GitHub.
Once initialization is complete, you should see some config files in your directory, along with a public directory with an index.html file. We'll update this file in a later step.
Step 2: Create a new Firebase app
Next, open the Firebase console and select your Firebase project. Create a new app inside the Firebase project:
- Open the Firebase console and select your project.
- From the Project Overview page, click the + icon to add a new web app.
- Pick a name for your app.
- After registering the app name, you will see some code samples for adding the Firebase SDK. Copy and save the
firebaseConfigJavaScript object. It will look something like this:
You'll use this in a later section when you initialize the Firebase SDK.{ "apiKey": "<FIREBASE_API_KEY>", "authDomain": "<FIREBASE_APP_NAME>.firebaseapp.com", "projectId": "<FIREBASE_APP_NAME>", "storageBucket": "<FIREBASE_APP_NAME>.firebasestorage.app", "messagingSenderId": "<SENDER_ID>", "appId": "<FIREBASE_APP_ID>" }
Step 3: Generate your public key
You'll need a key to encrypt push notifications. To generate this, follow these steps:
- In the Firebase console, click the gear icon and go to Project Settings.
- In the Cloud Messaging tab, go to the Web configuration section and then click Generate Key Pair.
- Copy the public key. You'll use this in the next section.
Create your web application
In this section, you'll create a TalkJS chat application and set up a service worker to handle Firebase Cloud Messaging.
Step 1: Create a TalkJS chatbox
First, create a page with a TalkJS chatbox. For more detail on how this works, see our getting started guide for the classic JavaScript SDK.
Replace the index.html file in your public directory with the following:
<!DOCTYPE html>
<html>
  <head>
    <meta charset="utf-8" />
    <meta name="viewport" content="width=device-width, initial-scale=1" />
    <title>Example: TalkJS with Firebase Cloud Messaging notifications</title>

    <!-- prettier-ignore -->
    <script>
      (function(t,a,l,k,j,s){
      s=a.createElement('script');s.async=1;s.src='https://cdn.talkjs.com/talk.js';a.head.appendChild(s)
      ;k=t.Promise;t.Talk={v:3,ready:{then:function(f){if(k)return new k(function(r,e){l.push([f,r,e])});l
      .push([f])},catch:function(){return k&&new k()},c:l}};})(window,document,[]);
    </script>

    <script>
      Talk.ready.then(function () {
        var me = new Talk.User({
          id: "sample_user_sebastian",
          name: "Sebastian",
          role: "default",
        });
        var other = new Talk.User({
          id: "sample_user_alice",
          name: "Alice",
          role: "default",
        });

        window.talkSession = new Talk.Session({
          appId: "<APP_ID>", // update this with your TalkJS app ID
          me: me,
        });

        var conversation = talkSession.getOrCreateConversation(
          "sample_conversation"
        );

        conversation.setParticipant(me);
        conversation.setParticipant(other);

        var chatbox = talkSession.createChatbox();

        chatbox.select(conversation);
        chatbox.mount(document.getElementById("talkjs-container"));
      });
    </script>
  </head>
  <body>
    <div id="talkjs-container" style="height: 700px"></div>
  </body>
</html>
Replace <APP_ID> with your TalkJS app ID, which you can find in the Settings tab of the TalkJS dashboard.
Now run the following command from the root directory of the project to deploy your site:
firebase deploy --only hosting
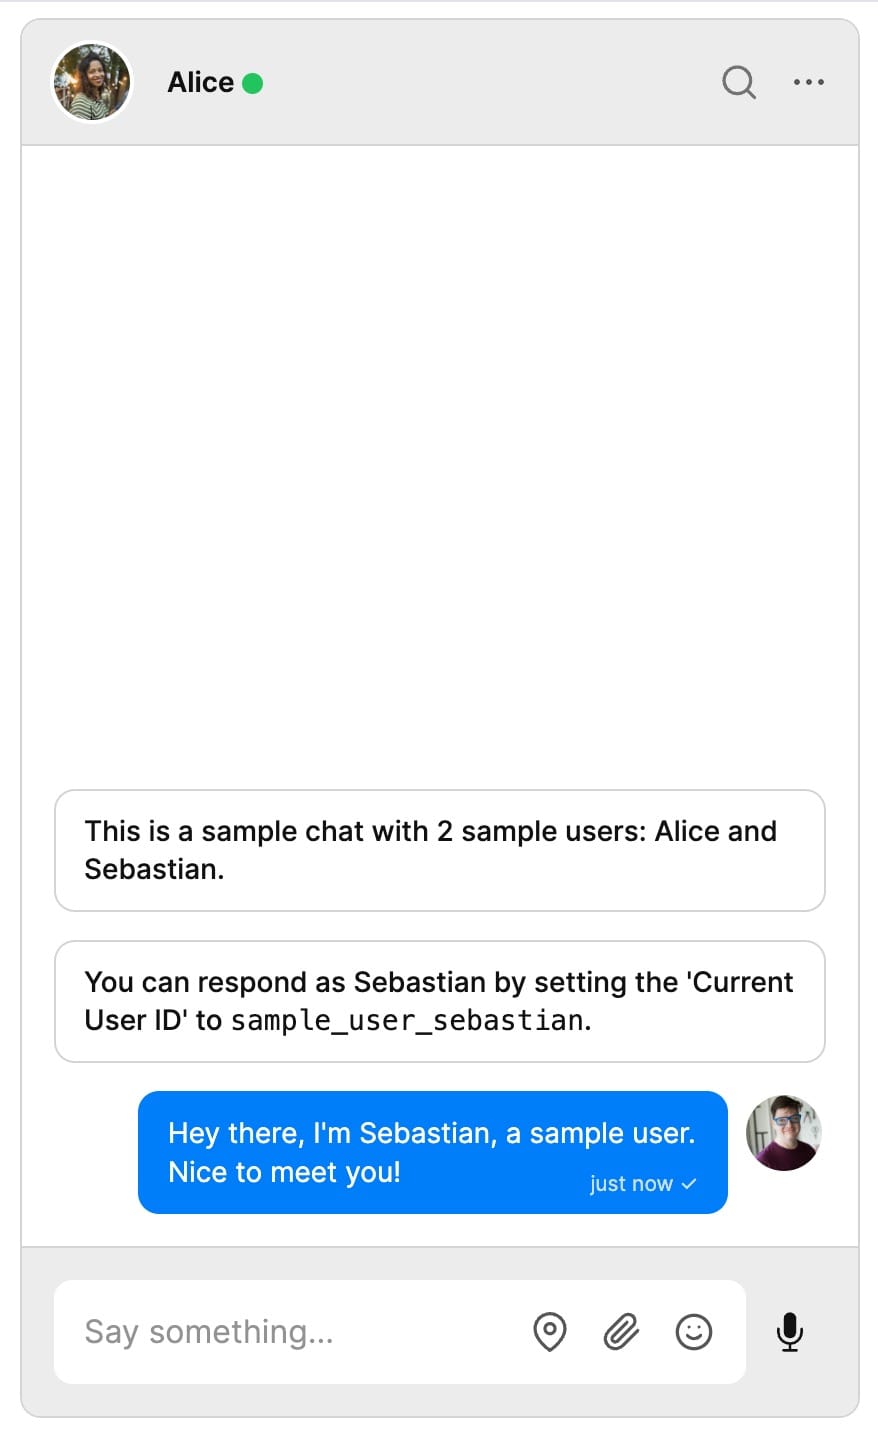
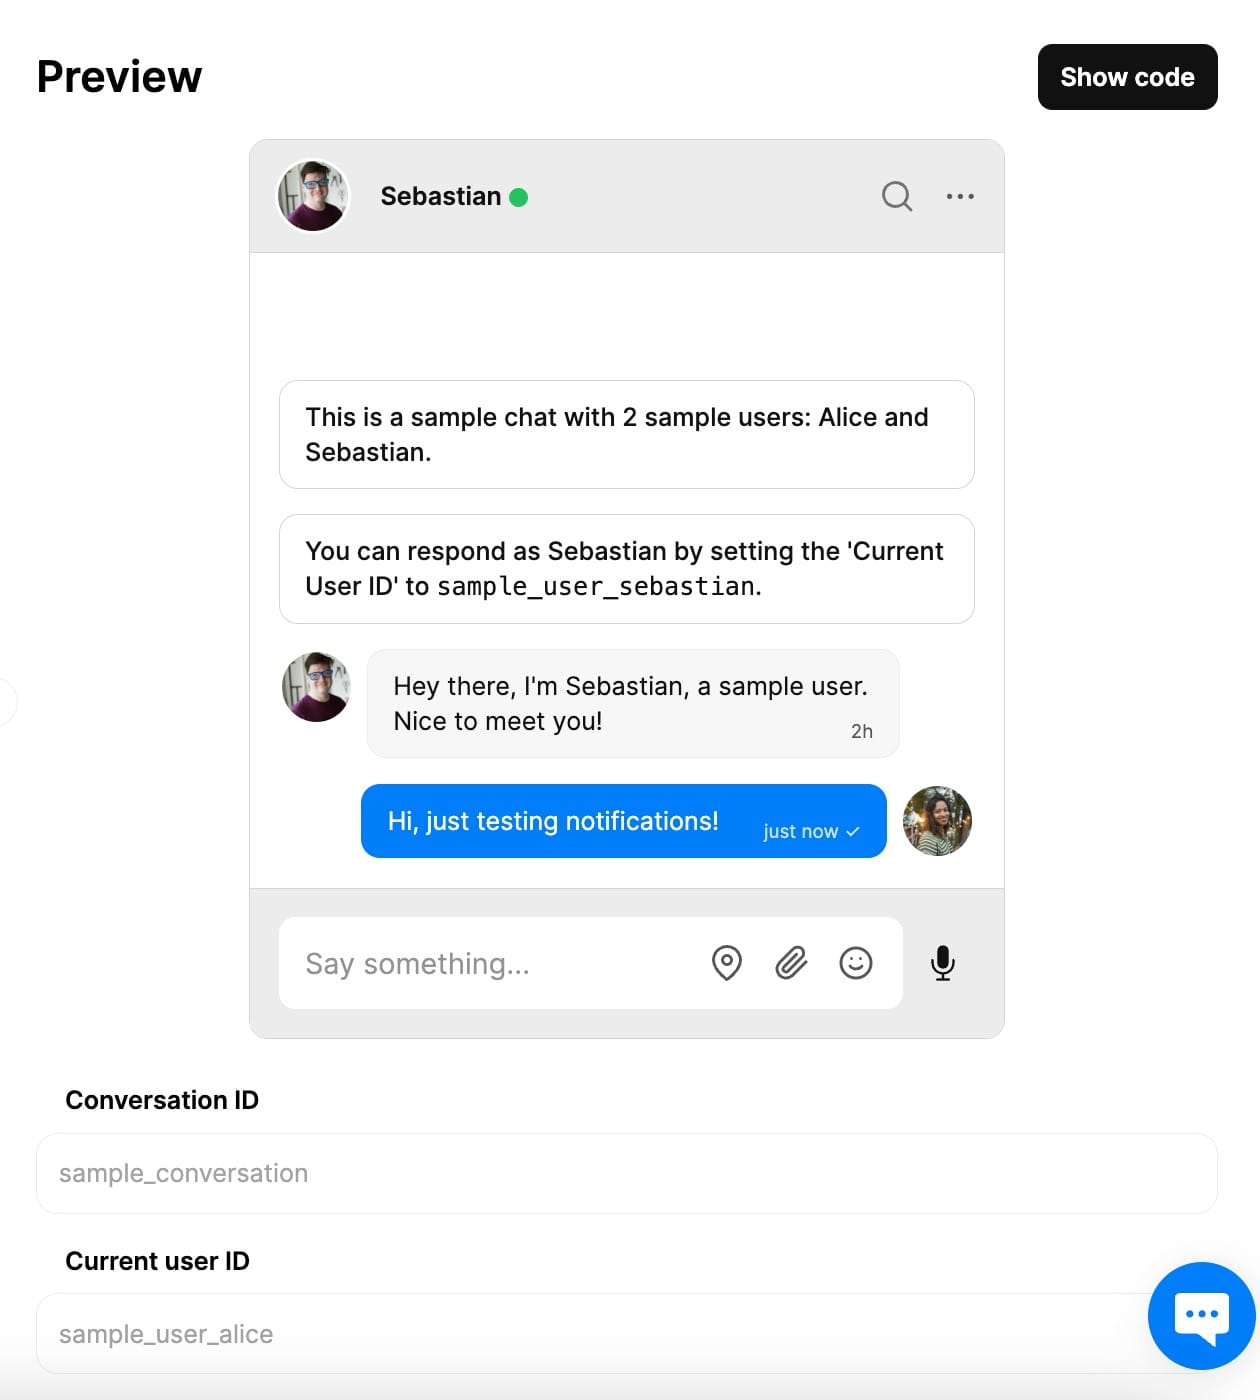
This will deploy the website at a URL like https://<FIREBASE_APP_NAME>.web.app. You should see a chatbox with a conversation between two users:
Step 2: Add the Firebase event listener
Next, we'll load and initialize Firebase. In the head tag of index.html, add the following scripts to load the Firebase App SDK and the Firebase Cloud Messaging SDK:
<!-- update the version number as needed -->
<script defer src="/__/firebase/11.1.0/firebase-app-compat.js"></script>
<!-- include only the Firebase features as you need -->
<script defer src="/__/firebase/11.1.0/firebase-messaging-compat.js"></script>
Then add the following elements to the body of index.html, above the TalkJS container:
<p class="load" id="load">Firebase SDK loading…</p>
<p class="load" id="token"></p>
<div style="display: flex; justify-content: center">
<button id="requestToken">Request token</button>
</div>
This adds a button to your site that will request the token. Add the following script to the end of the body to initialize the Firebase SDK and create an event listener for the button:
<script>
  document.addEventListener("DOMContentLoaded", function () {
    const loadEl = document.querySelector("#load");
    // Initialize Firebase SDK
    try {
      // Update this with the firebaseConfig object from your Firebase app
      let app = firebase.initializeApp({
        apiKey: "",
        authDomain: "",
        projectId: "",
        storageBucket: "",
        messagingSenderId: "",
        appId: "",
      });
      let features = [
        "auth",
        "database",
        "firestore",
        "functions",
        "messaging",
        "storage",
        "analytics",
        "remoteConfig",
        "performance",
      ].filter((feature) => typeof app[feature] === "function");
      loadEl.textContent = `Firebase SDK loaded with ${features.join(", ")}`;
    } catch (e) {
      console.error(e);
      loadEl.textContent = "Error loading the Firebase SDK, check the console.";
    }

    const messaging = firebase.messaging(firebase.app());

    document.getElementById("requestToken").addEventListener("click", () => {
      messaging
        .getToken({
          vapidKey: "<FIREBASE_PUBLIC_KEY>", // update this with your Firebase project public key
        })
        .then((token) => {
          window.talkSession.setPushRegistration({
            provider: "fcm",
            pushRegistrationId: token,
          });

          document.getElementById("token").textContent = token;
        });
    });
  });
</script>
Replace the placeholder object in firebase.initializeApp with the firebaseConfig object that you saved in Step 2 of the previous section.
Also, replace <FIREBASE_PUBLIC_KEY> with the public key that you saved in Step 3 of the previous section.
When you press the Request token button, the event listener will get your token with Firebase's messaging.getToken method. It will then call TalkJS's setPushRegistration method with the token to register for FCM push notifications.
To receive these notifications, you will need a service worker. By default, Firebase will look for a service worker file called firebase-messaging-sw.js in the public directory. We'll create this file in the next step.
Step 3: Create the service worker
Create a file called firebase-messaging-sw.js in your public directory and add the following:
importScripts(
  "https://www.gstatic.com/firebasejs/11.1.0/firebase-app-compat.js"
);
importScripts(
  "https://www.gstatic.com/firebasejs/11.1.0/firebase-messaging-compat.js"
);

// Update this with the firebaseConfig object from your Firebase app
firebase.initializeApp({
  apiKey: "",
  authDomain: "",
  projectId: "",
  storageBucket: "",
  messagingSenderId: "",
  appId: "",
});

// Retrieve an instance of Firebase Messaging so that it can handle background
// messages.
const messaging = firebase.messaging();

// Handle incoming messages. Called when:
// - a message is received while the app has focus
// - the user clicks on an app notification created by a service worker
//   `messaging.onBackgroundMessage` handler.
messaging.onMessage((payload) => {
  console.log("Message received. ", payload);
  // ...
});

messaging.onBackgroundMessage((payload) => {
  console.log(
    "[firebase-messaging-sw.js] Received background message ",
    payload
  );

  const data = JSON.parse(payload.data["talkjs"]);
  console.log("TalkJS payload: ", data);

  // Customize notification here
  const notificationTitle = `Message from ${data.sender.name}`;
  const notificationOptions = {
    body: data.message.text,
    icon: "/firebase-logo.png",
  };

  self.registration.showNotification(notificationTitle, notificationOptions);
});
As with index.html, replace the placeholder object in firebase.initializeApp with the firebaseConfig object that you saved in Step 2 of the previous section.
This service worker handles incoming messages and adds logging and custom notification text. It's currently configured to only show notifications when the web page is in the background, to prevent users getting notified when they are already viewing the chat. If you want to instead show notifications when the web page is in the foreground, copy the code inside onBackgroundMessage into the onMessage handler.
Step 4: Style the app
Finally, let's add some styling to the page. In the head tag of index.html, add the following script:
<style media="screen">
  body {
    /* background: white; */
    color: rgba(0, 0, 0, 0.87);
    font-family: Roboto, Helvetica, Arial, sans-serif;
    margin: 0;
    padding: 0;
  }
  .load {
    color: #525252;
    text-align: center;
    font-size: 13px;
  }
  #requestToken {
    margin: 0px 0px 12px;
    padding: 8px 16px;
    border-radius: 4px;
    background: #007df9;
    color: white;
    border: none;
    cursor: pointer;
  }
  @media (max-width: 600px) {
    body {
      margin-top: 0;
      background: white;
      box-shadow: none;
    }
  }
</style>
This styles the Request token button and the loading text.
Test your app
Let's verify that your push notification setup is working correctly by redeploying the application and sending a message.
Step 1: Deploy your application to Firebase hosting
Redeploy your site to Firebase Hosting:
firebase deploy --only hosting
This will deploy your website to a URL like https://<APP_NAME>.web.app.
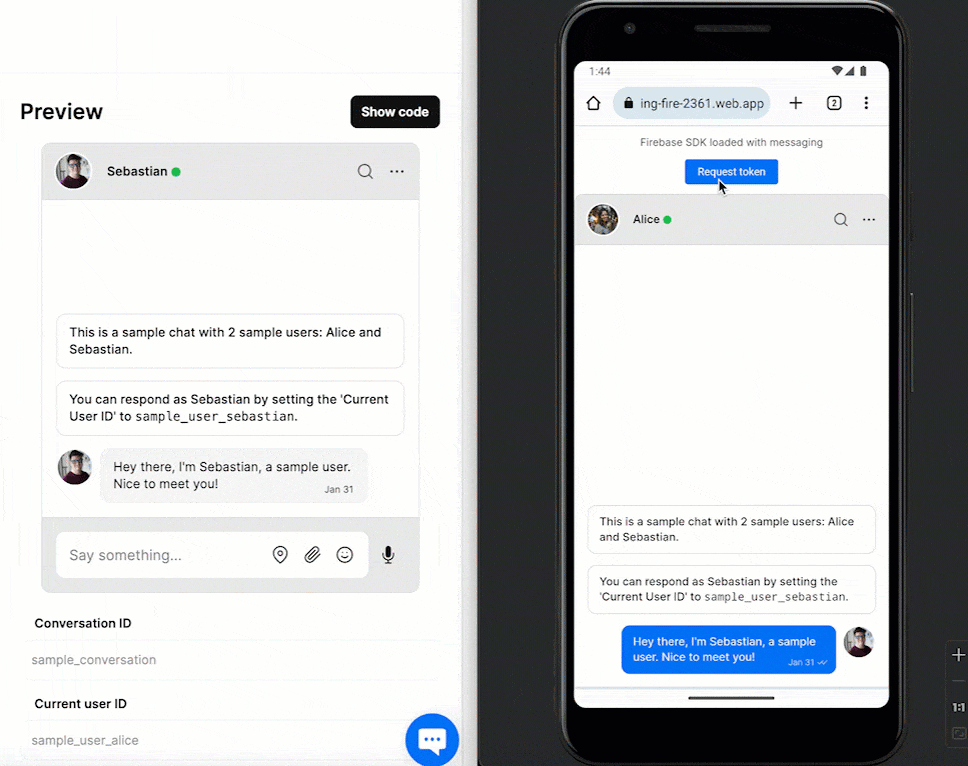
You should now see a TalkJS chatbox and a Request token button:
Step 2: Send a message from another user
We've set up our service worker to only show notifications when the web page is in the background, to save users from getting unnecessary notifications when they are already viewing the chat. So to test notifications, you will need to switch to another tab and then send a message from a different user:
- On the device where you want to receive push notifications, go to
https://<APP_NAME>.web.appand click the Request token button. Select to allow push notifications if prompted. - Switch to a different website in another tab, or to a different app.
- Add a new message to the TalkJS
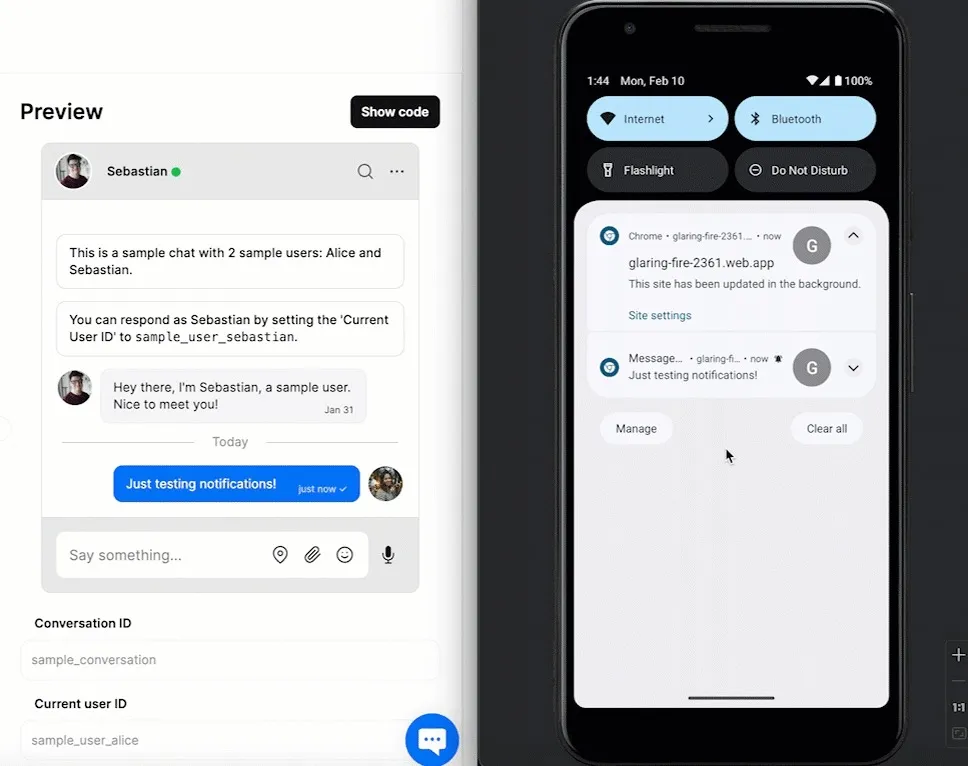
sample_conversationconversation from the other user,sample_user_alice. A simple way to do this is to go to the Chat UI tab of the TalkJS dashboard and add a message from the Preview chatbox UI:
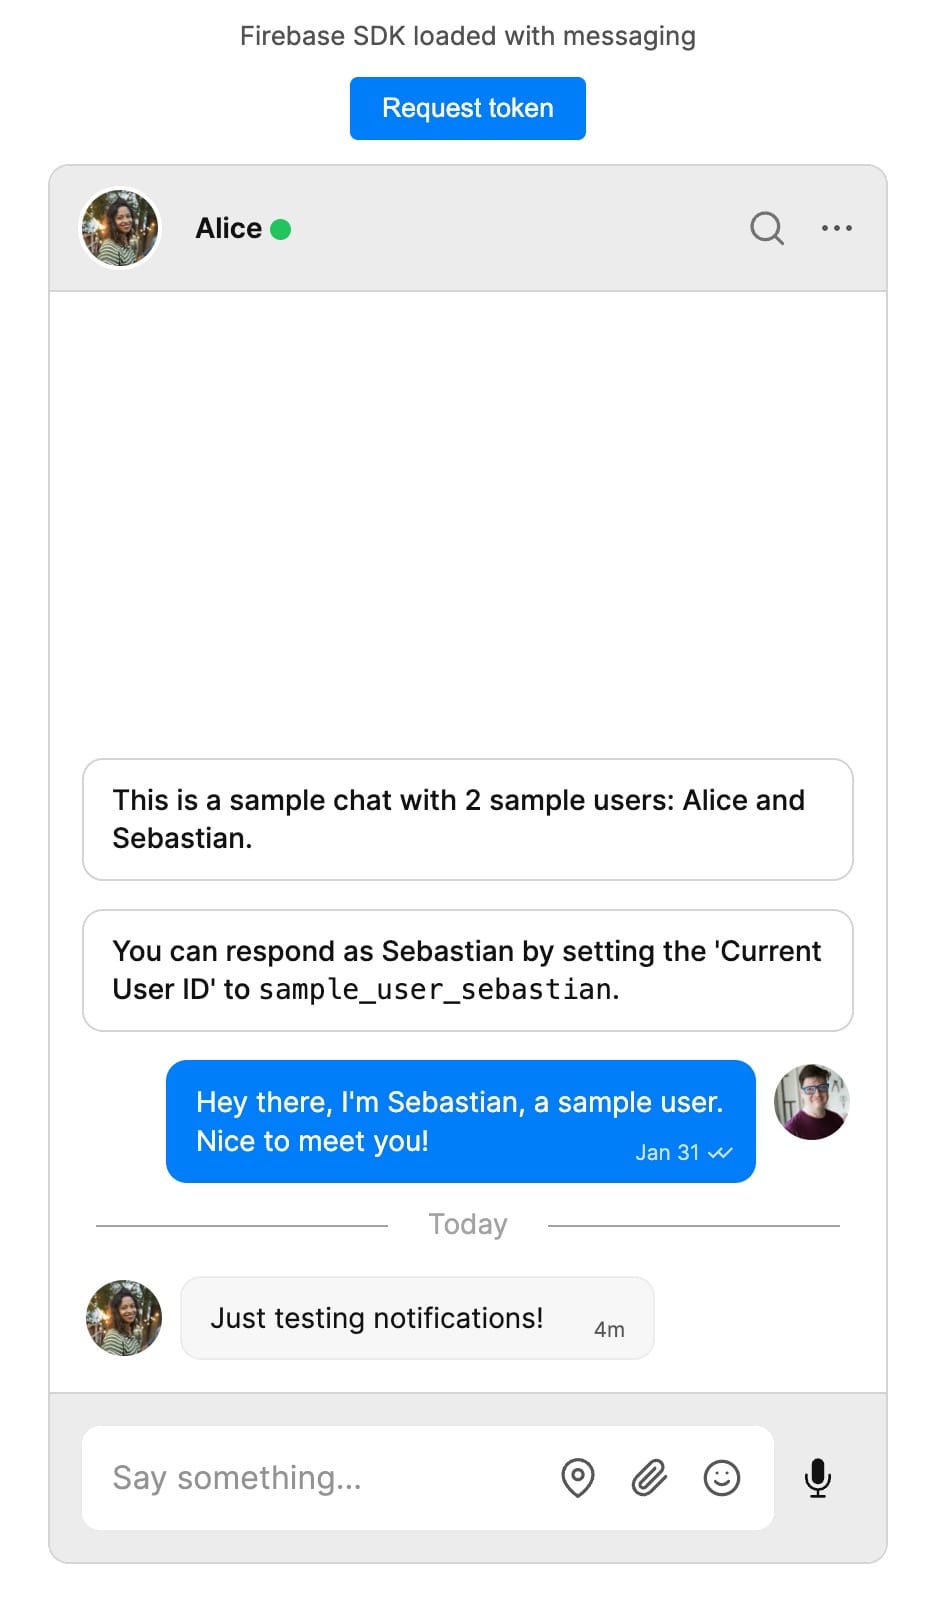
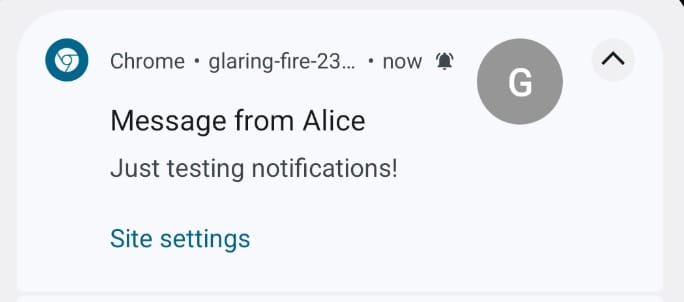
You should now receive a push notification for the message:
Conclusion
You now have a working implementation of web push notifications using Firebase Cloud Messaging and TalkJS. Your users will receive notifications when new messages arrive, even when they're not actively using your chat application.
To recap, you have:
- Set up Firebase Hosting
- Created a new Firebase app
- Created a web application with a TalkJS chatbox
- Added a button to register for Firebase Cloud Messaging
- Added a service worker to handle messages
- Tested that notifications worked
For the full example code for this tutorial, see our GitHub examples repo. Or for more ideas on how to use TalkJS, browse our tutorials and demos.
If you're ready to add chat and notifications to your application, try TalkJS for free.


