
This guide uses the classic JavaScript SDK. If you're starting a new project, consider using TalkJS Chat UI components, which are more customizable.
TalkJS provides an out-of-the-box solution for adding chat to your web or mobile app. This article will go over the steps needed to use the classic JavaScript SDK to integrate chat into Svelte, a lightweight Javascript framework that notably eschews the virtual DOM for the actual one. This tutorial presumes you have a working knowledge of Svelte, and will be handling user management and authentication on your own. Moreover, the styles apparent in the screenshots below will be omitted from the code present here.
Let’s begin building our chat component.
Setting up
First, let’s add TalkJS to our project.
# NPM
npm install talkjs --save

# Yarn
yarn add talkjs
Then, we’ll import it to our component.
<script>
  import Talk from 'talkjs';
</script>
To ensure our code executes only after the component has been mounted we’ll use onMount. This is similar to componentDidMount in React class components. We’ll also check whether the TalkJS script has finished loading using the Talk object’s ready promise.
<script>
  import { onMount } from 'svelte';
  import Talk from 'talkjs';

  onMount(() => {
    Talk.ready.then(() => {
      // most of the code below will go here
    });
  });
</script>
We’ll need to create a reference to an element using which TalkJS can mount its UI to the DOM. The reference can then be bound to an element using bind:this.
<script>
  // ...

  let chatboxEl;

 // ...
</script>

<main>
  <div bind:this={chatboxEl}></div>
</main>
Now we can move on to the heart of the component.
Creating a Session
Sessions represent connections between a user’s browser tab and TalkJS. They log users in and authenticate your app, and end once the user has navigated away from the page.
Let’s create a session using Talk.Session, and place it inside onMount and Talk.ready.then. The rest of the code in the succeeding sections will also be placed within these unless otherwise stated.
<script>
  // ...

  onMount(() => {
    Talk.ready.then(() => {
      const session = new Talk.Session({
        appID: ‘YOUR_APP_ID’,
        me: currentUser,
      });
    });
  });

  // ...
</script>
We’ll pass our appId and the current user to our session. The former can be found in your TalkJS dashboard, while the latter will be explained in the next section.
Creating users
The current user—denoted by me in the session above and the variable currentUser in this tutorial—refers to the user currently logged in to this instance of TalkJS.
Let’s create this User and place it before the session we created above.
const currentUser = new Talk.User({
  id: '1920',
  name: 'Oliver Johnson',
  email: 'oliverjohnson@example.com',
  photoUrl: 'oliver.jpeg',
  welcomeMessage: 'Hey there!',
  role: 'default',
});

const session = new Talk.Session({
// …
Now, let’s give Oliver someone to talk to
const otherUser = new Talk.User({
id: '2017',
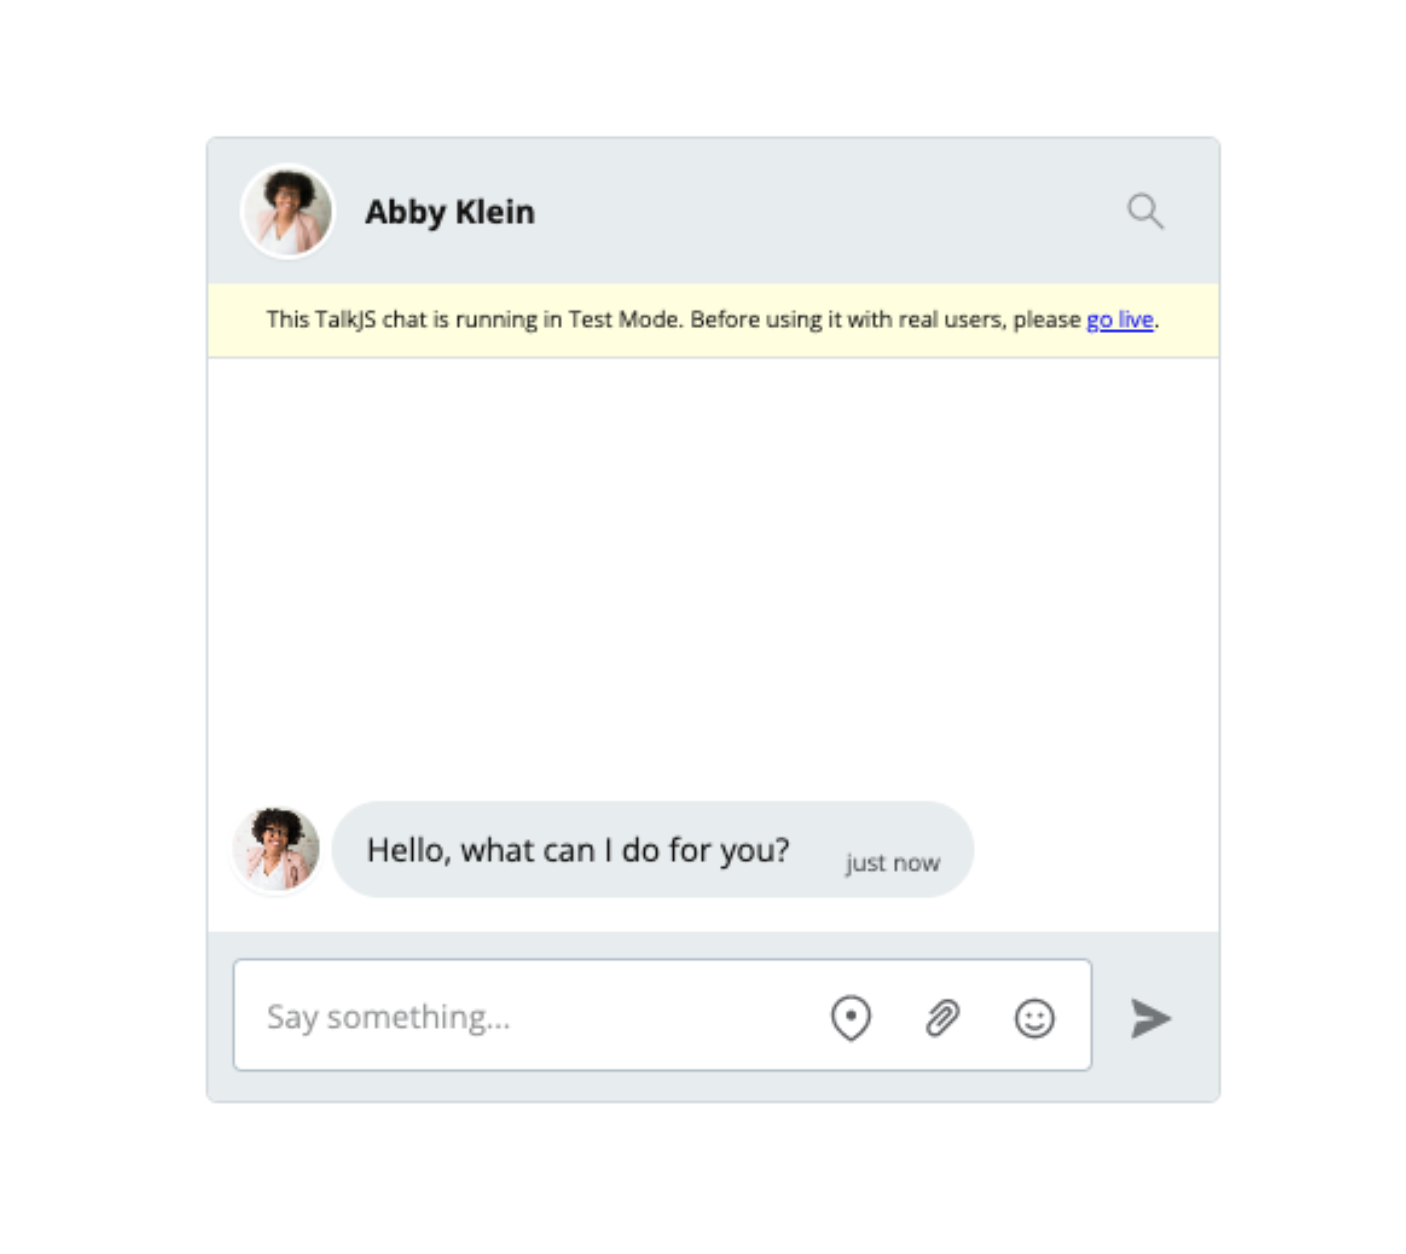
name: 'Abby Klein',
email: 'abbyklein@example.com',
photoUrl: 'abby.jpeg',
welcomeMessage: 'Hello, how are you today?',
role: 'default',
});
Usually, you would retrieve the details passed to User above from a database. Read more about the data you can include for a TalkJS User / Participant.
Starting a conversation
The getOrCreateConversation method can be used to begin a conversation between our two users. Let’s do that and then use setParticipant to add them to it.
const conversation = session.getOrCreateConversation(
  Talk.oneOnOneId(currentUser, otherUser)
);

conversation.setParticipant(currentUser);
conversation.setParticipant(otherUser);
The oneOnOneId uses the users’ IDs to create a unique ID for the conversation. A conversation that you have created before is fetched instead of created, along with its entire history.
Setting up the UI
There are different, customisable UIs available in TalkJS, and the process for adding them is similar. For this guide, we’ll be using a chatbox in our component.
Let’s use createChatbox to do what it says, after which we can select our conversation and mount the UI to the reference—chatboxEl—we created earlier.
const chatbox = session.createChatbox();
chatbox.select(conversation);
chatbox.mount(chatboxEl);
Our component is ready.
Making it reusable
While we have managed to add TalkJS to our Svelte app, it isn’t quite useful in a real-world scenario: it restricts our currentUser to a conversation with a specific person and would require the creation of a new component for each new conversation.
Let’s refactor our code to:
- be used to converse with any user;
- launch the chat box at the click of a button;
- have different buttons for talking to different users.
We’ll create a new function, outside onMount, and transfer the code, previously within onMount, to it.
<script>
  // ...

  function converse(user) {
    Talk.ready.then(() => {
      // ...

     const otherUser = new Talk.User(user);

      // ...
    });
  }

  // ...
</script>
While most of the code remains unchanged, otherUser will now take an object passed as an argument of the function. We’ll store the details for Abby in an object outside this function, and create a third user as well.
<script>
  // ...

  const abby = {
    id: '2017',
    name: 'Abby Klein',
    email: 'abbyklein@example.com',
    photoUrl: 'abby.jpeg',
    welcomeMessage: 'Hello, how are you today?',
    role: 'default',
   };

  const greg = {
    id: '2017',
    name: 'Abby Klein',
    email: 'abbyklein@example.com',
    photoUrl: 'abby.jpeg',
    welcomeMessage: 'Hello, how are you today?',
    role: 'default',
  };

  // ...
</script>
Remember, these details would normally be fetched from a database and probably passed to our component rather than being stored within it.
All we need to do now is pass the details of the user we want to talk with to the converse function.
Launching on-click
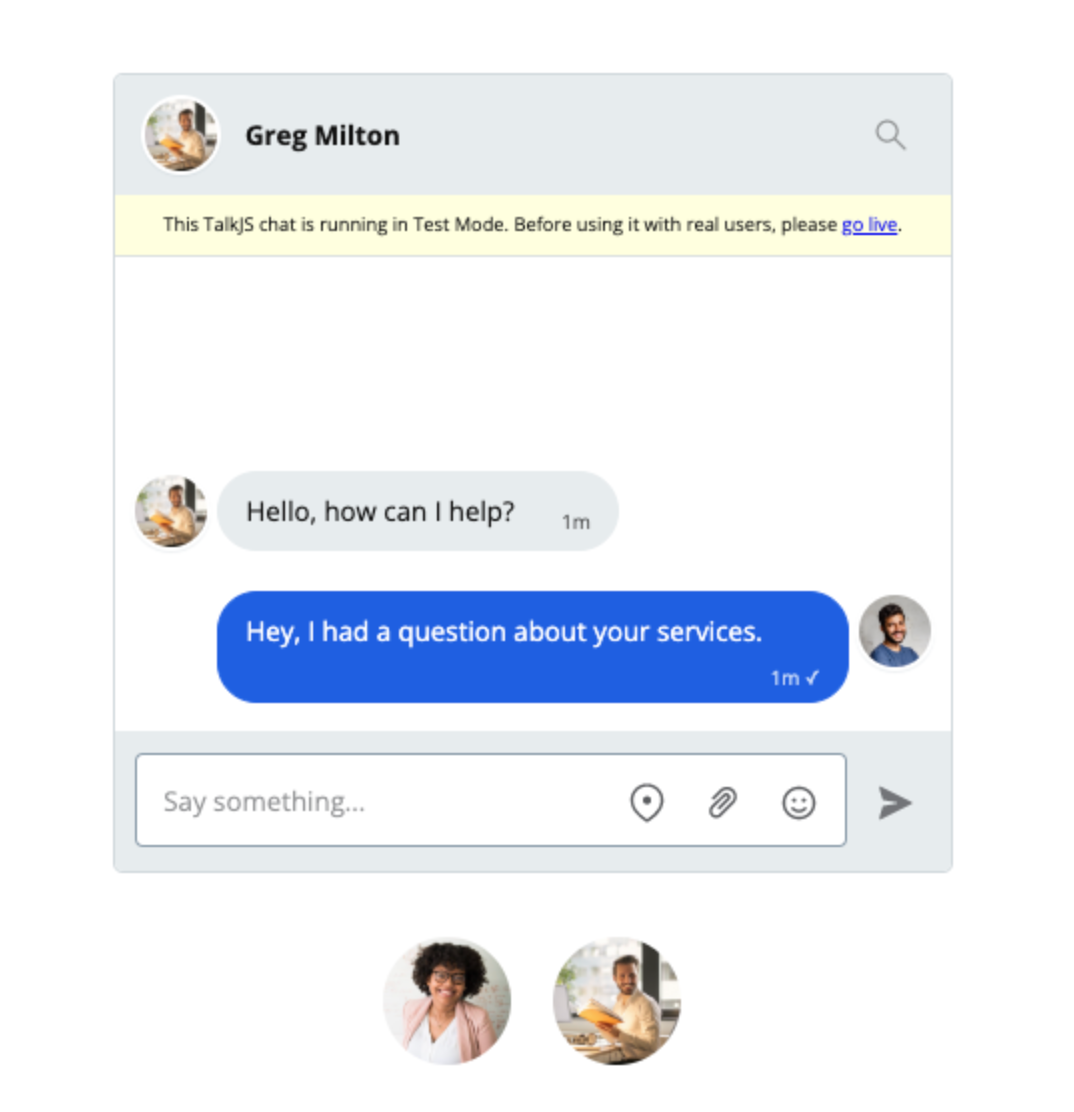
We’ll create a <section> below the <div> that the chatbox is mounted to and populate it with a couple of <button>s, one for abby and one for greg.
<section>
  <button on:click={() => converse(abby)}>
    // ...
  </button>
  <button on:click={() => converse(greg)}>
    // ...
  </button>
</section>
Clicking on either <button> will execute converse with the respective user’s object passed as an argument.
And that’s all there is to it!
Final remarks
This tutorial has gone over the process of adding TalkJS to a Svelte app, and making that integration reusable and content-agnostic. In addition, it has introduced you to some of the basic concepts of TalkJS and how they relate to one another.


