
This guide uses the classic JavaScript SDK. If you're starting a new project, consider using TalkJS Chat UI components, which are more customizable.
TalkJS' classic JavaScript SDK now supports adding custom actions to chat messages. This opens up possibilities to add support for actions like reporting, deleting, or liking a message. In this how-to, we’ll set up a custom action to report a message in TalkJS using this new feature. Note that the feature by itself does not report a message but provides you with the custom action and its handler. You must invoke a service in the backend that does the reporting functionality based on your business requirements.
Setting up a Report Action
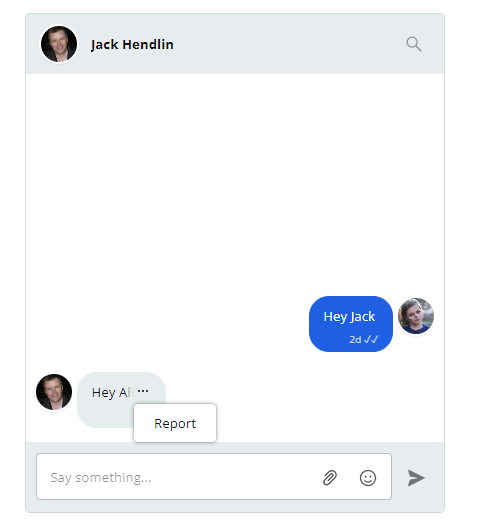
To add a report action, you must log in to your TalkJS account. Click on Roles from the top navbar and select the role for which you want to add the action. For this how-to, we are adding it to the default role. Scroll down to the Custom actions section and enter the name as report and label as Report. The name you give the action will be included in the event that is triggered when the user clicks the action, whereas the label will be shown to the user. In the “Which messages” dropdown, select All, and click on Add action.
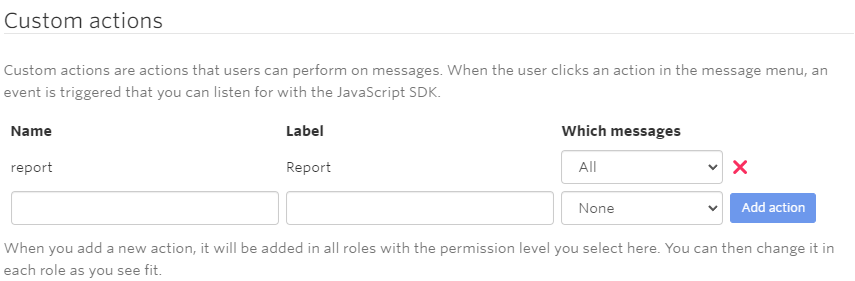
The action should look as shown in the image above. Click Save all roles to add the action to the role. As mentioned, the action is available across all roles once you create it, and you must disable them according to your requirements. To disable an action for a role, select the None option from the Which messages dropdown.
Handling the action
Now that we’ve set up the action, we’ll want to run some code when the user clicks it. To add an event handler, you use the chatbox object (or the inbox or popup objects), and its onCustomMessageAction method. When the user clicks the action’s menu item, our callback is called with an event object containing details about the message. For this how-to, we’ll send a request with this information to the backend.
  chatbox.onCustomMessageAction("report", (event) => {
    let reportAction = {
      id: event.message.id,
      message: event.message.body,
      senderId: event.message.senderId,
      senderName: event.message.sender.name,
      timestamp: event.message.timestamp,
    };
    console.log(event);
    fetch("http://127.0.0.1:3000/reportMessage", {
      method: "POST",
      body: reportAction,
    });
  });
The backend
We are not going to delve into too many details regarding the backend since it varies according to various requirements. To get you started, you can set up a Node server, listening for POST requests. For the sake of testing it out, you can use the nodemailer module and a fake SMTP server like MailTrap to send and receive emails. If a message is reported, it is best to send it to an administrator who can then review the contents of the message and who it was sent from. Further decisions can be based on company policy and investigations.
Next Steps
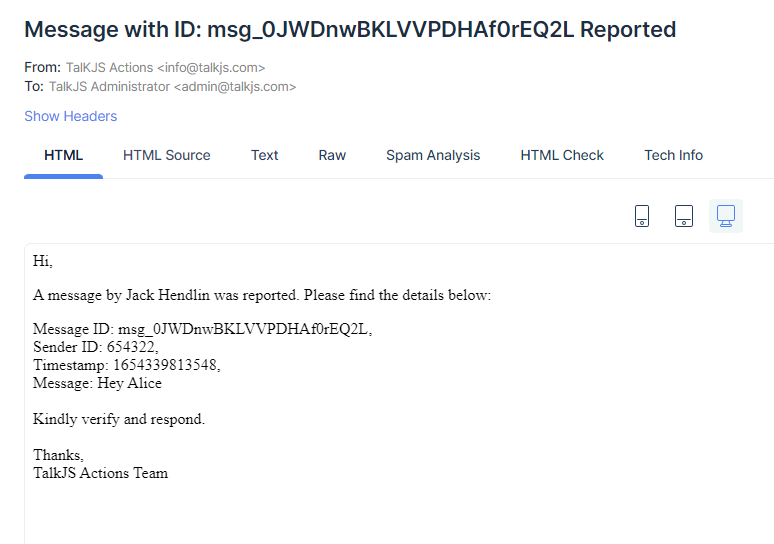
After using a fake SMTP server and the details we sent from the frontend, an administrator can receive something like this. Apart from a simple email, you can add a queue to which all the reported messages come in, and the administrator can look at them individually. You can also give capabilities like banning users and deleting them if found to be fraudulent, spam, or something else altogether. Again, all of this depends on the backend system you build. We can’t wait to see what you guys come up with our custom actions.


