Voice messages

Users can easily record and share voice messages in conversations.

You can enable voice messages by selecting the 'Allow recording voice messages' checkbox in the Chat UI page of your TalkJS dashboard.

Checkbox on the Settings page in the TalkJS dashboard to allow recording voice messages

Usage

When recording voice messages is enabled, if the message field is empty, a microphone ('Voice Message') button shows next to the message field. To start recording, the user has to click the microphone button.

Chat interface showing the message field, with on the right-hand side a microphone button

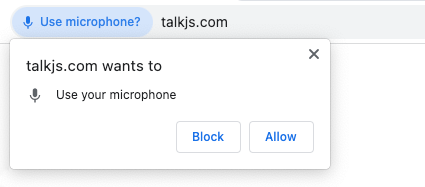
On a web interface, when a user clicks the microphone button, the user's browser sends a prompt to request microphone access, for example as follows:

A web browser prompt to ask a user whether they want to allow or block microphone access

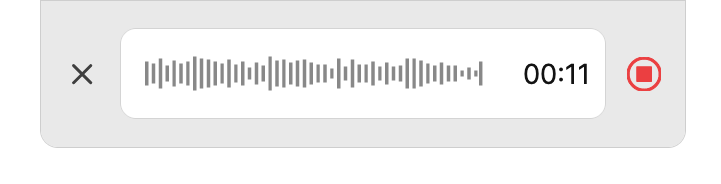
While a user is recording a voice message, the message field area shows a real-time display of the recorded waveform. Recording continues until the user clicks the red square ('Stop') button next to the message field.

Chat interface showing the message field, with on the right-hand side a square stop button

When the user stops recording, their voice recording gets processed. While the recording is processing, a spinner icon appears next to the message field.
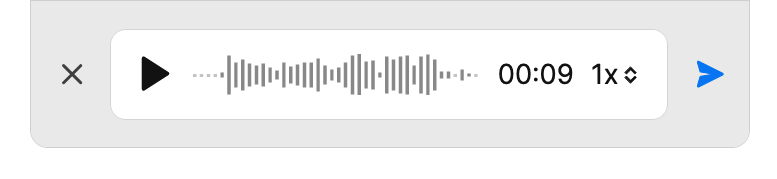
Once the recording ready, the user can:

  • Delete the recording, using the cross ('Cancel upload') button on the left side of the message field.
  • Play back the recording before sending, using the triangular ('Play') button in the message field.
  • Send the recording to the chat as a voice message, using the paper plane ('Send') button on the right side of the message field.

Chat interface showing the message field, with on the right-hand side a send button

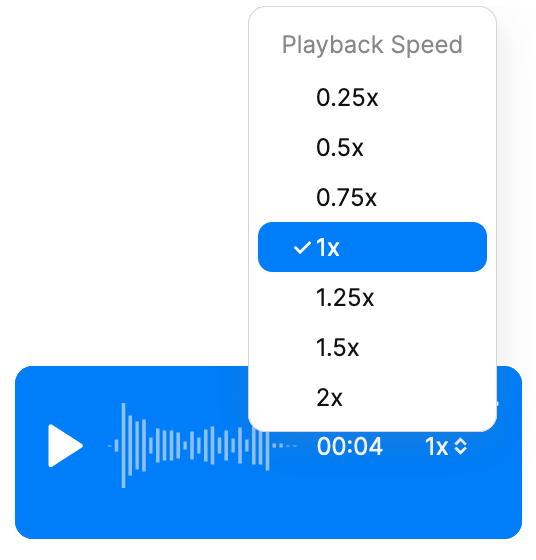
Once sent, the voice recording appears as a playable message in the conversation. The user can select the playback speed of the voice message from a pop-up menu on the message itself.

Voice recording message with a pop-up selector to choose the playback speed

Voice messages for different user groups

If you would like only one group of users to be able to send voice messages, but not other user groups, create a separate role for each user group and adjust the voice messaging settings per role.

Adding voice messages to your theme

In most cases, voice messages work normally as soon as you have enabled recording voice messages on the Settings page of your dashboard.

However, if you signed up or have customized your theme before October 2022, then follow the instructions in the upgrade guide to add the voice recording feature to your existing theme.

Browser permissions

On the web, the user needs to grant the browser permission to use the microphone before sending their first voice message. TalkJS automatically triggers this permission dialog. Additionally, you can listen to the onBrowserPermissionNeeded and onBrowserPermissionDenied events to amend this permission flow with your own dialogs or help messages.

Using voice messages with a mobile SDK

When using a mobile SDK, such as React Native or Flutter, you should add the Microphone/Record Audio permission to your app. How to add the Microphone/Record Audio permission to your app depends on the platform:

Android

Add the following to your AndroidManifest.xml file:

1<uses-permission android:name="android.permission.MODIFY_AUDIO_SETTINGS" />
2<uses-permission android:name="android.permission.RECORD_AUDIO" />

iOS

Add the following to your info.plist:

1<key>NSMicrophoneUsageDescription</key>
2<string>Your message to user when the microphone is accessed for the first time</string>

If you are using Flutter, you need to update your Podfile, as shown in the following:

1post_install do |installer|
2 installer.pods_project.targets.each do |target|
3 flutter_additional_ios_build_settings(target)
4
5 target.build_configurations.each do |config|
6 config.build_settings['GCC_PREPROCESSOR_DEFINITIONS'] ||= [
7 '$(inherited)',
8 'PERMISSION_MICROPHONE=1',
9 ]
10 end
11 end
12end