

This guide uses the classic JavaScript SDK. If you're starting a new project, consider using TalkJS Chat UI components, which are more customizable.
TalkJS's Conversation Actions feature makes it easy to add new custom options to your conversations. In this tutorial, we'll demonstrate how to add a new action that sends a web request to your backend server. The server then calls TalkJS's REST API to delete the conversation.
To follow along, you’ll need:
- A TalkJS account. TalkJS provides a ready-to-use chat client for your application. Your account gives you access to TalkJS's free development environment.
- An existing TalkJS project using the classic JavaScript SDK. See our Getting Started guide for an example of how to set this up.
- An installation of Node.js along with the npm package manager. We’ll use this to create our backend server.
We’ll build up the feature step by step in the following sections. If you would rather see the complete example code, see the GitHub repo for this tutorial.
Add a delete option to the menu
First, we need add a way to trigger the delete action in the frontend. You can configure which actions a user is able to take based on their user role. In this example we'll apply a custom conversation action to the "default" role.
In the Roles tab of the TalkJS dashboard, select the "default" role option. In the Custom conversation actions section, add a new custom conversation action with a Name of "delete" and a Label of "Delete conversation".:
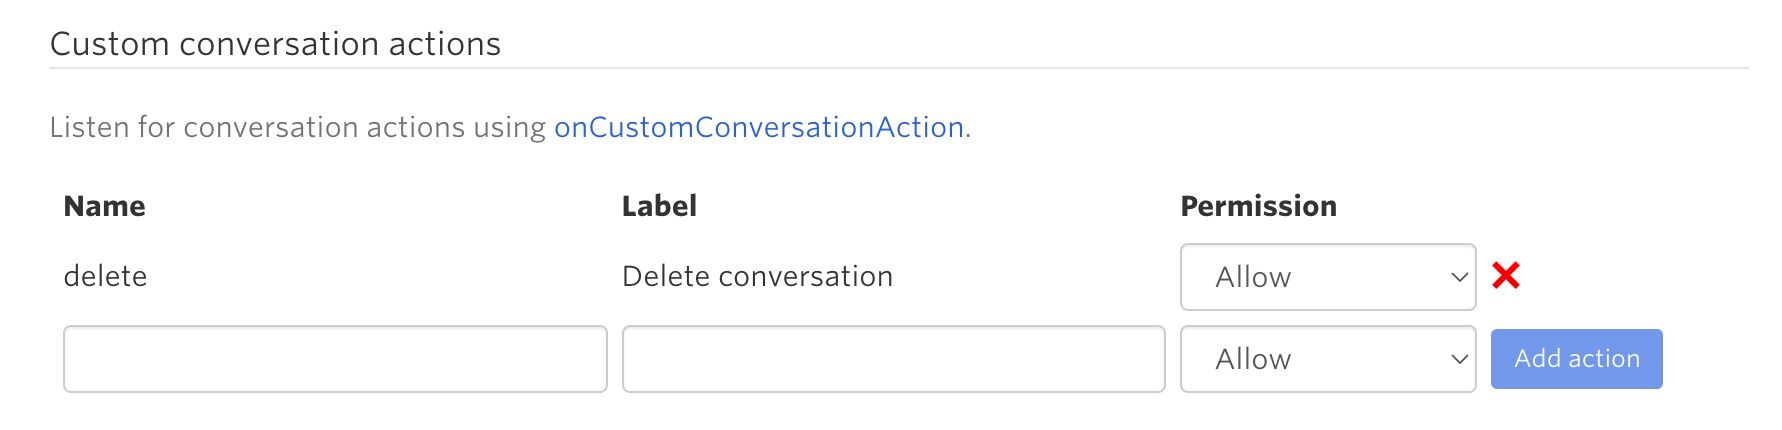
The name will be used in our code, while the label is what appears in the UI.
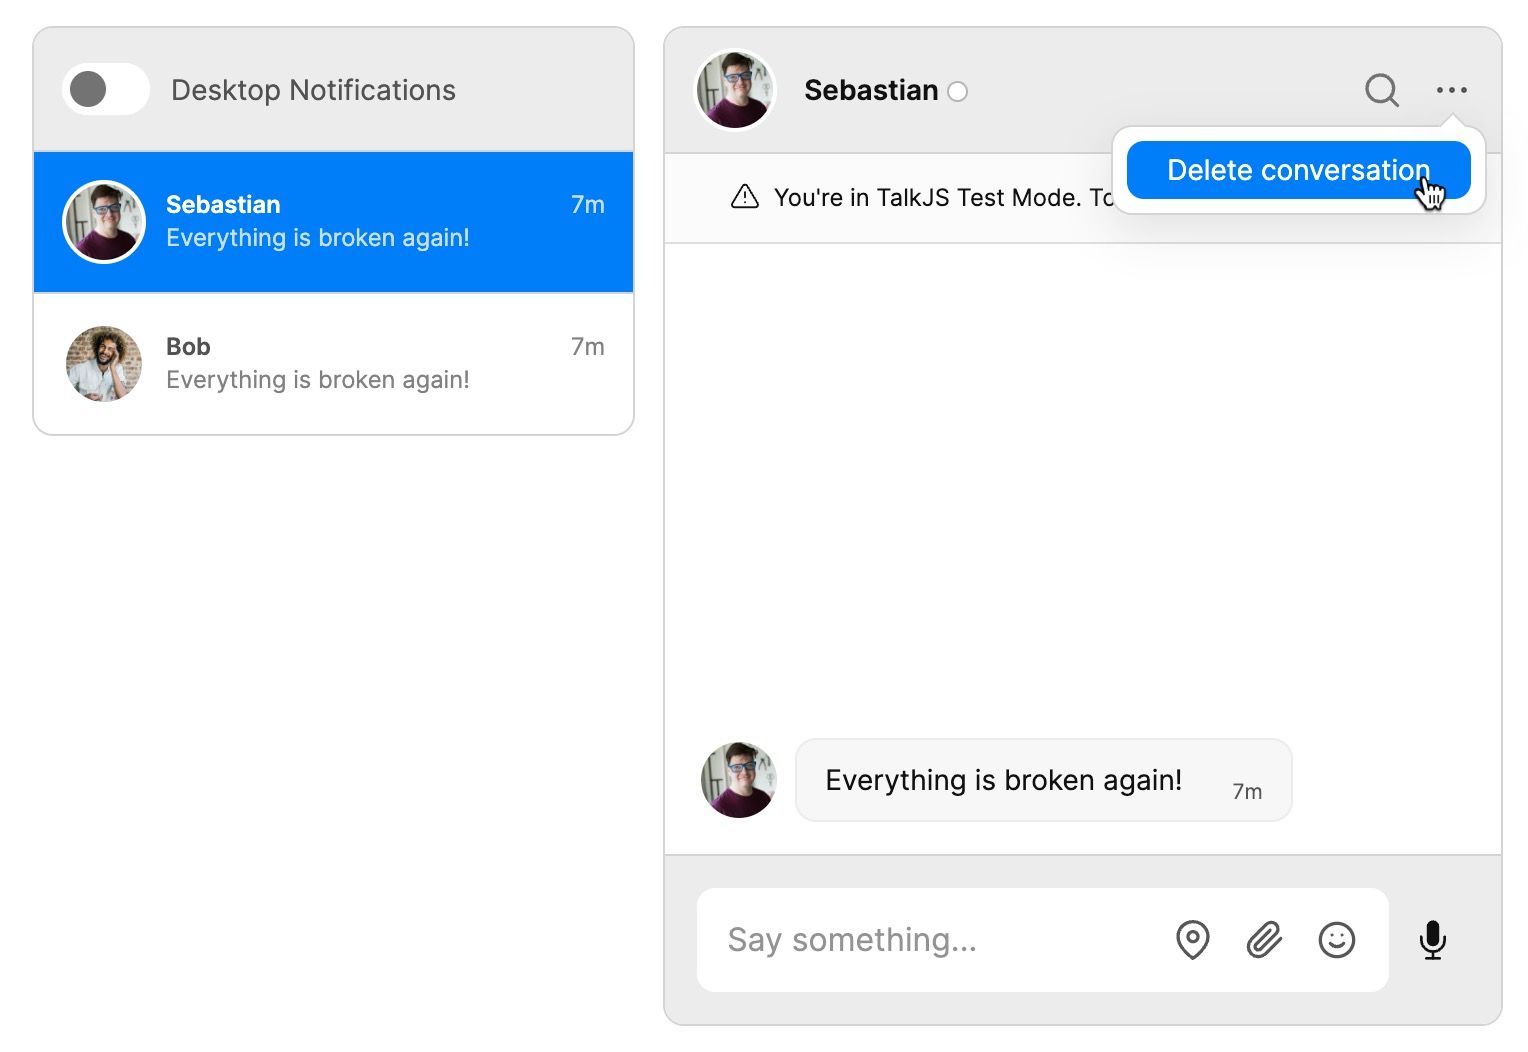
If you're using a preset theme, you should now see a new Delete conversation option in the menu at the top of your conversation:
If you're using a legacy theme, or customized a theme before the custom conversation actions feature was released, you'll need to add this menu to your theme before it will show up. See our docs for details on how to edit the theme.
Listen for the "Delete conversation" event
Next, listen for your new conversation action using the onCustomConversationAction method in TalkJS's classic JavaScript SDK.
As a test, add the following to your TalkJS code:
inbox.onCustomConversationAction("delete", (event) => {
  console.log("Deleted conversation with id:", event.conversation.id);
});
You should now see a log message in the browser console when you click the Delete conversation menu option.
Send the conversation ID to your backend server
In this section we'll create a backend server and send it the conversation ID. Later, we'll pass that ID to TalkJS's REST API to delete the conversation. You'll need to call the API from a backend web server rather than in your existing frontend code to avoid exposing your secret API key, which has full admin access to your TalkJS account.
We’ll be using Express in this tutorial, but feel free to use your favorite web server library instead. You'll also need to set up CORS support on your server. In this case we'll use the cors package.
In your server code, create a /deleteConversation endpoint to receive the conversation ID:
import express from "express";
import cors from "cors";

const app = express();
app.use(cors());
app.use(express.json());

app.listen(3000, () => console.log("Server is up"));

app.post("/deleteConversation", async (req, res) => {
  console.log(req.body["conversationId"]);
  res.status(200).end();
});
Then update your onCustomConversationAction call to post the conversation ID to the server endpoint:
inbox.onCustomConversationAction("delete", (event) => {
  async function postConversationId() {
    // Send conversation id to your backend server
    const response = await fetch("http://localhost:3000/deleteConversation", {
      method: "POST",
      headers: {
        "Content-Type": "application/json",
      },
      body: JSON.stringify({ conversationId: event.conversation.id }),
    });
  }

  postConversationId();

  console.log("Deleted conversation with id:", event.conversation.id);
});
Start your server and click the Delete conversation option in the conversation menu again. You should now see the conversation ID logged to your server console as well.
Delete the conversation
Now you have the conversation ID on the backend, you can call the TalkJS REST API to delete the conversation.
In this tutorial we will use the node-fetch module to send the HTTP requests to the API, but you can use another library if you prefer. Import node-fetch at the start of your server code:
import fetch from "node-fetch";
Now replace your app.post method in your server code from the previous section with the following:
const appId = "<APP_ID>";
const secretKey = "<SECRET_KEY>";

const basePath = "https://api.talkjs.com";

async function deleteConversation(conversationId) {
  console.log("Deleting conversation with id:", conversationId);
  return fetch(`${basePath}/v1/${appId}/conversations/${conversationId}`, {
    method: "delete",
    headers: {
      "Content-Type": "application/json",
      Authorization: `Bearer ${secretKey}`,
    },
  });
}

app.post("/conversationAction", async (req, res) => {
  const conversationId = req.body["conversationId"];
  await deleteConversation(conversationId);
  res.status(200).end();
});
This code sends the conversation ID in an HTTP request to the delete conversation endpoint on the TalkJS REST API.
You'll find your app ID and secret API in your TalkJS dashboard.
Finally, restart the server and click "Delete the conversation" again. This time, the conversation will be deleted and removed from the inbox.
Conclusion
You now have a working demonstration of how to delete a conversation! To recap, in this tutorial we have:
- Added a new 'Delete conversation' custom conversation action.
- Created a backend server and sent it the conversation ID.
- Called TalkJS's REST API to delete the conversation.
For the full example code for this tutorial, see our GitHub repo.
If you want to learn more about TalkJS, here are some good places to start:
- The TalkJS Docs help you get started with TalkJS.
- TalkJS tutorials provide how-to guides for many common TalkJS use cases.
- The talkjs-examples Github repo has larger complete examples that demonstrate how to integrate with other libraries and frameworks.


