
This guide uses the classic JavaScript SDK. If you're starting a new project, consider using TalkJS Chat UI components, which are more customizable.
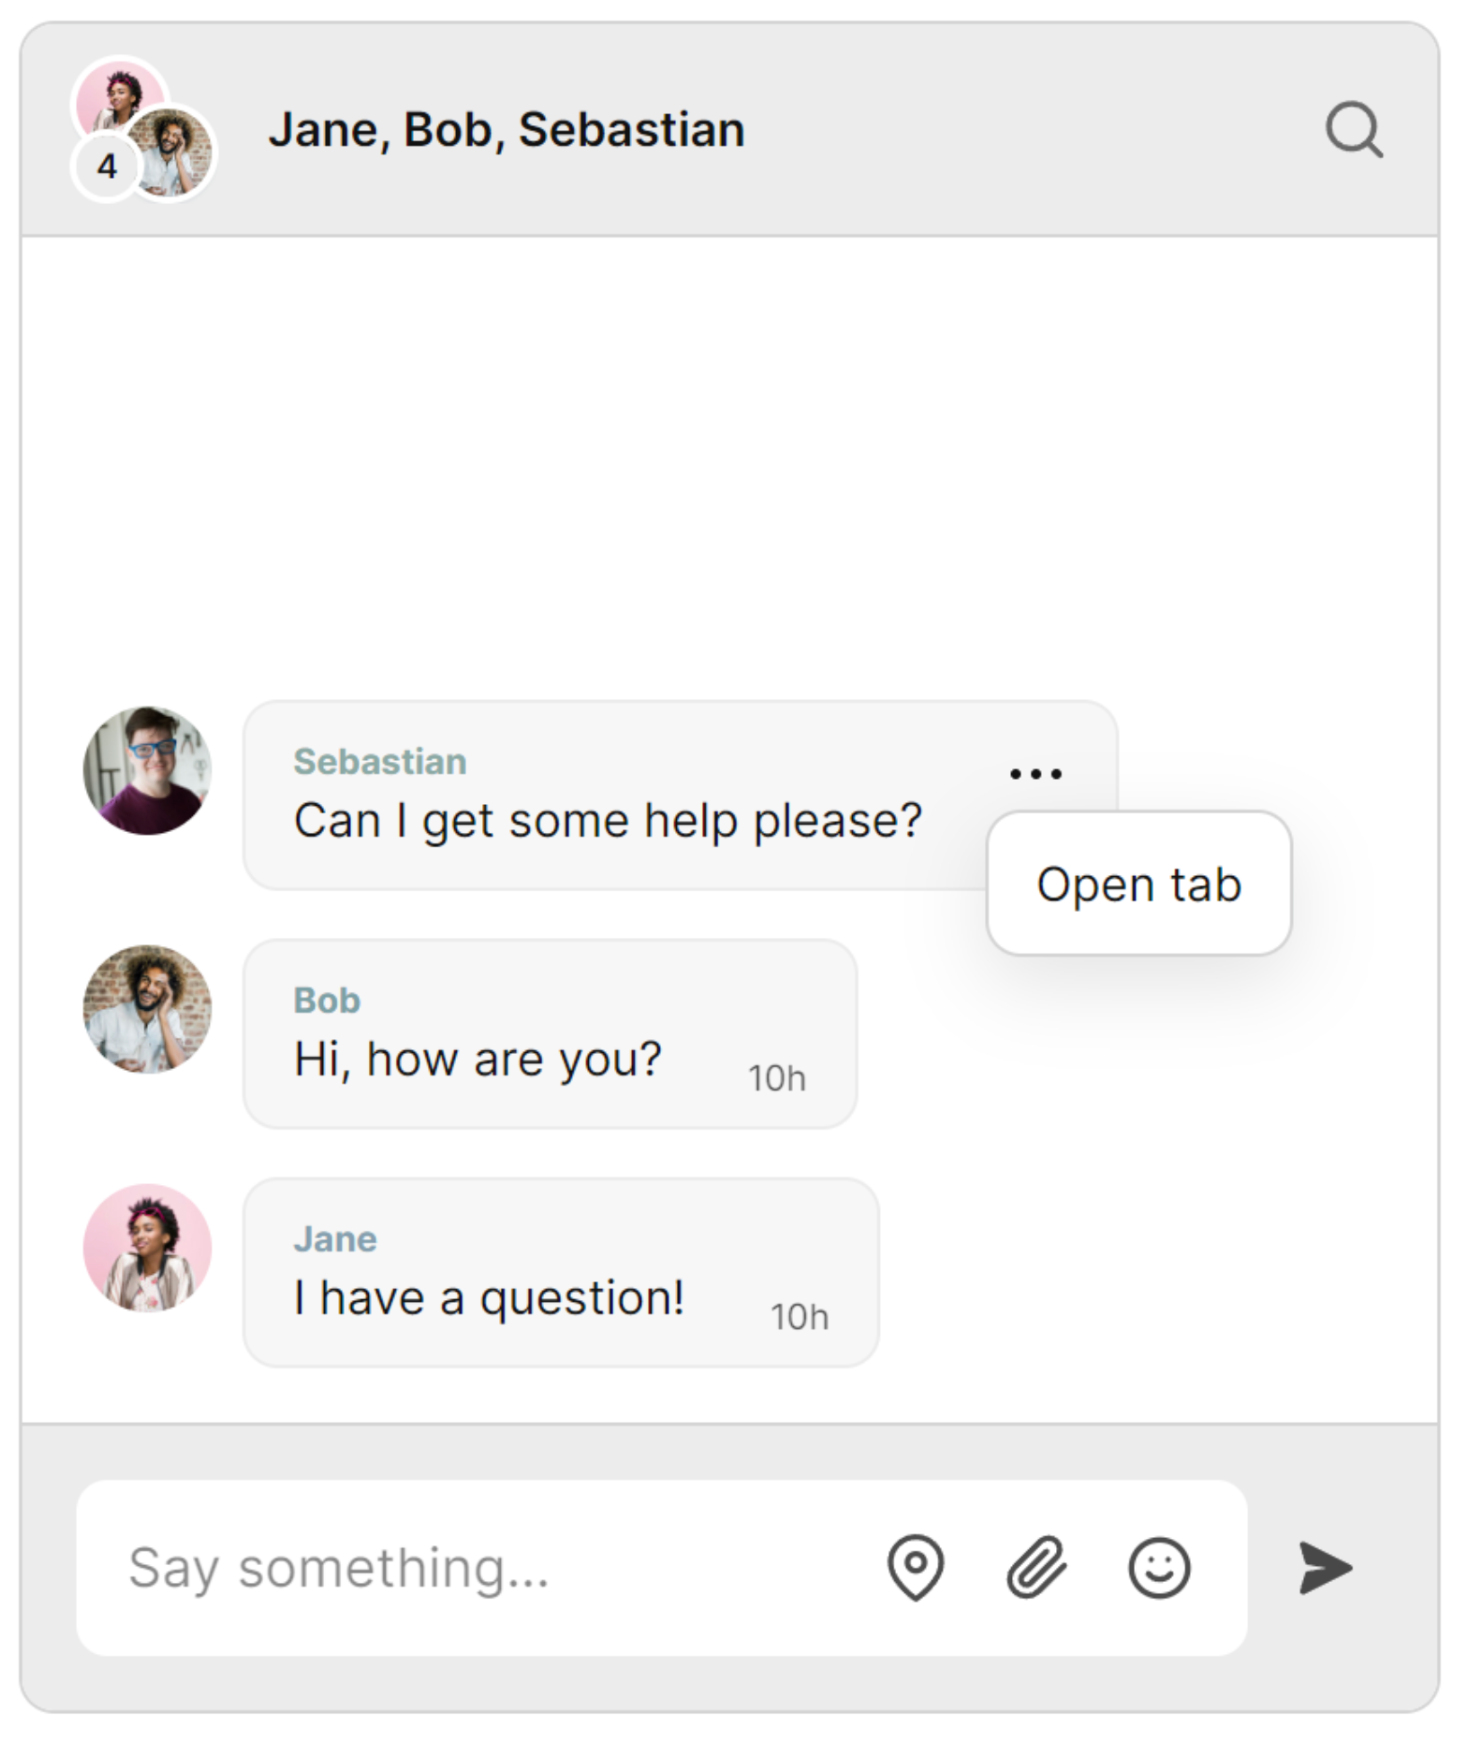
This guide shows you how to create clickable tabs for conversations using TalkJS. We will use TalkJS's custom message actions to add a new "Open tab" option to each message a user sends in the chatbox UI. If the "Open tab" option is clicked for a given message, a tab gets created, and the chatbox switches to a private conversation between you and the user who sent the message. Use these new tabs to navigate between conversations.
To follow along, you’ll need:
- A TalkJS account. TalkJS provides a ready-to-use chat client for your application. Your account gives you access to TalkJS's free development environment.
- An existing TalkJS project using the classic JavaScript SDK. See the associated Getting Started guide for an example of how to set this up.
- An installation of Node.js along with the npm package manager. We’ll use this to create our backend server.
We’ll build up the feature step by step in the following sections. If you would rather see the complete example code, see the GitHub repo for this tutorial.
Add a custom message action on the settings page
We must add a new custom message action that will appear on all messages for the users in our conversation. Follow these steps:
- Navigate to the TalkJS settings page.
- Navigate to the Custom message actions section.
- For the Name field, enter “openTab”.
- For the Label field, enter “Open tab”.
- Leave the other field values as default.
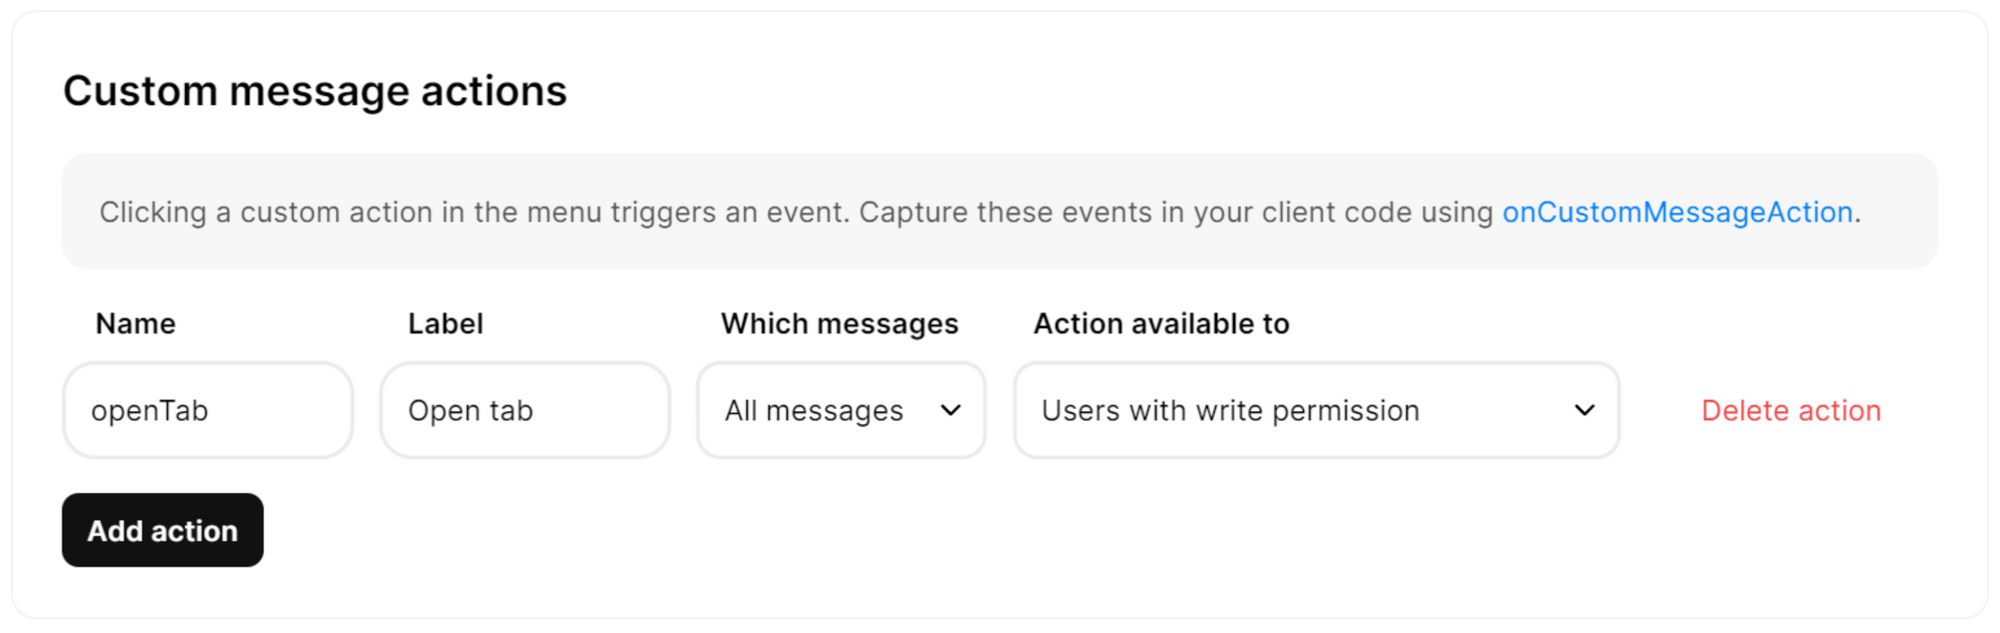
In this state, the new action will appear as an option for each message, and clicking that action triggers an event. You then need to write the code to capture these events in your client code using onCustomMessageAction.
Let’s think about what we want to happen when the Open tab option is clicked. When the option is clicked, the following events should happen:
- We create a new tab containing the name of the user who sent the message.
- We create another new tab called “Group” which will allow us to return to the main conversation containing the rest of the users.
- The chatbox switches the active conversation to a private conversation between you and the user whose message was clicked.
Let’s look at the code that accomplishes this in the next section.
Creating new tabs dynamically
We need tabs to be created dynamically when the Open tab option is clicked. First, add a placeholder div to contain the tabs that will be created:
<div id="chat-container">
      <div id="dynamicTabContainer" class="tab">
        <!-- Tabs will be added here -->
      </div>
      <!-- container element in which TalkJS will display a chat UI -->
      <div id="talkjs-container">
        <i>Loading chat...</i>
      </div>
    </div>
Next, let’s write the function called createTab() that creates a tab and adds it to the placeholder div called dynamicTabContainer:
function createTab(tabId, tabName) {
    // Create the new tab button
    var btn = document.createElement("button");
    btn.id = tabId;
    btn.className = "tablinks";
    btn.textContent = tabName;
    btn.onclick = function(event) { openTab(event, tabId, tabName); };

    // Add the new tab button to the tab container
    var tabContainer = document.getElementById("dynamicTabContainer");
    tabContainer.appendChild(btn);
  }
Assign each tab an ID, class, textContent, and an event handler called openTab(). Make a call to the openTab() function when the user clicks on the tab. Append the newly created tab to the placeholder dynamicTabContainer. Let’s write the openTab() function:
function openTab(event, tabId, tabName) {
    var i, tablinks;

    // Get all elements with class="tablinks" and remove the class "active"
    tablinks = document.getElementsByClassName("tablinks");
    for (i = 0; i < tablinks.length; i++) {
        tablinks[i].className = tablinks[i].className.replace(" active", "");
    }

    // Show the current tab, and add an "active" class to the button that opened the tab
    document.getElementById(tabId).style.display = "block";
    event.currentTarget.className += " active";

    //changes the active conversation in the chatbox to the tab/conversationId we have selected.
    chatbox.select(tabId);
}
This function iterates through all of the created tabs, and makes sure only the tab that has been clicked is currently active. This function also makes the chatbox select the correct conversation to display using chatbox.select(tabId). The parameter of select() has to be the ID of a valid TalkJS conversation. You’ll notice we have provided a variable called tabId, which is the element ID of each tab that gets created. You’ll see how this works in the next section.
At this stage, we have the code in place to create tabs dynamically and change the active conversation in the chatbox. However, we still have not created the “Group” tab which will allow us to return to the main conversation containing the rest of the users. We also have to add the event handler for Open tab which is where the createTab() and openTab() will be called.
Let’s add this event handler!
Add a custom message action event handler
This code will handle what occurs when the user clicks the Open tab custom action. The logic must handle:
- The first time the Open tab is clicked:
- The conversation between the two users is created.
- The “Group” tab is created.
- switches to that conversation.
- All future clicks of Open tab:
- The conversation already exists.
- The “Group” tab already exists.
- The code should just need to switch conversations.
Let’s dive into the code:
chatbox.onCustomMessageAction("openTab", (event) => {
    //The handler for our open tab custom action. This event
    //creates the tab for the user and swaps to a conversation with the selected user.
      const messageSender = new Talk.User({
          id: event.message.senderId,
          name: event.message.sender.name,
          email: event.message.sender.email,
          role: event.message.sender.role,
          photoUrl: event.message.sender.photoUrl,
          welcomeMessage: event.message.sender.welcomeMessage,
      });

      const conversation = talkSession.getOrCreateConversation(
          event.message.senderId
        Talk.oneOnOneId(me, event.message.senderId)
      );

      conversation.setParticipant(me);
      conversation.setParticipant(messageSender);
      chatbox.select(conversation);

      convId = conversation.id;
      tab = document.getElementById(convId);
      if(tab){
        tab.click();
      }
      else{

        const groupTab = document.getElementById('tabConversationExample1')
        if(!groupTab){
          createTab('tabConversationExample1', 'Group');
        }

        const privateConversation = document.getElementById(convId);
        if(!privateConversation){
          createTab(convId, event.message.sender.name);
        }

        tab = document.getElementById(convId);
        tab.click();
      }
    });
Let’s break down this code down piece-by-piece!
Notice how chatbox.onCustomMessageAction("openTab", (event) => {}); uses the Name of the custom message action we defined on the settings page.
First, we create a valid TalkJS user based on who sent the message we just clicked on:
const messageSender = new Talk.User({
        id: event.message.senderId,
        name: event.message.sender.name,
        email: event.message.sender.email,
        role: event.message.sender.role,
        photoUrl: event.message.sender.photoUrl,
        welcomeMessage: event.message.sender.welcomeMessage,
    });
We have the senderId of this user to act as our conversation ID. We call getOrCreateConversation() to either create the conversation for the first time or create the conversation if it doesn’t already exist:
      const conversation = talkSession.getOrCreateConversation(
          event.message.senderId
        Talk.oneOnOneId(me, event.message.senderId)
      );

      conversation.setParticipant(me);
      conversation.setParticipant(messageSender);
      chatbox.select(conversation);
We will also use this senderId value to act as the element ID for our tabs. The values of senderId, convId and tabId are shared. This conveniently links the correct tab to the correct conversation!
convId = conversation.id;
tab = document.getElementById(convId);
We assign the conversation.id to a variable, then check if a tab created using this element ID value already exists.
If the tab does exist, we call:
if(tab){
tab.click();
}
This clicks the tab which calls the openTab() event handler we defined earlier. This function changes the active tab and selects the correct conversation to display in the chatbox.
If the tab does not exist, we’ll instead reach the else block:
else{

        const groupTab = document.getElementById('tabConversationExample1')
        if(!groupTab){
          createTab('tabConversationExample1', 'Group');
        }

        const privateConversation = document.getElementById(convId);
        if(!privateConversation){
          createTab(convId, event.message.sender.name);
        }

        tab = document.getElementById(convId);
        tab.click();

      }
In the else block, we set ourselves and the user as participants in the conversation, and select that conversation to display in the chatbox.
We then create the group tab which allows us to navigate back to our original conversation. Note how the ID for this tab matches the conversation ID of the original conversation: 'tabConversationExample1'.
Finally, we create the new tab, using the message sender name to populate the tab text: event.message.sender.name.
For styling our new tabs to look like the chatbox, we use CSS and adhere to the TalkJS design principles. See the style.css in the example project for more details.
There you have it! We have successfully created tabs that let us navigate through multiple conversations in a chatbox.
Summary
In this tutorial, we have performed the following actions:
- Created an “Open tab” custom message action: This custom message action appears on each message for the user and allows you to open a tab for that user.
- Dynamically created tabs for conversations: These tabs allow us to switch the active conversation that is displayed in our chatbox.
The tutorial provides code snippets and explanations for each step, allowing you to create clickable tabs for TalkJS conversations. For the full example code for this tutorial, see our GitHub repo.
If you want to learn more about TalkJS, here are some good places to start:
- The TalkJS Docs help you get started with TalkJS.
- TalkJS tutorials provide how-to guides for many common TalkJS use cases.
- The talkjs-examples GitHub repo has larger complete examples that demonstrate how to integrate with other libraries and frameworks.


