
The TalkJS chat API comes bundled with a system for push notifications. You may, however, want to build your own. Which might be useful for:
- Adding a notification channel TalkJS doesn’t support yet.
- Integrating it with the architecture you already have.
- Having more control over which notifications are sent and when.
Here, we’ll use TalkJS’ webhooks to build such a mechanism. This guide will introduce you to the webhooks offered by TalkJS and how you can use them in your app. It will also cover how this might differ for various platforms and frameworks.
To follow along, you will need an app with TalkJS integrated into it. If you haven’t done this yet, check out our guides and tutorials. You will also need to handle back and front end code, and have a system in place for interacting between them.
Setting up
The app used in this tutorial is based on a simple Express server.
const express = require('express');
const app = express();

// ...

const server = app.listen(3000);
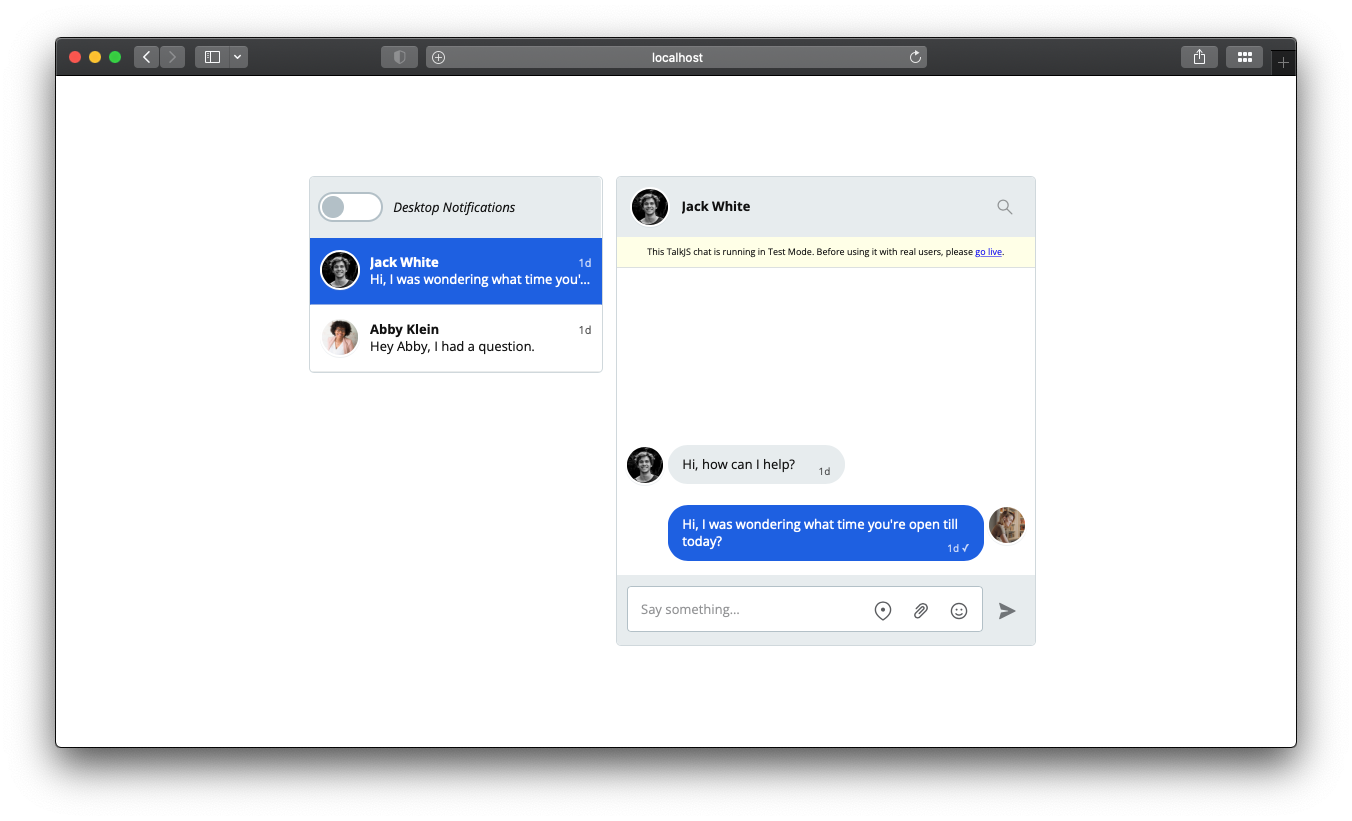
The frontend is essentially the same as our getting started guide for the classic JavaScript SDK. It displays the current user’s Inbox.
First, we’ll create a route on our server for TalkJS’ webhooks to interact with.
app.post('/talkjs', (req, res) => {
  res.status(200).send('OK');
});
This route will listen for POST requests at /talkjs. If you’re developing locally, then you can use ngrok to allow incoming webhooks to interact with your app.
Using webhooks
Webhooks can be enabled in your dashboard. Scrolling down to the Webhooks section, we’ll enter the URL for the route we just created.
Since the app used here is running locally, the base URL is generated by ngrok. It’s important to note that every time you run ngrok, the URL changes. You will need to update your dashboard to reflect this.
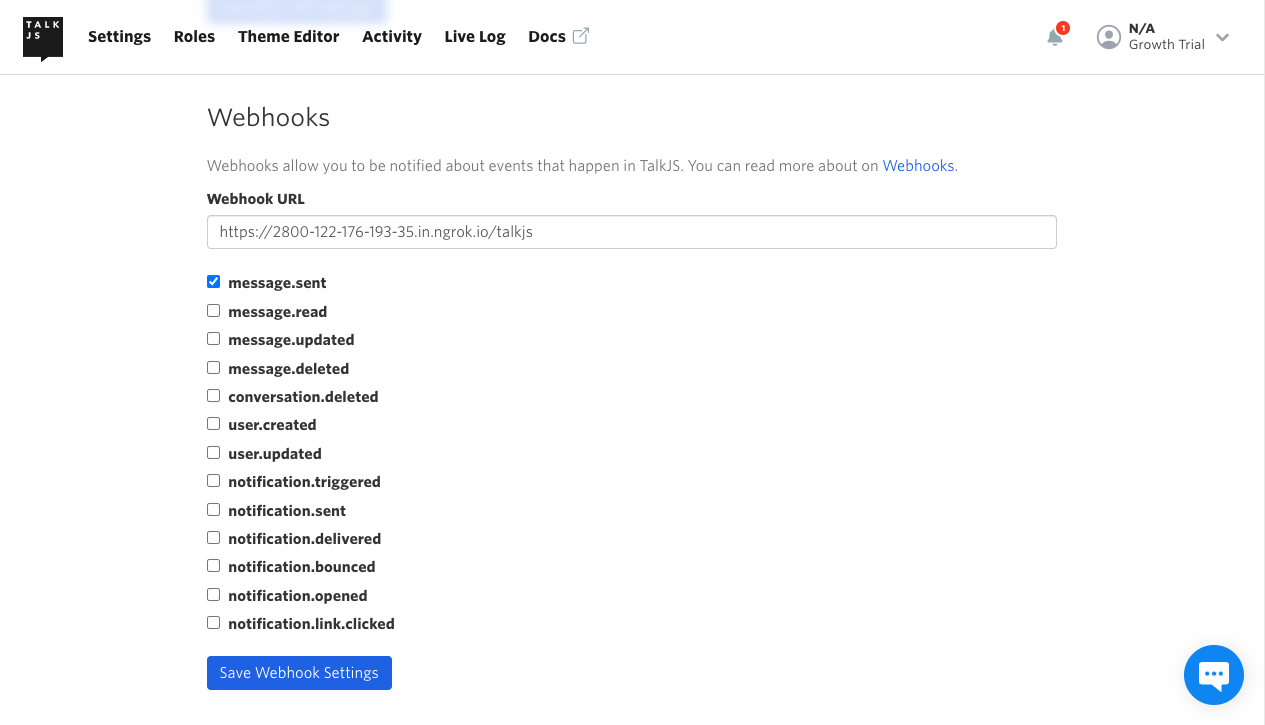
We can now select the events we want to be notified of and save our settings. While we’re only interested in when a message is sent, there are many more events available for you to use.
Every time a user sends a message, TalkJS will POST a request to our endpoint at /talkjs. This request will contain all information pertaining to that message. We can then relay this data to our frontend, which in turn will notify the user. How this relay happens will depend on your architecture.
// Request data sent by TalkJS to /talkjs
{
    "createdAt": 1659016183145,
    "data": {
        "conversation": {
            // ...
        },
        "message": {
           // ...
        },
        "sender": {
            // ...
        }
    },
    "id": "evt_ALx5mpzPpFh1e1WjhI",
    "type": "message.sent"
}
In a production setting, it would be wise to validate these incoming requests to ensure they’re from TalkJS. You would want to enable authentication and test for webhook integrity.
Pushing notifications
To push notifications, we’ll be using the Notifications API which is native to client-side JavaScript.
First, we will need to requestPermission from the user when the app first loads.
window.addEventListener(‘load’, () => {
  // ...
  Notification.requestPermission();
});
Then, we can create a function to notifyUser whenever a request is relayed.
function notifyUser(event) {
  const msg = JSON.parse(event.data);
  const { name } = msg.data.sender;

  const notification = new Notification(
    'New message',
    { body: `${name} sent you a message!` }
  );
}
If you send a message now, you should see a notification pop up on your device.
In certain browsers, notifications need to be sent from a secure context. If you’re developing locally, you’ll need to use a different browser.
In a production app, we would probably want to ensure only messages sent to the current user—and not by them—are pushed. Moreover, we would also want to create a fallback in case the user declines to give permission for notifications.
Mobile devices
If we open our app on a mobile device, we’ll notice that our notifications don’t work. Due to restrictions placed upon mobile browsers, notifications need to be handled differently. What you use will depend on the platform of the device and the framework you’re using. Let’s go over some briefly to see how you would handle push notifications on mobile.
Firebase Cloud Messaging (FCP)
This is a fairly well-supported alternative for the Notifications API. It works on all browsers that support the Push API and is how push notifications are handled on Android devices. If we were to use this in our app, we’d use the FCP JavaScript client. You can find the client for your particular setup in the official documentation. Whichever client you use—including third-party ones—you’ll need to register your app.
Apple Push Notification Service (APNs)
iOS needs an app to run natively in order to push notifications; web apps can’t send notifications from a browser. While you could use FCP in a native iOS app, it would still be using Apple’s own APNs for notifications. So, if your app runs natively, you may want to use this directly instead. You can also handle notifications server-side using APNs. It’s important to note that your app will either need to handle Swift or Objective-C, or implement a way to bridge the gap for your framework. Moreover, you’ll need to register your app with APNs to make use of it.
React Native
React Native can use either FCP or APNs. A library such as React Native Push Notifications can handle both. You could also use a cross-platform service such as Expo Push Notifications or OneSignal. This will be true for the next 3 frameworks discussed below, as well.
Flutter
Flutter can also handle notifications using FCP and APNs. As a Google product, it integrates seamlessly with FCP. If you’d like to forego FCP for handling iOS notifications, you can use a native APNs package to do the job.
Swift
Built by Apple, Swift utilizes the APNs to send notifications natively. The way to do this will be identical to the APNs documentation. To push notifications on Android devices, you can add Firebase, and thus FCP, to your Swift app.
Kotlin
Kotlin works seamlessly with FCP. Its interoperability with Java means the process for plain Java apps is quite similar. Kotlin/Native extends this interoperability to Swift and Objective-C. You can, thus, use the APNs documentation to implement iOS notifications directly.
Final remarks
We’ve covered a lot of ground in this guide. By now, you should be familiar with TalkJS’ webhooks, the events they cover, how you use them, and how they—indirectly—push notifications to your users. The example app is just one of many ways to build your custom system. Regardless of what architecture you use, the principle remains the same:
- a user interacts with your TalkJS-integrated app;
- this triggers a webhook;
- TalkJS notifies your server of this event;
- your server relays the request to your frontend;
- your app pushes the notification to your user.
Building a system for any of the different frameworks we’ve gone over will follow this same basic process.


