Email notifications
Send and customize email notifications for offline users.
 View as Markdown
When a user is offline for a while, you can send email notifications for any messages they missed.
TalkJS automatically handles sending email notifications to users who go offline. You can set a custom sender address, adjust when emails are sent, and who receives them, all from your dashboard.
If you're on the Growth plan or higher, you can fully customize the look and feel of your notification emails with email themes.
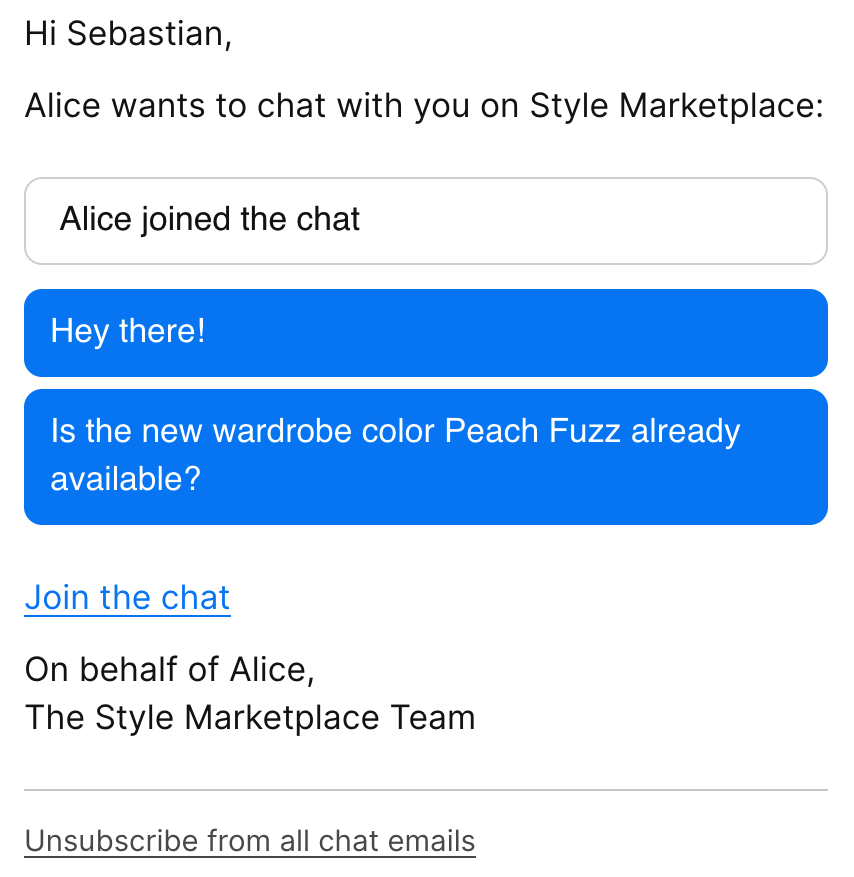
Example notification email
You can globally enable email notifications from the Notifications page of your dashboard, in the Email settings section, using the Enable email toggle.
Once enabled, any user with at least one valid email address on record automatically starts receiving notifications after being offline for a while. Users can have more than one email address, and TalkJS notifies all email addresses on record.
You can optionally set up a custom domain for email notification purposes, for example chat.example.com or notificationsdomain.com. Using a custom domain can improve deliverability, and prevent conflicts if your main domain already has its own mail server.
To set up a custom domain, you must have access to your domain's DNS configuration to add the necessary records.
Steps to set it up:
- On your TalkJS dashboard, from the top right menu, select Email domains.
- Add your domain in the section Add domain.
- Find your domain in the list and select Details.
- To verify your domain, copy the relevant records and add them to your DNS settings.
TXTandCNAMErecords must be verified to use a custom domain. AnMXrecord is required to use the reply by email feature. - Refresh your TalkJS dashboard page. Your domain should now show up as verified.
You can add multiple dedicated domains, but only one can be active at any point in time.
By default all email notifications come from the address [email protected]. If you’re using a custom email domain, you can customize the local part of the sender address (the part before the @-symbol) directly from your TalkJS dashboard.
To customize your sender address:
- On your TalkJS dashboard, from the top right menu, select Email domains.
- From the list of domains, find the email domain for which you'd like to change the local part, and select Details.
- On the details page, under Sender addresses, update the email details and select Save sender addresses.
Your email notifications are now sent from the custom sender address you specified.
If the details page doesn't show any settings for the local part, and your notification emails come from an address with a long, random-looking sender name, then custom sender addresses likely aren't enabled for your account. Get in touch and a member of the TalkJS team can get this set up for you.
TalkJS groups missed messages into a single email notification and sends it after a defined period of user inactivity. In the Timeout (in seconds) field, you can specify the period of inactivity after which TalkJS should send a notification. The maximum allowed timeout is 900 seconds (15 minutes).
You can control whether any missed messages themselves are included in the body of the email notifications. Use the Include unread messages in the email notification checkbox to turn message inclusion on or off.
You control whether any chat message attachments are included in email notifications.
On the Notifications page, choose your preference from the Email attachments selection, with the following options:
- Enabled: All attachments are included in notifications.
- Enabled (excluding images): Only attachments other than image files are included in notifications.
- Disabled: No attachments are included in notifications.
Beyond delivery settings, you can also customize the content of your notification emails.
You can use a limited macro syntax to personalize your email notifications, for example Hello {{recipient.name}}!.
You can use macros directly in various fields on the Notifications page of your TalkJS dashboard.
You can also pass your metadata for users or conversations using the macro syntax. For example, you can specify a custom special token {{sender.custom.specialToken}}. The custom field has to be an object with strings as values.
For example, you can specify a special token for Alice in your code:
Note that custom user data is publicly visible (for example, in the browser), so don't use this for sensitive data.
Similarly, you can customize a conversation:
Fields that you can personalize with macros include:
- Subject
- Sender name
- Unsubscribe link text
- Header (inside the email body)
- Inbox link text
- Inbox URL
- Footer
You can localize the content of email notifications using app metadata custom fields, which support localization.
To localize content with app custom fields:
- On the Settings page of your TalkJS dashboard, in the App metadata section, add a custom field for the string you want to localize. For example:
newMessagesText. - For each locale you want to support, add another custom field with the same, plus a
:colon and locale suffix to the field name. For example, addnewMessagesText:frfor French ornewMessagesText:zh-TWfor Chinese as spoken in Taiwan.
- On the Notifications page of your dashboard, use the base custom field (without suffix) directly in your email notification header or email theme. For example, you could set the Subject field to:
{{app.custom.newMessagesText}}.
That's it. TalkJS now automatically renders the custom field in the user's locale.
TalkJS resolves the field by trying, in order: the user's full locale, language code, your app's default locale, and as a fallback the unlocalized field.
You can link back to your site or app directly from your email notifications, so that users can easily rejoin the conversation. Add your link under Inbox URL on the Notifications page of your TalkJS dashboard.
You can either add a plain link, for example https://example.com, or use template macros to let TalkJS build the inbox URL to go directly to the correct page or conversation.
The inbox URL applies globally to all users, unless overridden per user role.
If you're using the Inbox prebuilt chat UI, you can make the inbox URL immediately preselect the right conversation. For example, if you have a user's inbox on https://example.com/inbox and their conversation ID is 123456, you can add the conversation ID in a query parameter: https://example.com/inbox?conversation=123456. With a template macro, you could then add the following inbox URL:
This way, TalkJS generates a URL to preselect the correct conversation.
You can link straight to a page about a product or order, by adding a custom field to the conversation to identify the product or order. For example, you could pass {"productId": "12345"} when creating the conversation, and then configure the inbox URL as follows:
With a chatbox or pop-up embedded on the destination page, users can directly continue their conversation right there.
Email replies let users stay engaged with conversations even when they’re not in your app.
When a user replies via email, their reply automatically shows up in the chat conversation. No additional setup is needed for replying by email, as TalkJS automatically routes replies to the correct conversation.
Users who only have Read access to a conversation can receive email notifications, but replies they send to a notification email won't show up in the conversation.
You can enable and turn off reply by email using the Enable replying to email notifications via email checkbox.
All email notifications include an unsubscribe link which, when clicked, unsubscribes the user. Including an unsubscribe link ensures reliable delivery, and complies with Google's requirements for bulk email senders.
When a user unsubscribes from email notifications, they won't receive any further email notifications about unread messages. You won't be notified that a user has unsubscribed.
In case a user clicks the unsubscribe link by mistake, the link takes them to a page where they can resubscribe.
If you're on the Growth plan or higher, you can customize the unsubscribe link with email themes.
You can globally turn off email notifications from the Notifications page of your dashboard, in the Email settings section, by turning off Enable email.
To turn off email notifications for a specific user, you can remove the user's email address by setting their email field to null.
You can also use the REST API to modify or turn off notifications for a participant in a conversation. Specifically, each participant has a notify property, which can be set to:
true: Send the user notifications."MentionsOnly": Only send the user notifications for messages in which they are @mentioned.false: Don't send the user notifications.
When notifications are turned off, your user won't receive any notifications for that conversation, including email notifications.
- Email themes
- Email component reference details
- SMS notifications
- Mobile push notifications